
Watch your back
How to make a live edge slab mantel. it’s back breaking work.
The mantel is the centerpiece of a living room. It is where you keep the photos of the people you can actually tolerate in life or in the case of my ex it is where you keep multiple balls of yarn to satisfy your inner cat-person. Either way the mantel is an important decorative component so you want something that makes your mom say “oh, that’s pretty.” One of the best ways to do this is by using a live-edge wood slab that is simple and sturdy and brings a little nature into a room full of electronics and furniture. Here I walk you through how I went from an ugly slab to a not so ugly centerpiece, all while highlighting the lessons learned from my mistakes and successes so you don’t have to learn them the hard way.
On edge
This mantel was for a couple that I was friends with. Together they make up about fifty percent of my friend group. They were in the process of building a new home and wanted a live edge mantel. Live edge means that one edge is not cut so it is actually the outside of the tree, bark and all. I began my process by finding a slab guy who is pretty much my future self twenty years from now: just a guy living alone in the woods cutting down trees and selling them to other people.

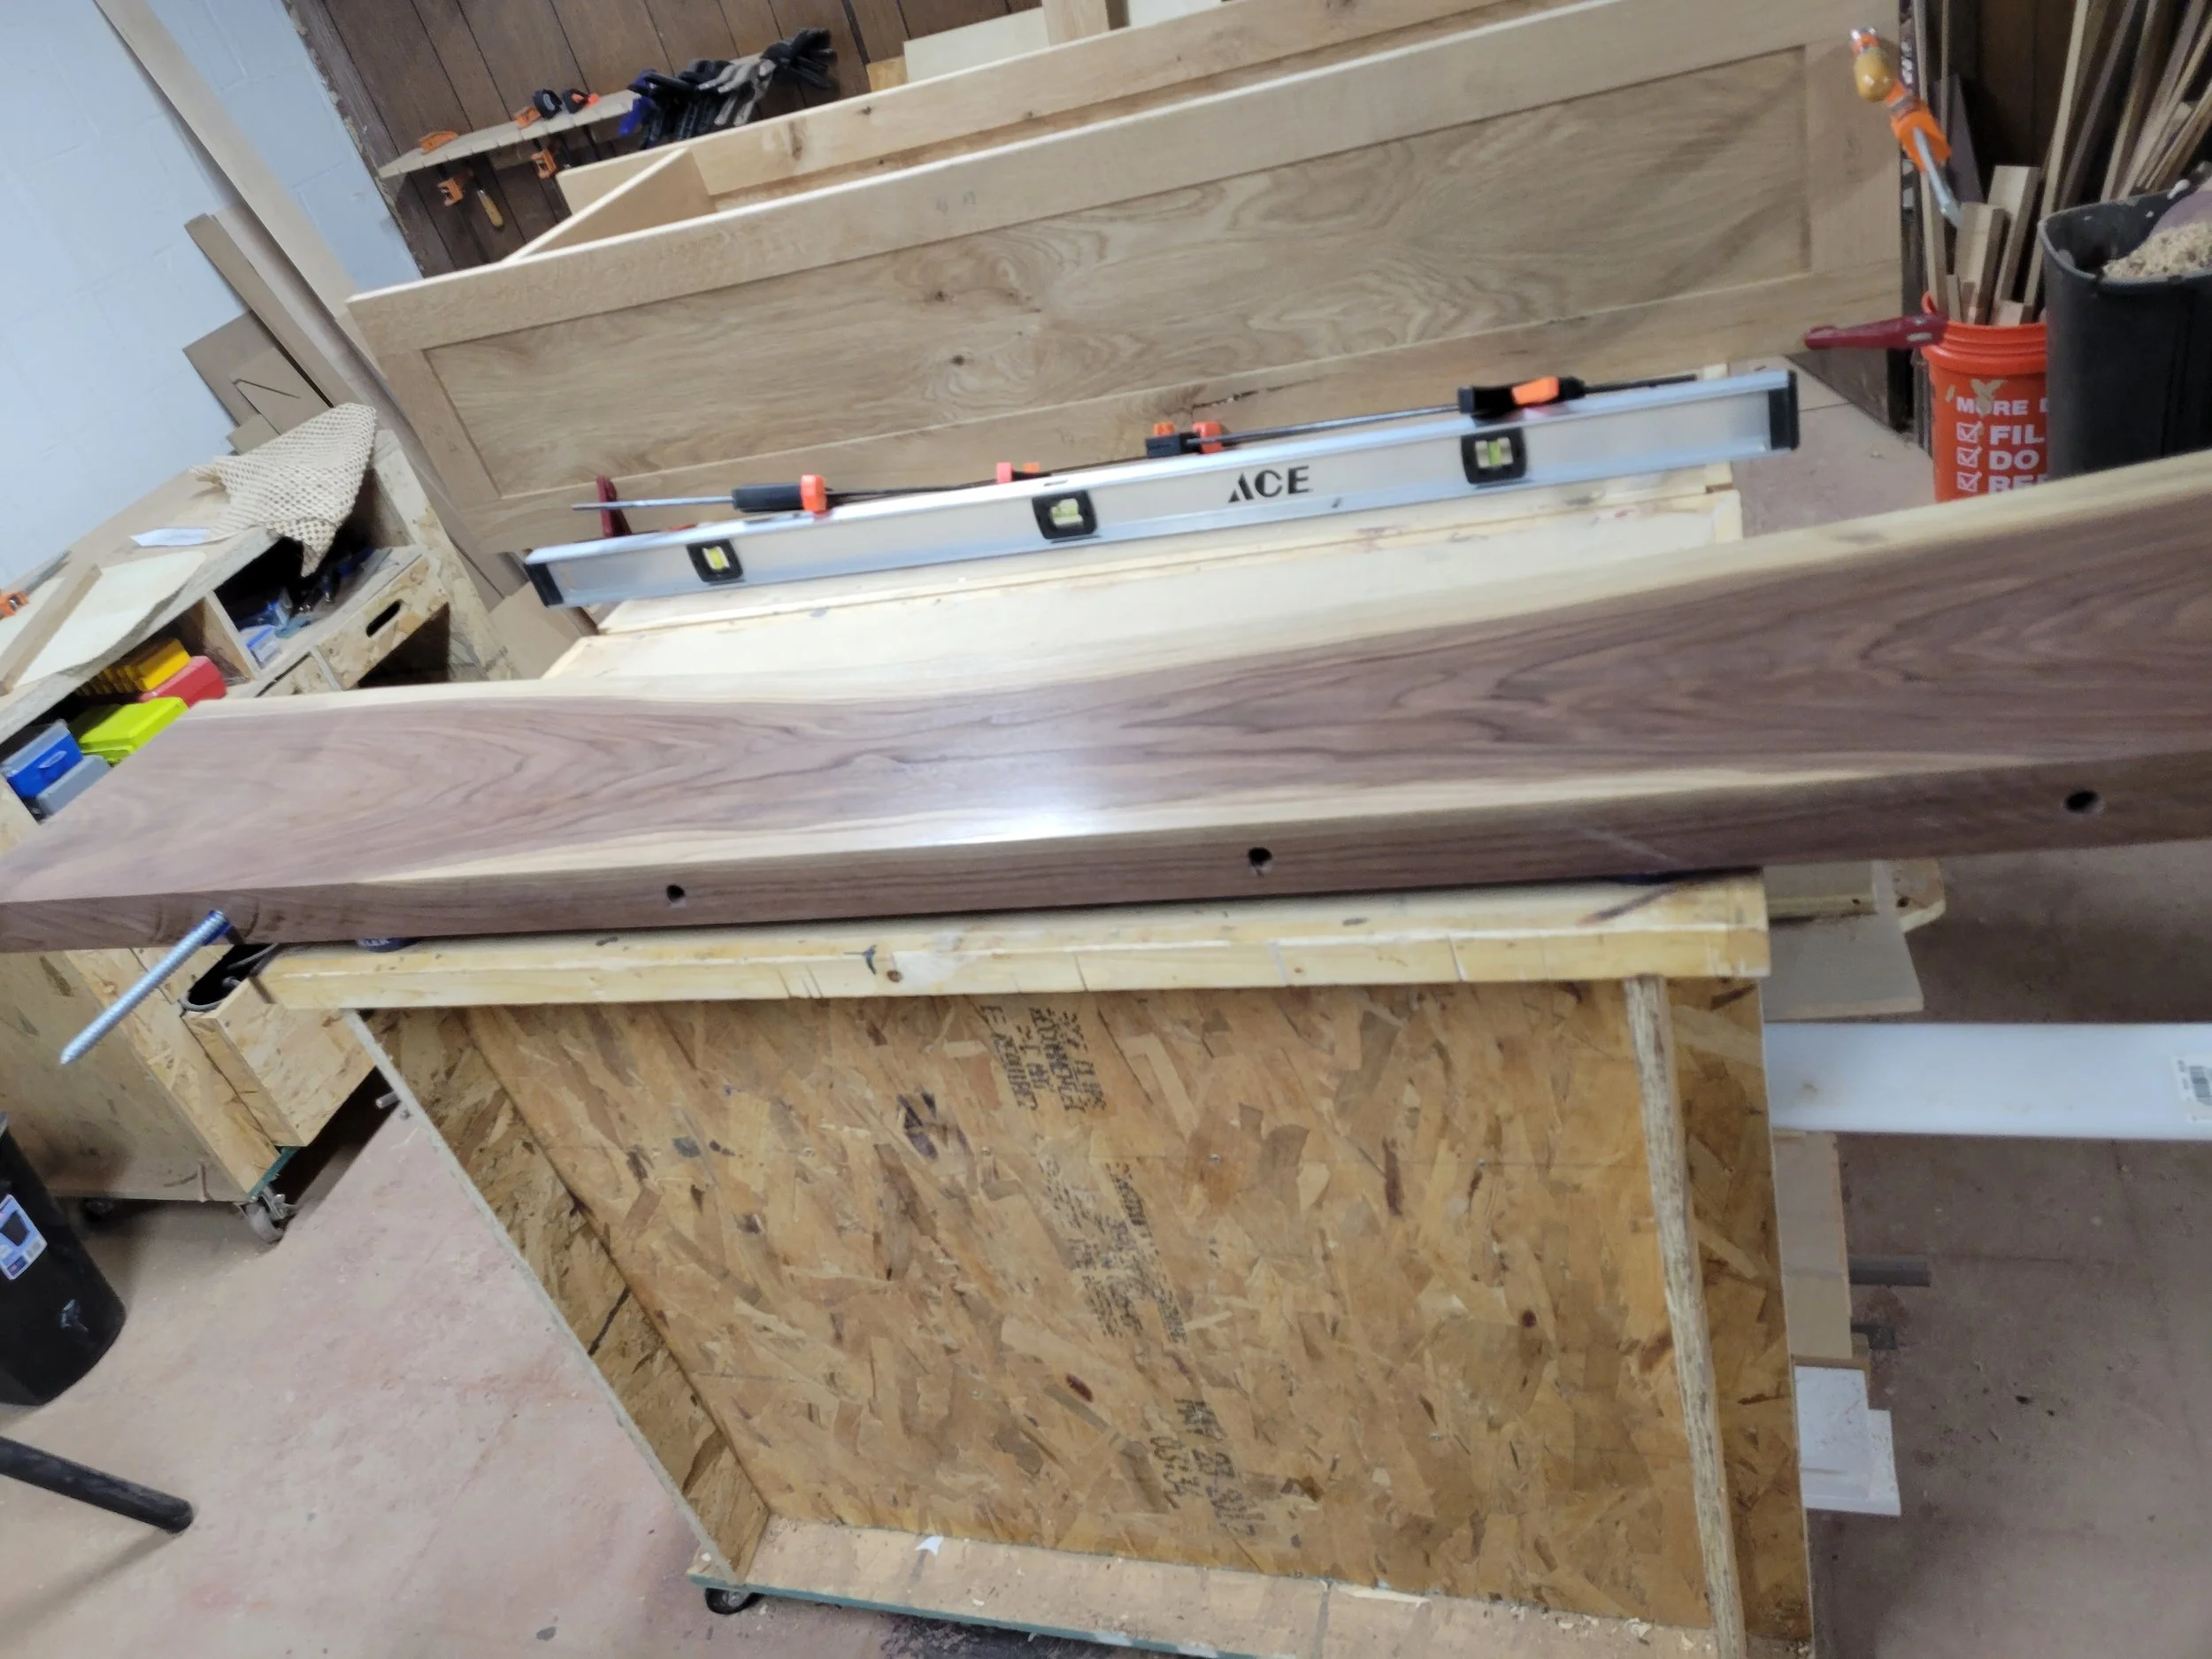
The requested size of the slab was 12” wide, 2” thick, and about 5’ long. I ended up choosing this slab which was about 16” wide, 2 1/4” thick and 6’ long. It was relatively flat which is a plus and had no major checks or cracks. However, it still need to be surfaced which takes a lot more work than I anticipated.
I could have gone to a local Amish mill and bought a slab that was already surfaced but the thickness would have only been 1 3/4”. And we all know thicker is better, so I opted for this thicker one. What I didn’t account for was that after flattening it would only be 2”. And that 1/4” was not worth all the work. I figured that surfacing the slab myself won’t be that bad. But it was more than that bad, it was terrible. Moral of the story: let the Amish do your work for you.
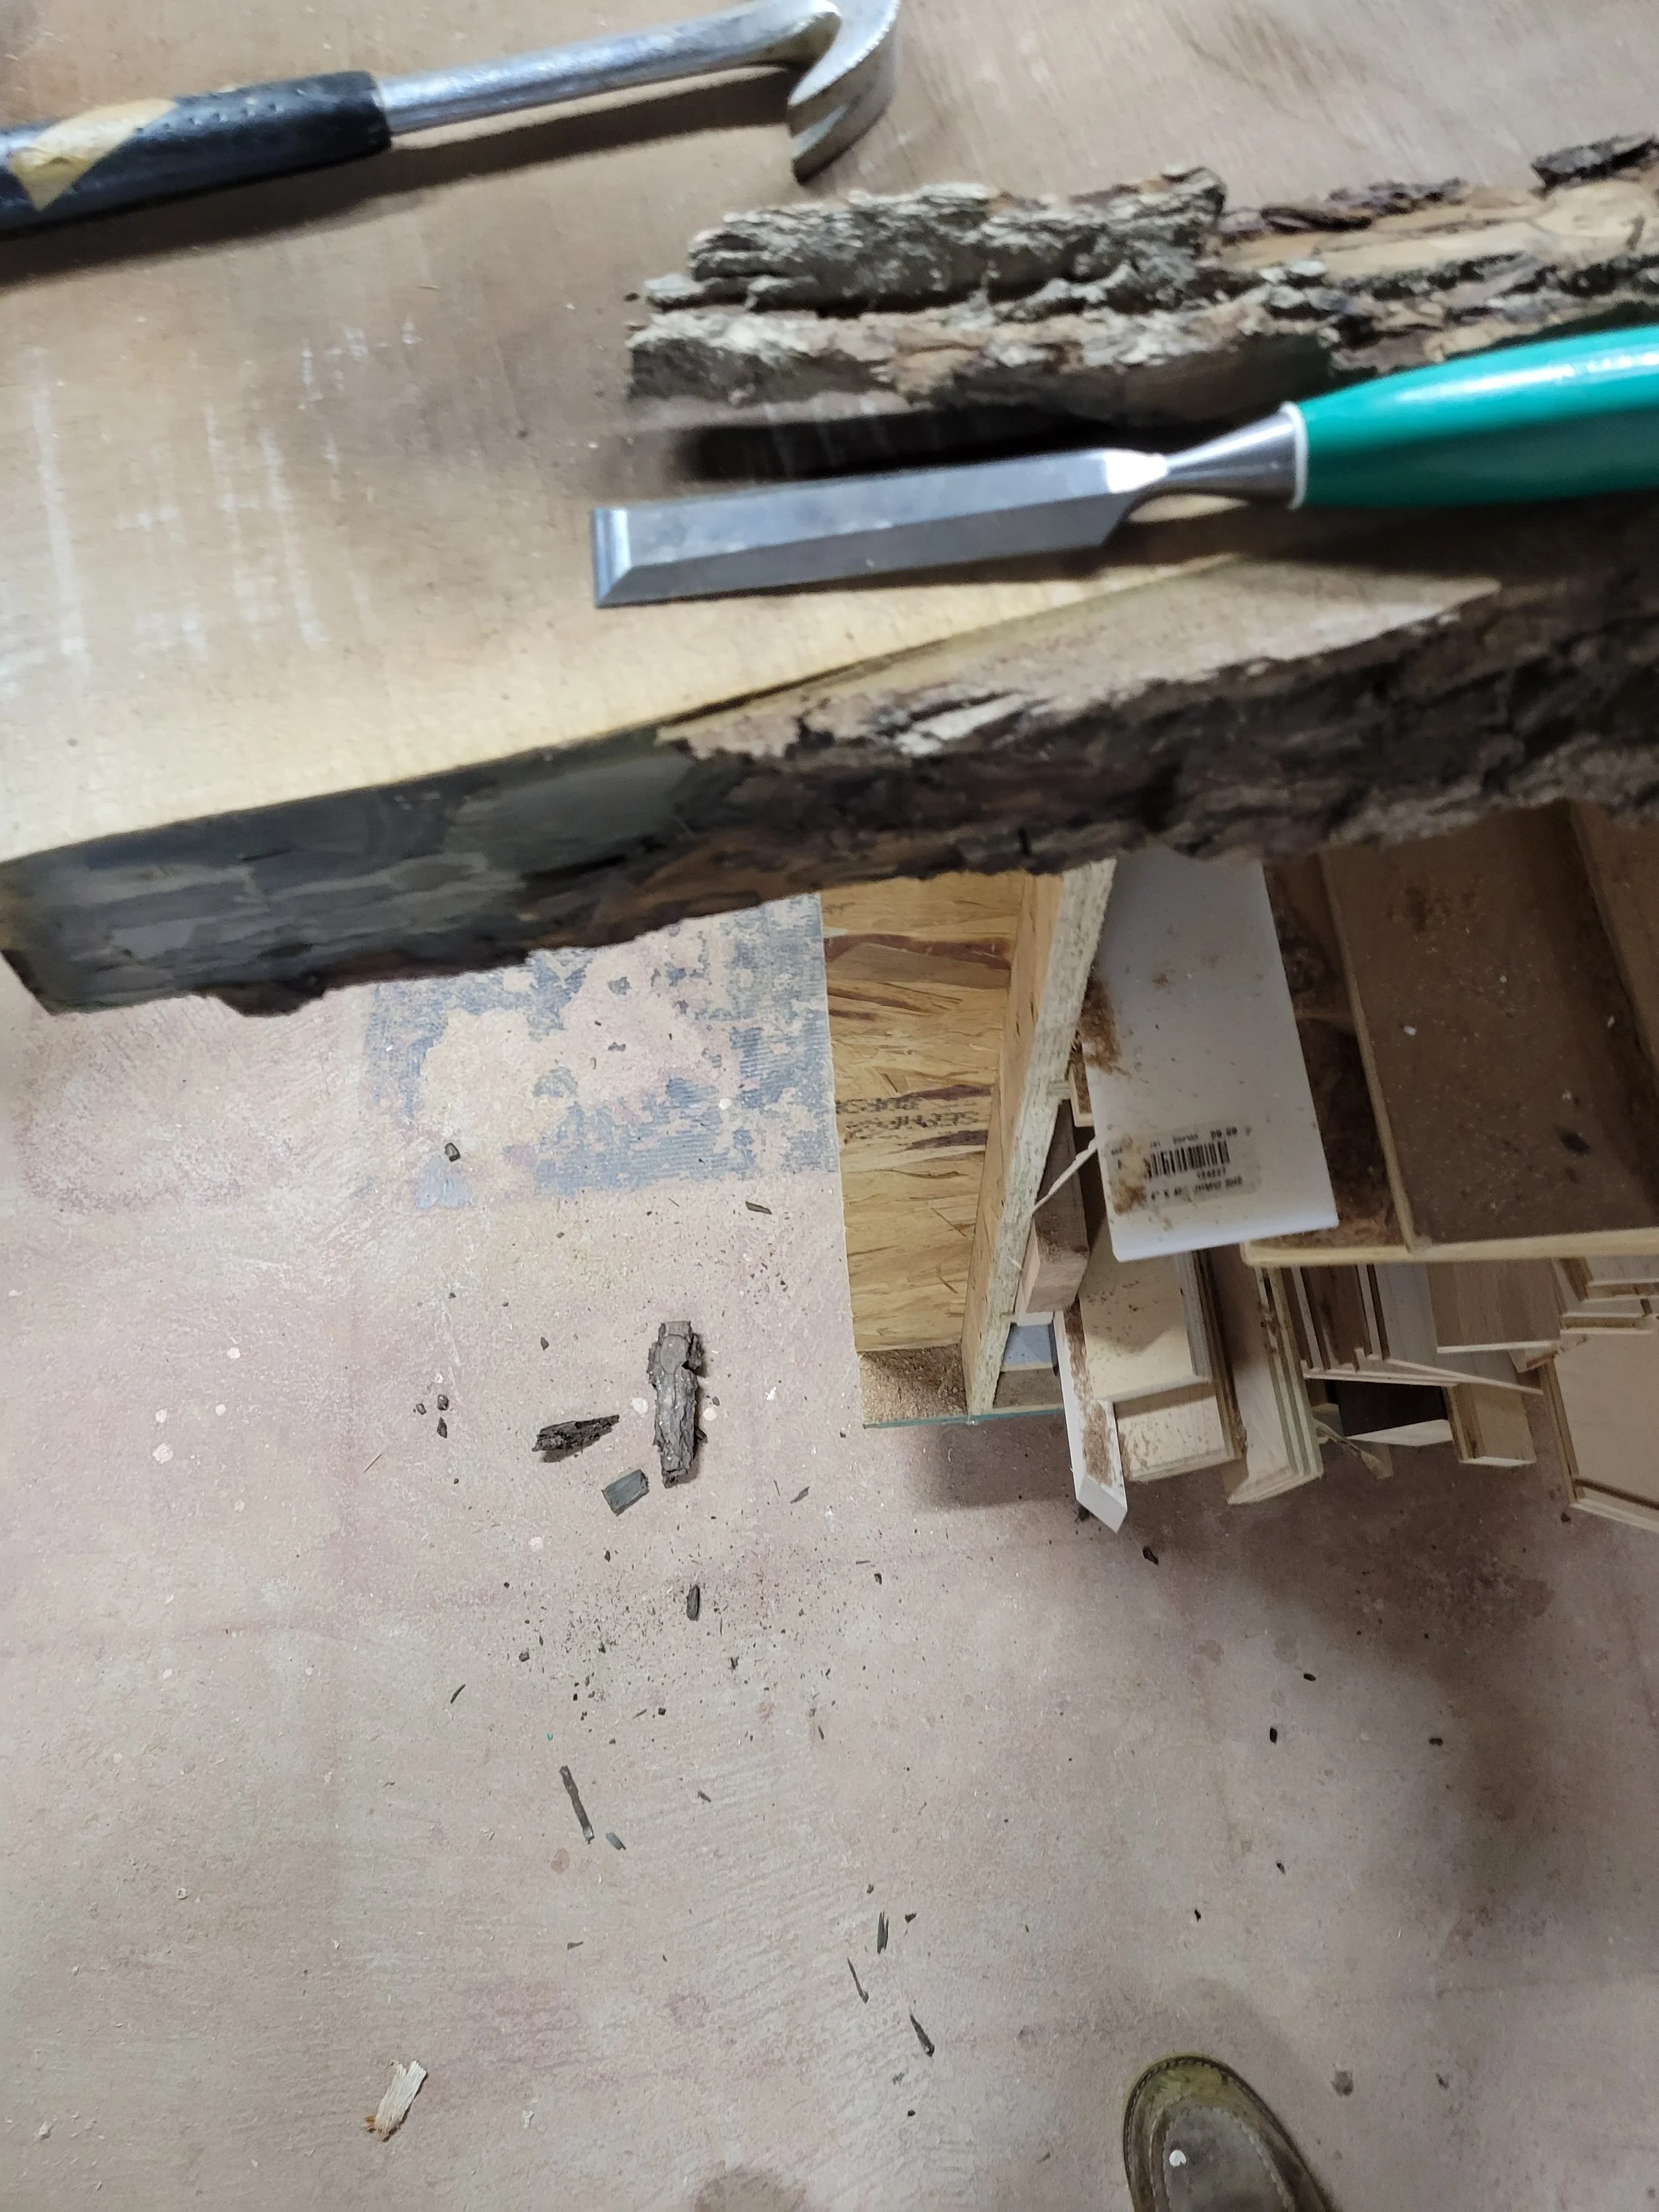
The first thing I did was debark the slab using a mallet and chisel. Yes, the bark may look nice initially. But I’ve been in enough relationships to know it’s likely going to break off over time so it’s best to end it now. When using a chisel be careful not to gouge the slab itself. To help prevent this I used the chisel bevel-down so it naturally wanted to pull away.
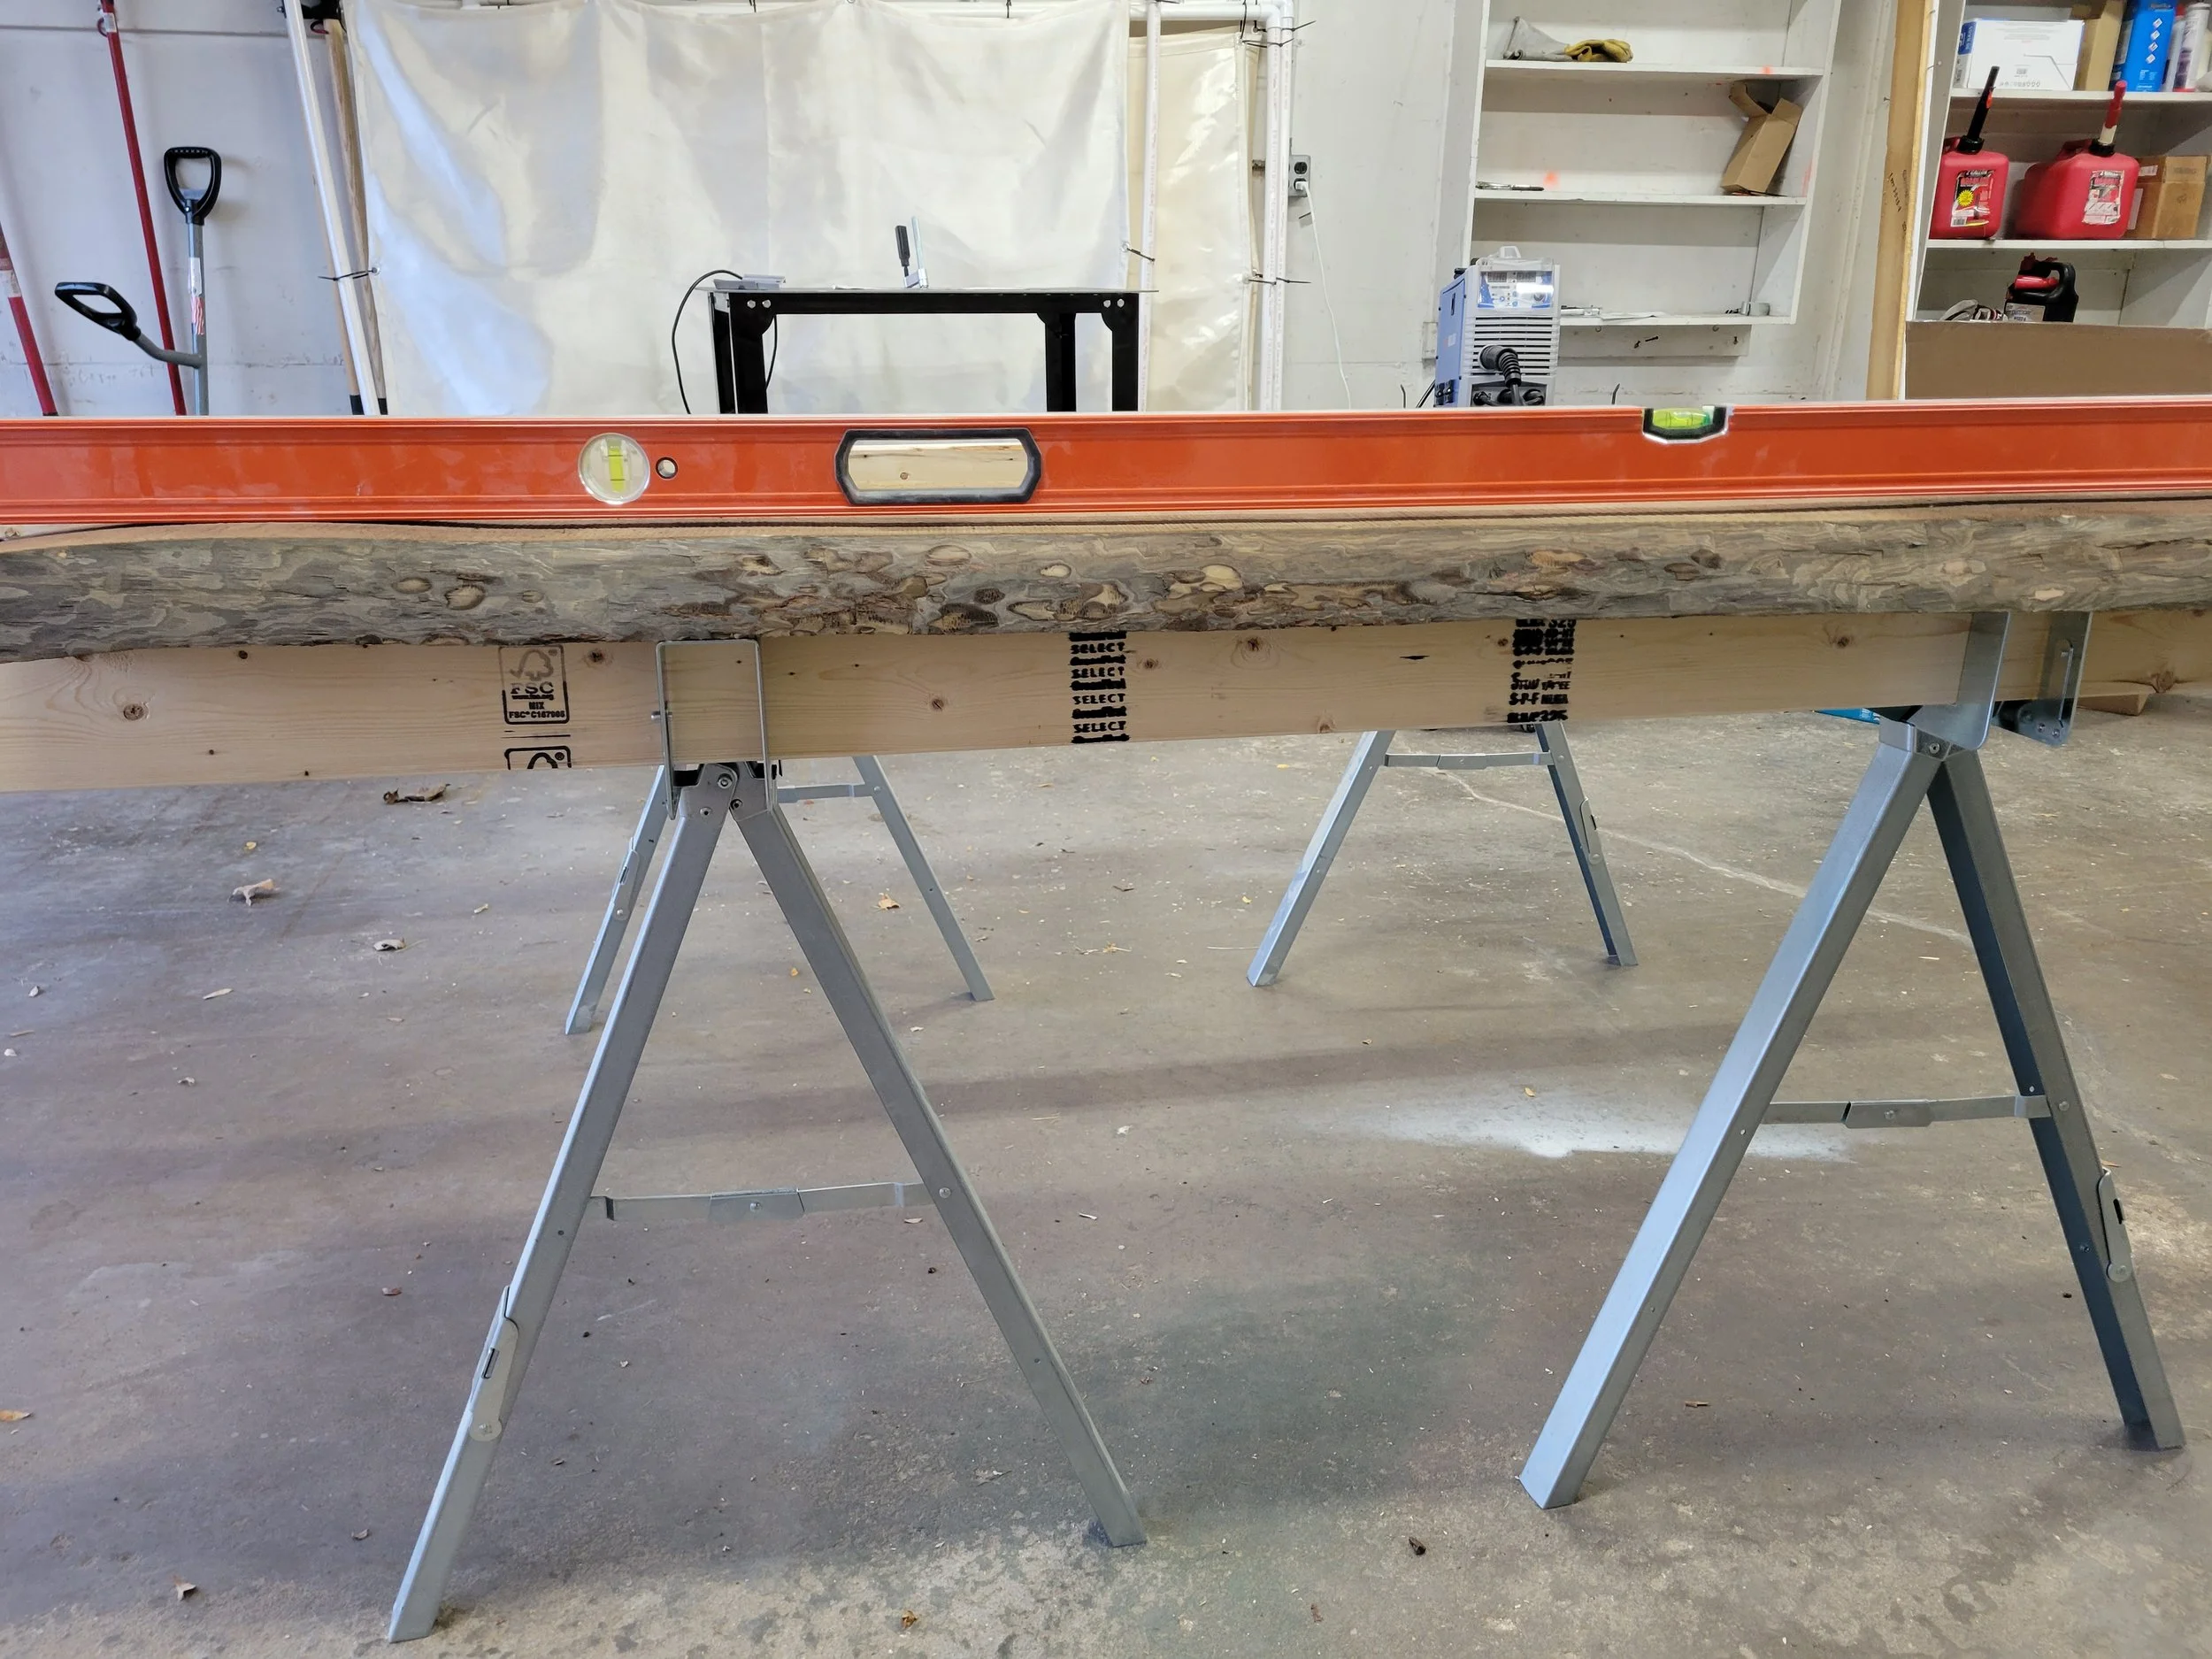
The next step was to flatten the slab which sounds so much easier than it is if you don’t have industrial equipment. 16” was wider than my equipment could accommodate so I brought out the level and a belt sander. I used the level to identify the high spots and belt sanded away, using the level to check my progress. The guess and check method is very tedious. This took me a solid day and a number of sanding belts, but that’s partially because I was using a belt sander that was given to me by someone who dubbed it a “piece of shit.” I really wanted to prove him wrong but sometimes a piece of shit is just a piece of shit. That’s likely to be the headline of my obituary.
Also, this slab was walnut which is toxic if the sawdust is inhaled so I had to wear a respirator which I should be wearing anyways when belt sanding. If you own anything made of walnut don’t panic, it’s really only a problem if you are inhaling the sawdust. Probably also if you eat the sawdust. Don’t know why you would but I’m sure somebody out there is into that.

Once flat, I had to take about 4” off one side to get down to 12”. I also needed one side to be perfectly straight so that it sits nicely against the wall. For this I used a circular saw with a straight edge to guide it.
Just a forewarning I fried three 18v batteries trying to do this. Then I purchased a 36v saw and it got the job done, but I would strongly recommend a corded saw. It was a good excuse for a tool shopping spree.

I used an orbital sander to sand down to 220 grit for a nice finish and remove any scratches or lines left behind from the belt sander.
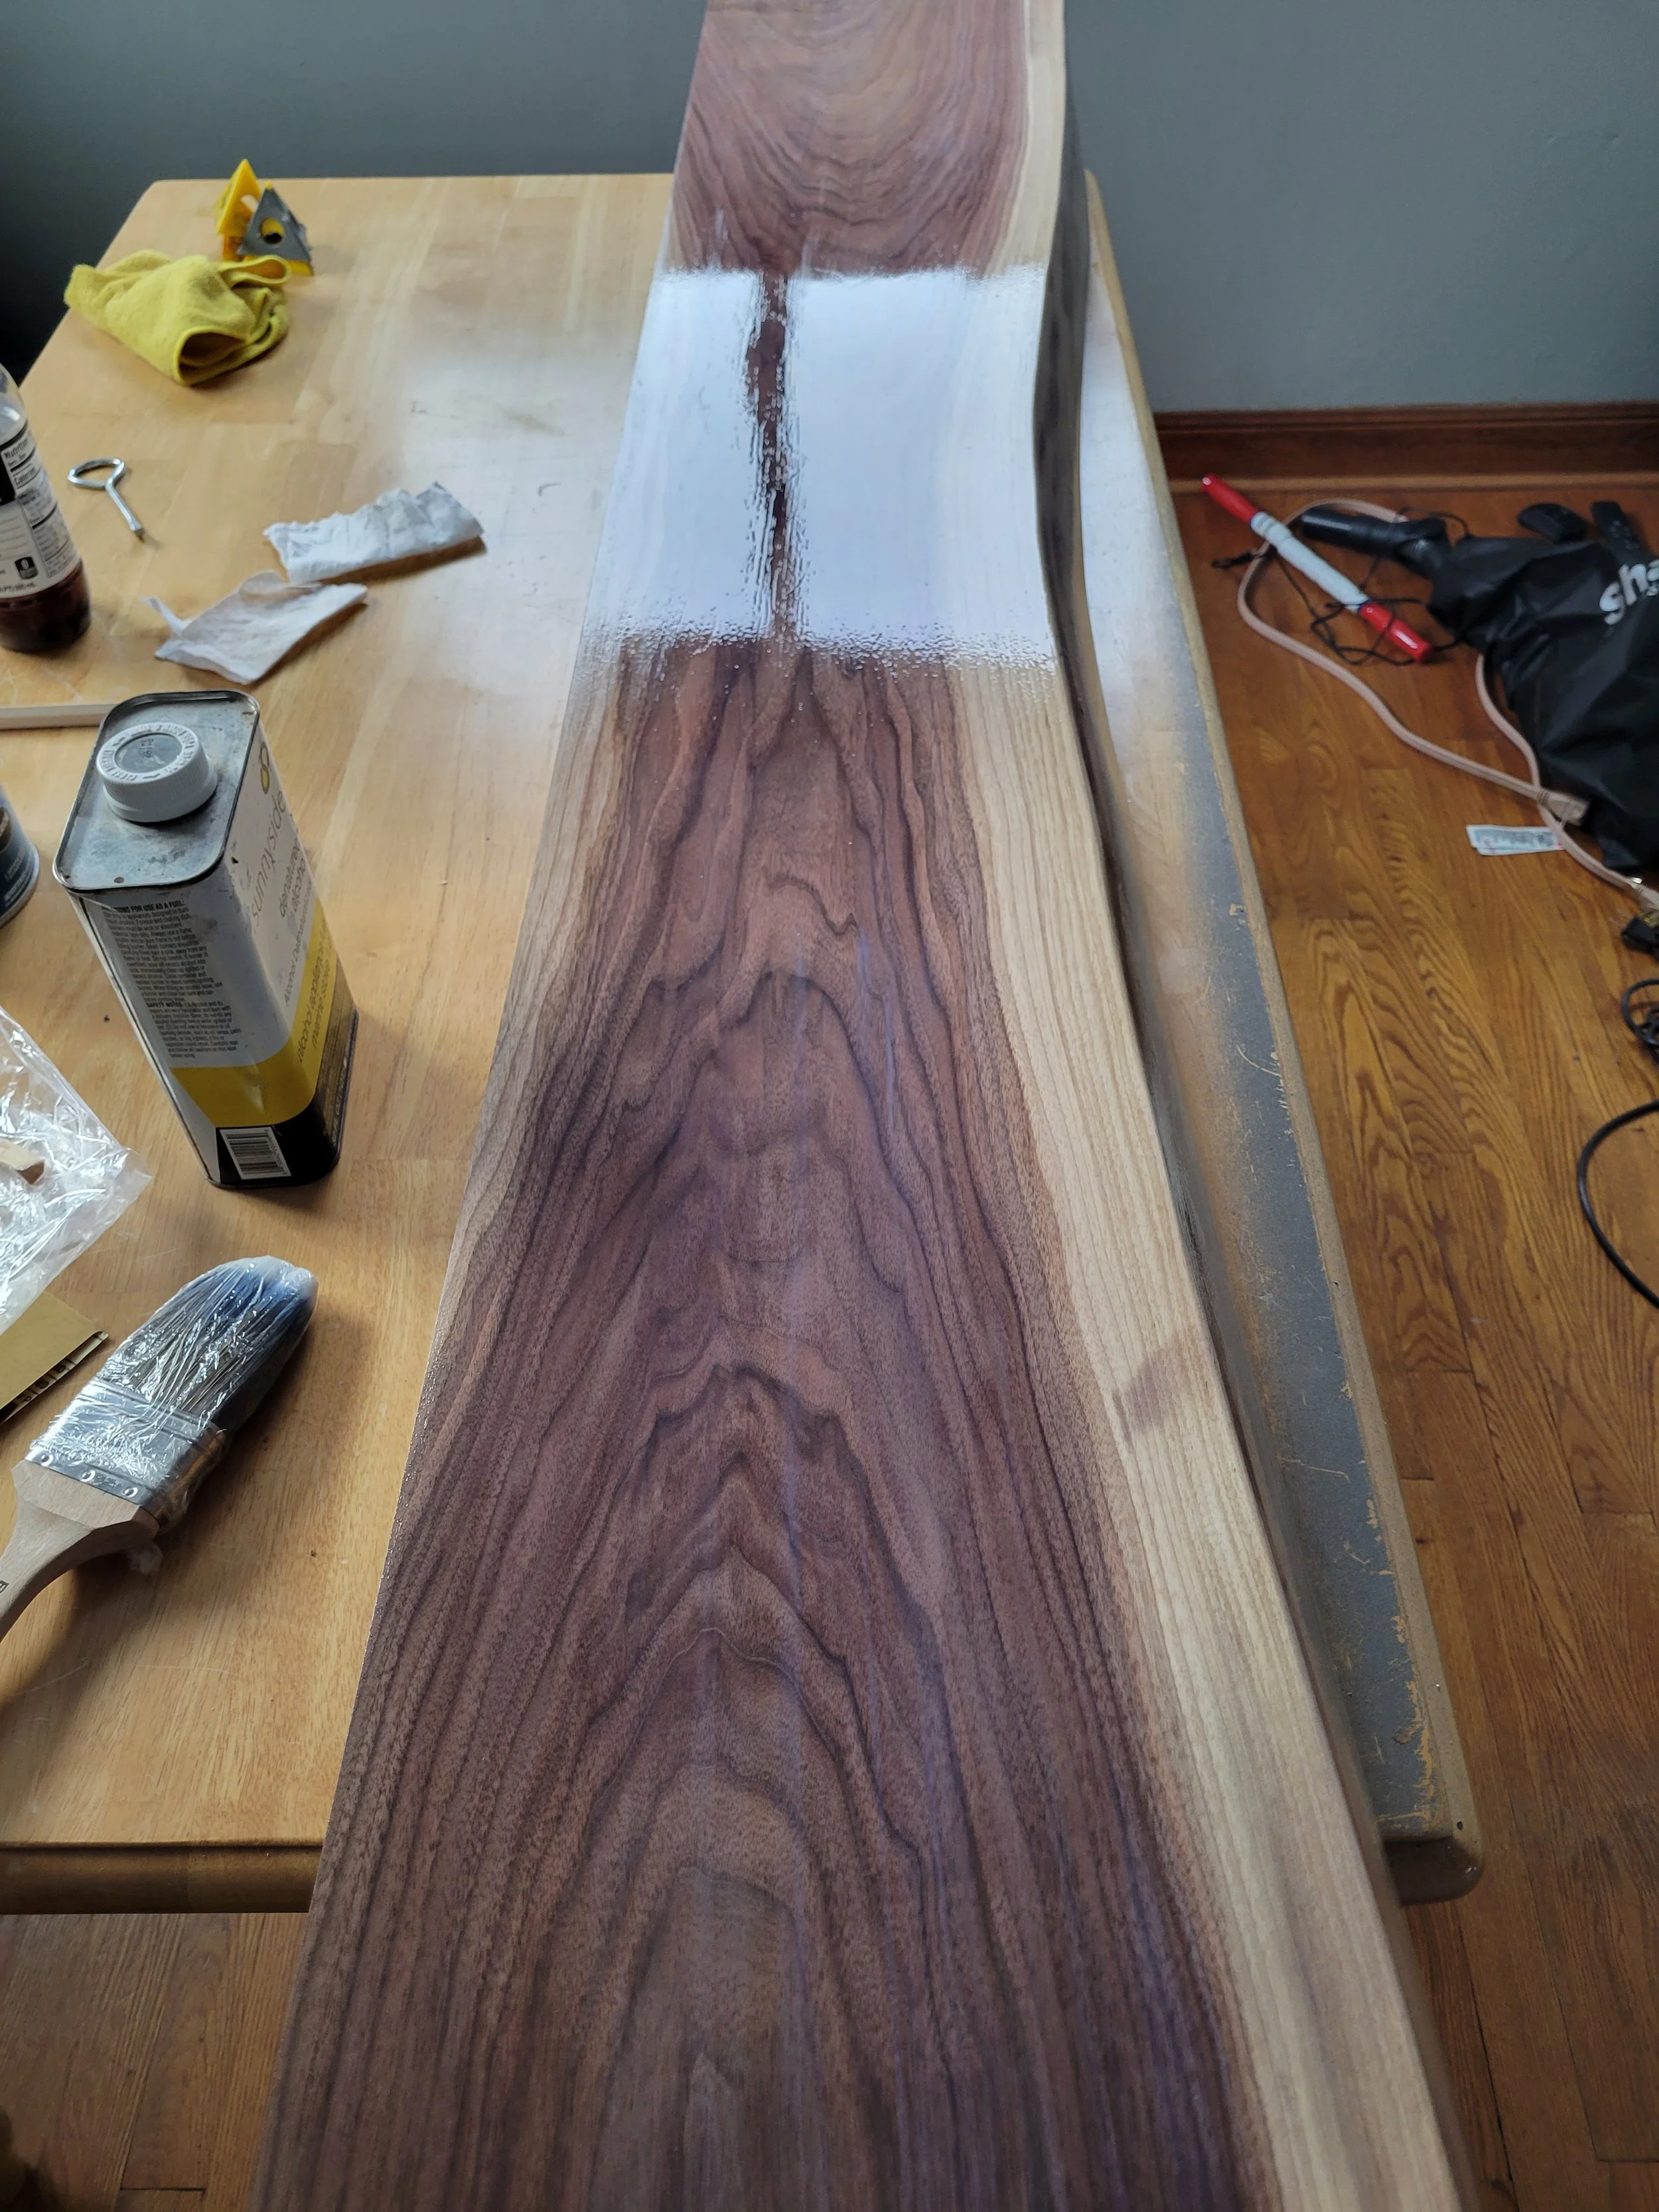
After sanding I put 4 coats of water based polyurethane on all sides.
Filling the void
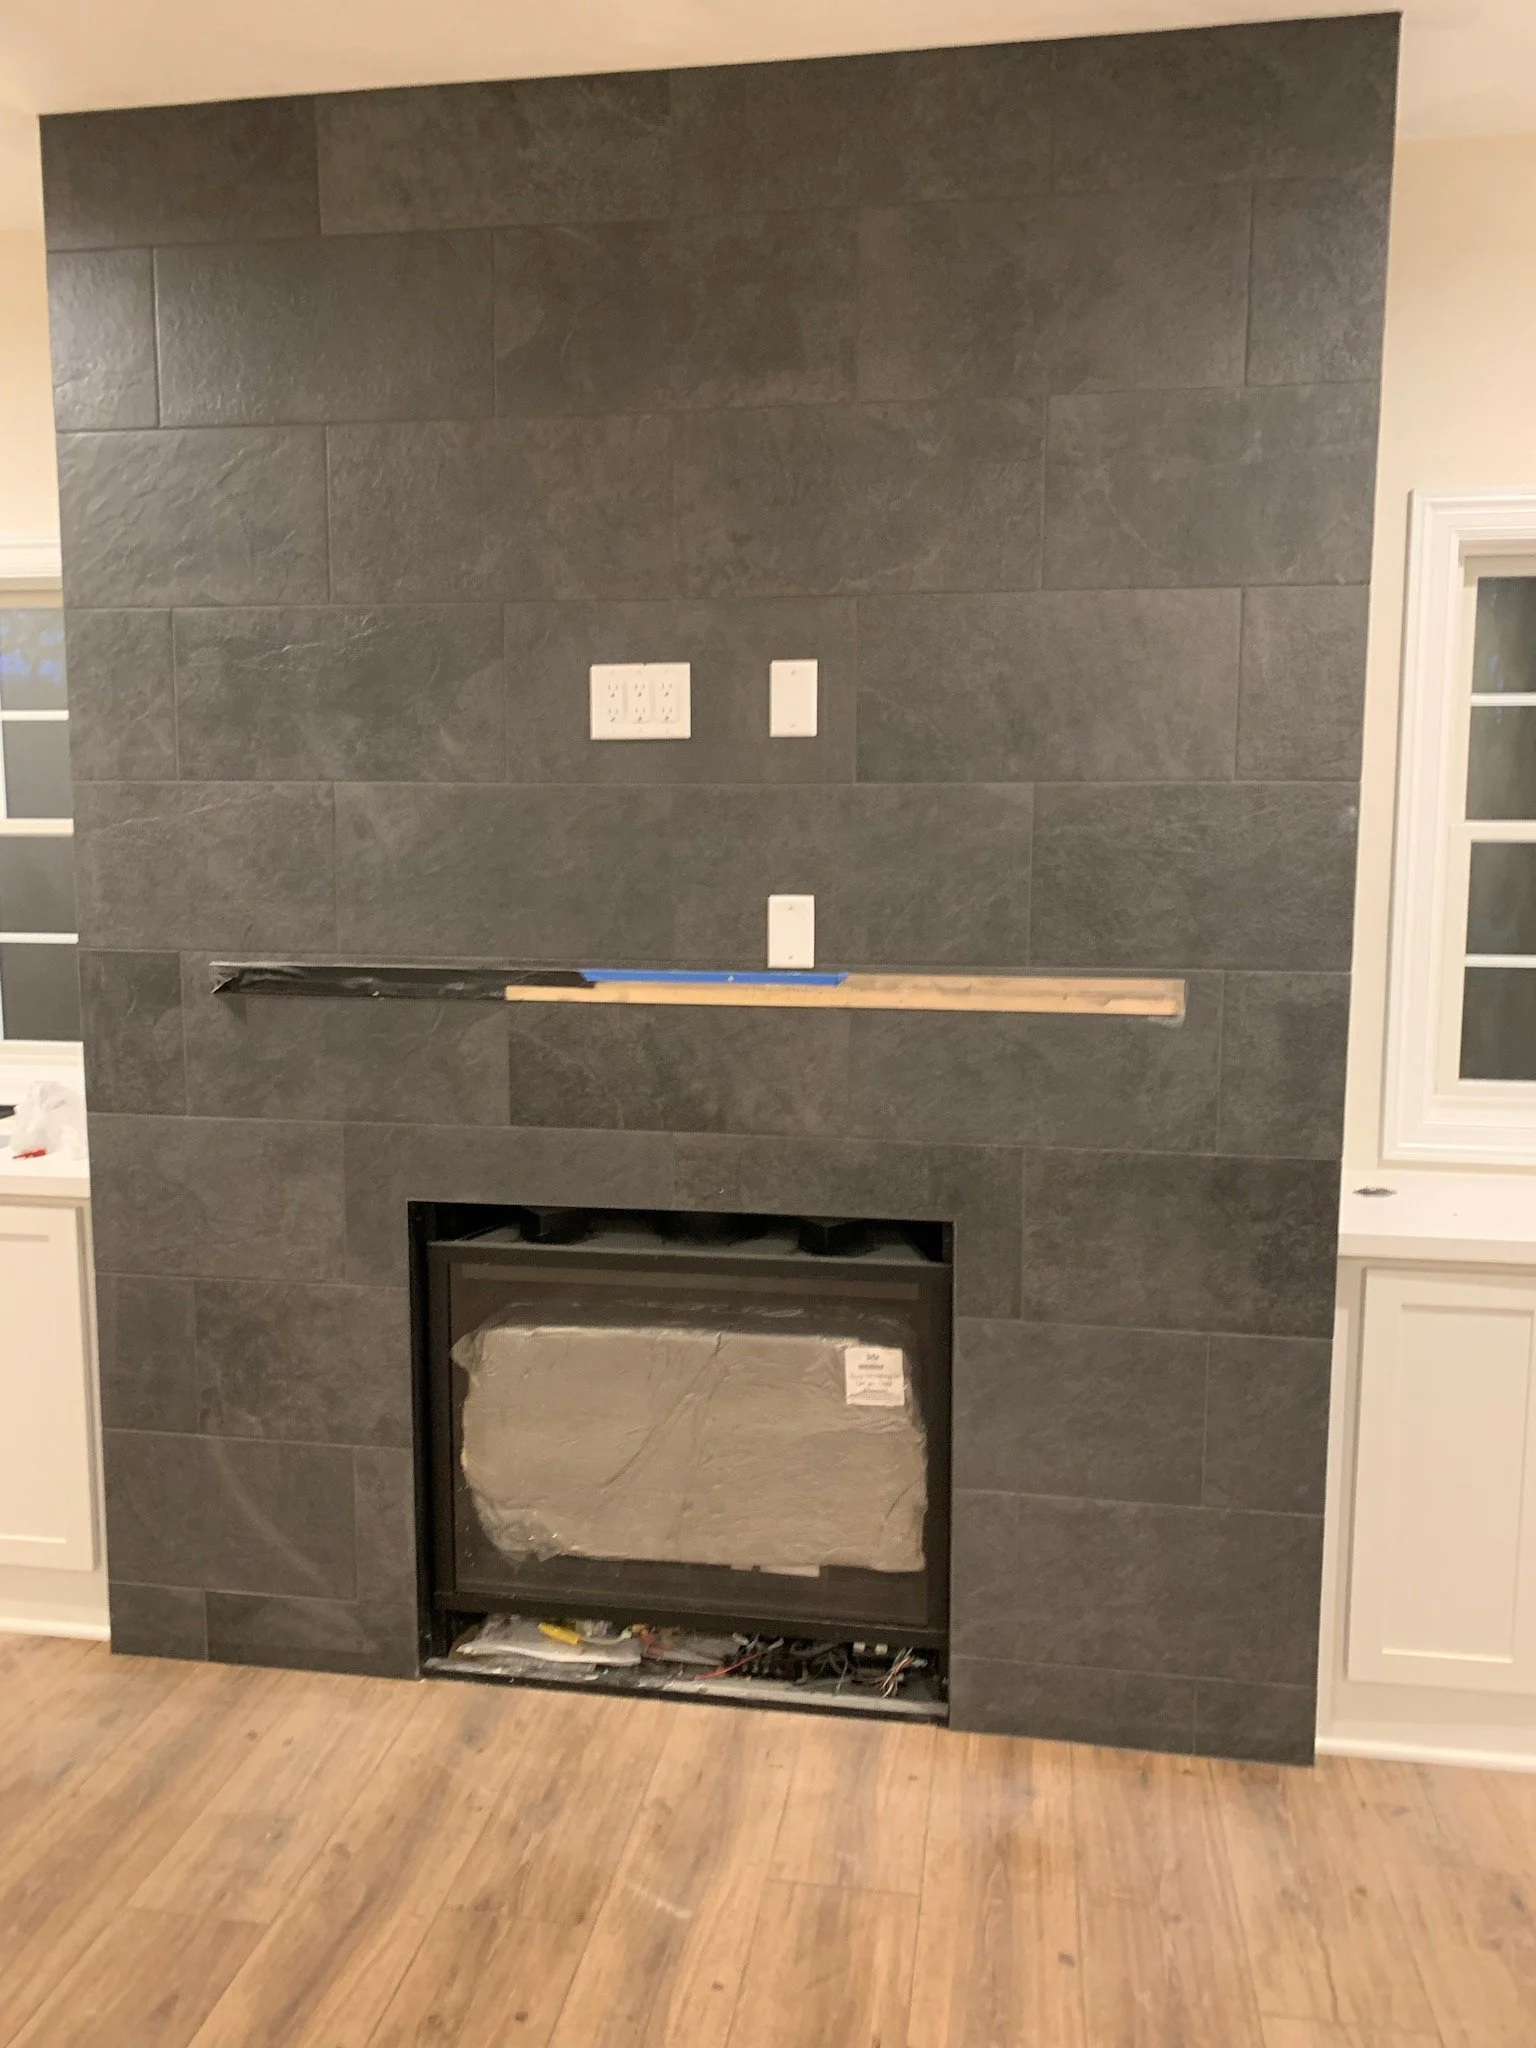
Here is where the process gets a little more complicated. This project was particularly weird because it was for a new build house. The wall it was going to hang on was going to be fully tiled so I decided it would be best to make a spacer board that was the same thickness and length of the panel. I mounted this to the wall after the drywall went up but before the tile. That way the tiler could go around the spacer board. The plan was that once the tile was up I would just remove the spacer board and be able to slide the mantel into that void. Little did I know this was just one more void that I would have trouble filling.
I find that working in new construction with a bunch of different contractors is a lot like sex. It’s nice to have someone to share in the work but sometimes it’s just easier to do it yourself. If I was doing the tile I would’ve done a few things to make the mantel install easier, but I couldn’t depend on a stranger satisfying my needs so I went with this strategy. I’m not knocking the tile guy, it was high quality install in my opinion.

The plan was to use 12” lag bolts that were 1/2” in diameter that would screw into the studs and then protrude out of the wall about 7”. I would then cut the heads off of the bolts and be able to slide the mantel onto the bolts. The key to making this plan work was drilling level and square. I played around with a number of “hacks” that would help me out but I found the best way for me was to eyeball it. So I practiced drilling a solid number of holes before I drilled into the slab.
I had found the studs that I would be drilling into and transferred those over to the slab as I would be drilling corresponding holes into the slab. There were so many holes to be drilled.
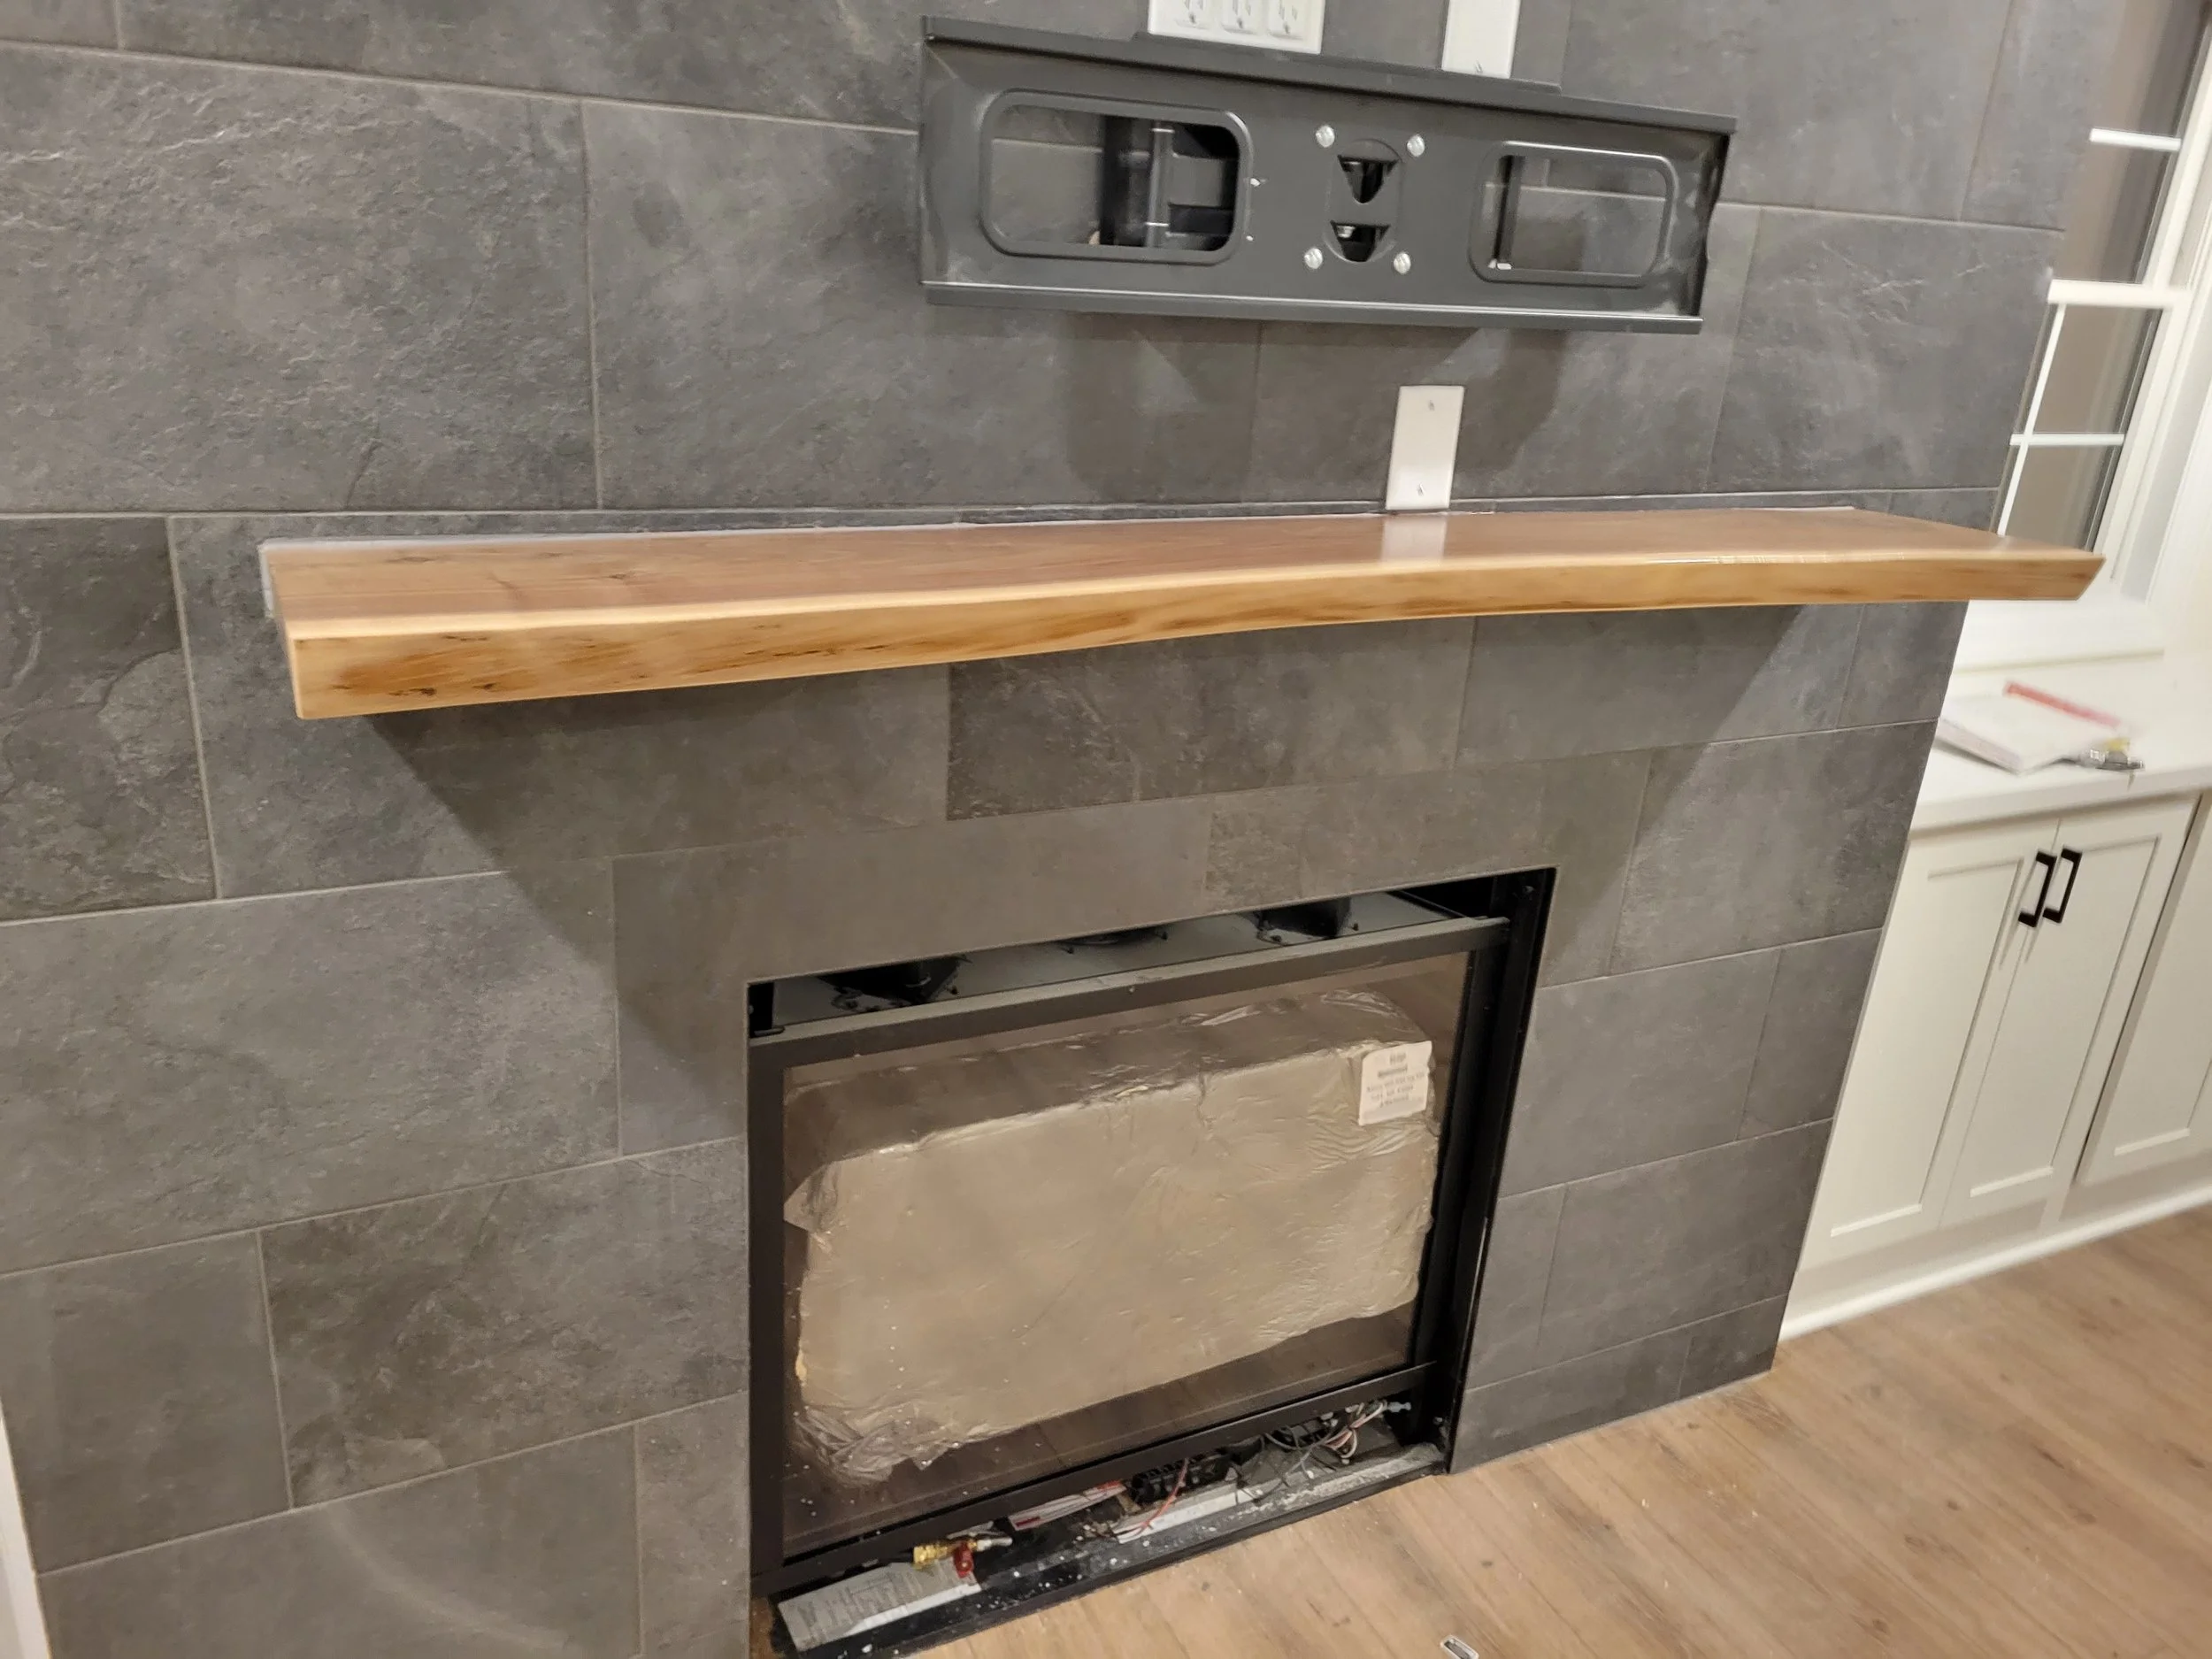
I conveniently forgot to take pictures of the shitshow called the installation, so this picture is the best I can do to illustrate. The bolt sticking out of the slab will be set all the way into the stud, about 4” if you account for drywall.
Back Pain

The morning of the install I had hurt my back because I have the body of an eighty year old man. I later found out that I had herniated a disk. I knew that I was going to hurt even more the next couple of days so I decided to go through with the install. So you can imagine how much fun I was having while putting this heavy slab on the wall.
I started by removing the spacer board and set my lag bolts into the studs, again trying my best to keep them square and level. I had these holes marked from my previous visit when I hung the spacer board. When it came time to slide the slab over the bolts I came to the horrifying realization that the board had warped slightly and was really gonna ruin my life. The warp wasn’t so bad that it was apparent to the eye but it was just enough to make everything difficult.
The thing about wood is that when it is cut form the tree it has a high moisture content. As the wood dries it will warp, especially if it isn’t allowed to dry evenly on all sides. When I was first asked to do this job I thought it was going to be a quick turnaround. When I bought the slab I was told that it was kiln dried and figured it would be on the wall in a short amount of time. But if you’ve ever built a home you know that things don’t always go as planned and the installation ended up being delayed another couple of months. My guess is that the slab wasn’t as dry as I thought it was and that it dried out a little more while being stored in a spare bedroom. In hindsight I should’ve checked with a moisture meter before flattening it, but if I could do things over again I wouldn’t be where I am in life.
So I first had to battle with the lag bolts, which I will admit weren’t all exactly level. A few love taps with a hammer helped this. However, the slab wouldn’t fit into the void left behind between the tile. The tile person didn’t do me any favors as I hoped they would leave an expansion gap around the spacer board but instead they tiled right up to it.
The fix for this was to slide the slab up to the tile and then fill any gaps with caulk that matched the grout color which I had brought along just in case something like this happened (because it always does). The gaps weren’t huge and the caulk would look like grout so in the end it still looked like something I would like to have on my wall. Another thing to note is that before sliding the mantel onto the bolts I put construction adhesive in the holes so that the mantel was securely in place.

If I was to do it again I may opt to just drill the anchor holes through the tiles rather than using a spacer board, although the it would’ve worked just fine if the board didn’t warp. But at the end of the long day it was a success. I was happy with it and more importantly they were happy with it. I then spent the following two weeks icing my back and getting physical therapy from a guy in his basement.