
Open Up
for the same cost as a therapist you can open up your three season room instead of opening up to them.
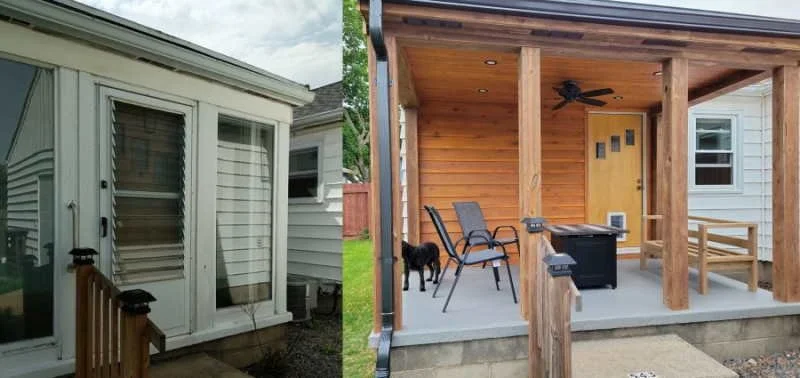
Cramped, Rotting, Ugly, Not Functional. The way you feel inside may be the same way you feel about your three season room. Sure, you can do work on yourself and go pay a lot of money to see a therapist. Or you can pretend you’re doing work on yourself by actually doing work on your house. It’s much more immediately rewarding and you still get to spend a lot of money. Summer is coming, so I’m told, and I thought it would be a good time to talk about my three season remodel I did last Summer. While I can’t go into specifics about the construction process because I just didn’t document it, I can still go over the bigger picture things and maybe give you some ideas for when you decide to deflect from your own emotions.
What’s Wrong With that?


When I purchased my home I was initially excited about the three season room. I overlooked the rotting wood, small space, and carpeting that consisted of sample squares, because who doesn’t get excited about a three season room? But after a couple of years I started to realize why more than half of the three season rooms I see when I’m doing my window peeping rounds are just storage rooms for everyone’s junk. The room was small so it was cramped if more than two people were in at once. And I know I never have that issue but that’s beyond the point. Also, the room got so hot with all that glass in the summer that it was pretty much unusable. It didn’t help that glass walls were made of patio sliding doors that were sealed shut for whatever reason. Combine that with the fact that the room itself was aging worse than I am, and it was about time to do something. The patio doors were wood framed, which were rotting. Whenever it rained, water got into the room. Also the roof was leaking which caused the structure under it to rot. I guess sometimes you just reach a point where you have to start demolishing the things in your life.
I was initially planning on remaking the whole thing into a screened porch. I even planned to reuse the glass panels to make inserts for the cooler months. But after pricing everything out I decided I was going to cheap out like I do with most things in my life. So I went with a covered porch option. That way I can keep all of the framing and not have to deal with windows and framing. This would save me some money, but I still ended up spending more than I wished. With a project like this I don’t think that can be avoided.
Breakdowns Can Be fun

I began like I do most of my days, with a very intense breakdown. I removed all of the windows and patio doors with a sawzall and prybar. Then I tore down the thin plywood that made up the ceiling and the wallcovering of the house. I went on to take off all of the siding and even ripped the roof off. Luckily the 4x4 posts, rafters, and ceiling joists were still in good condition so I was able to leave all that.
I Wish the Roof Was On Fire
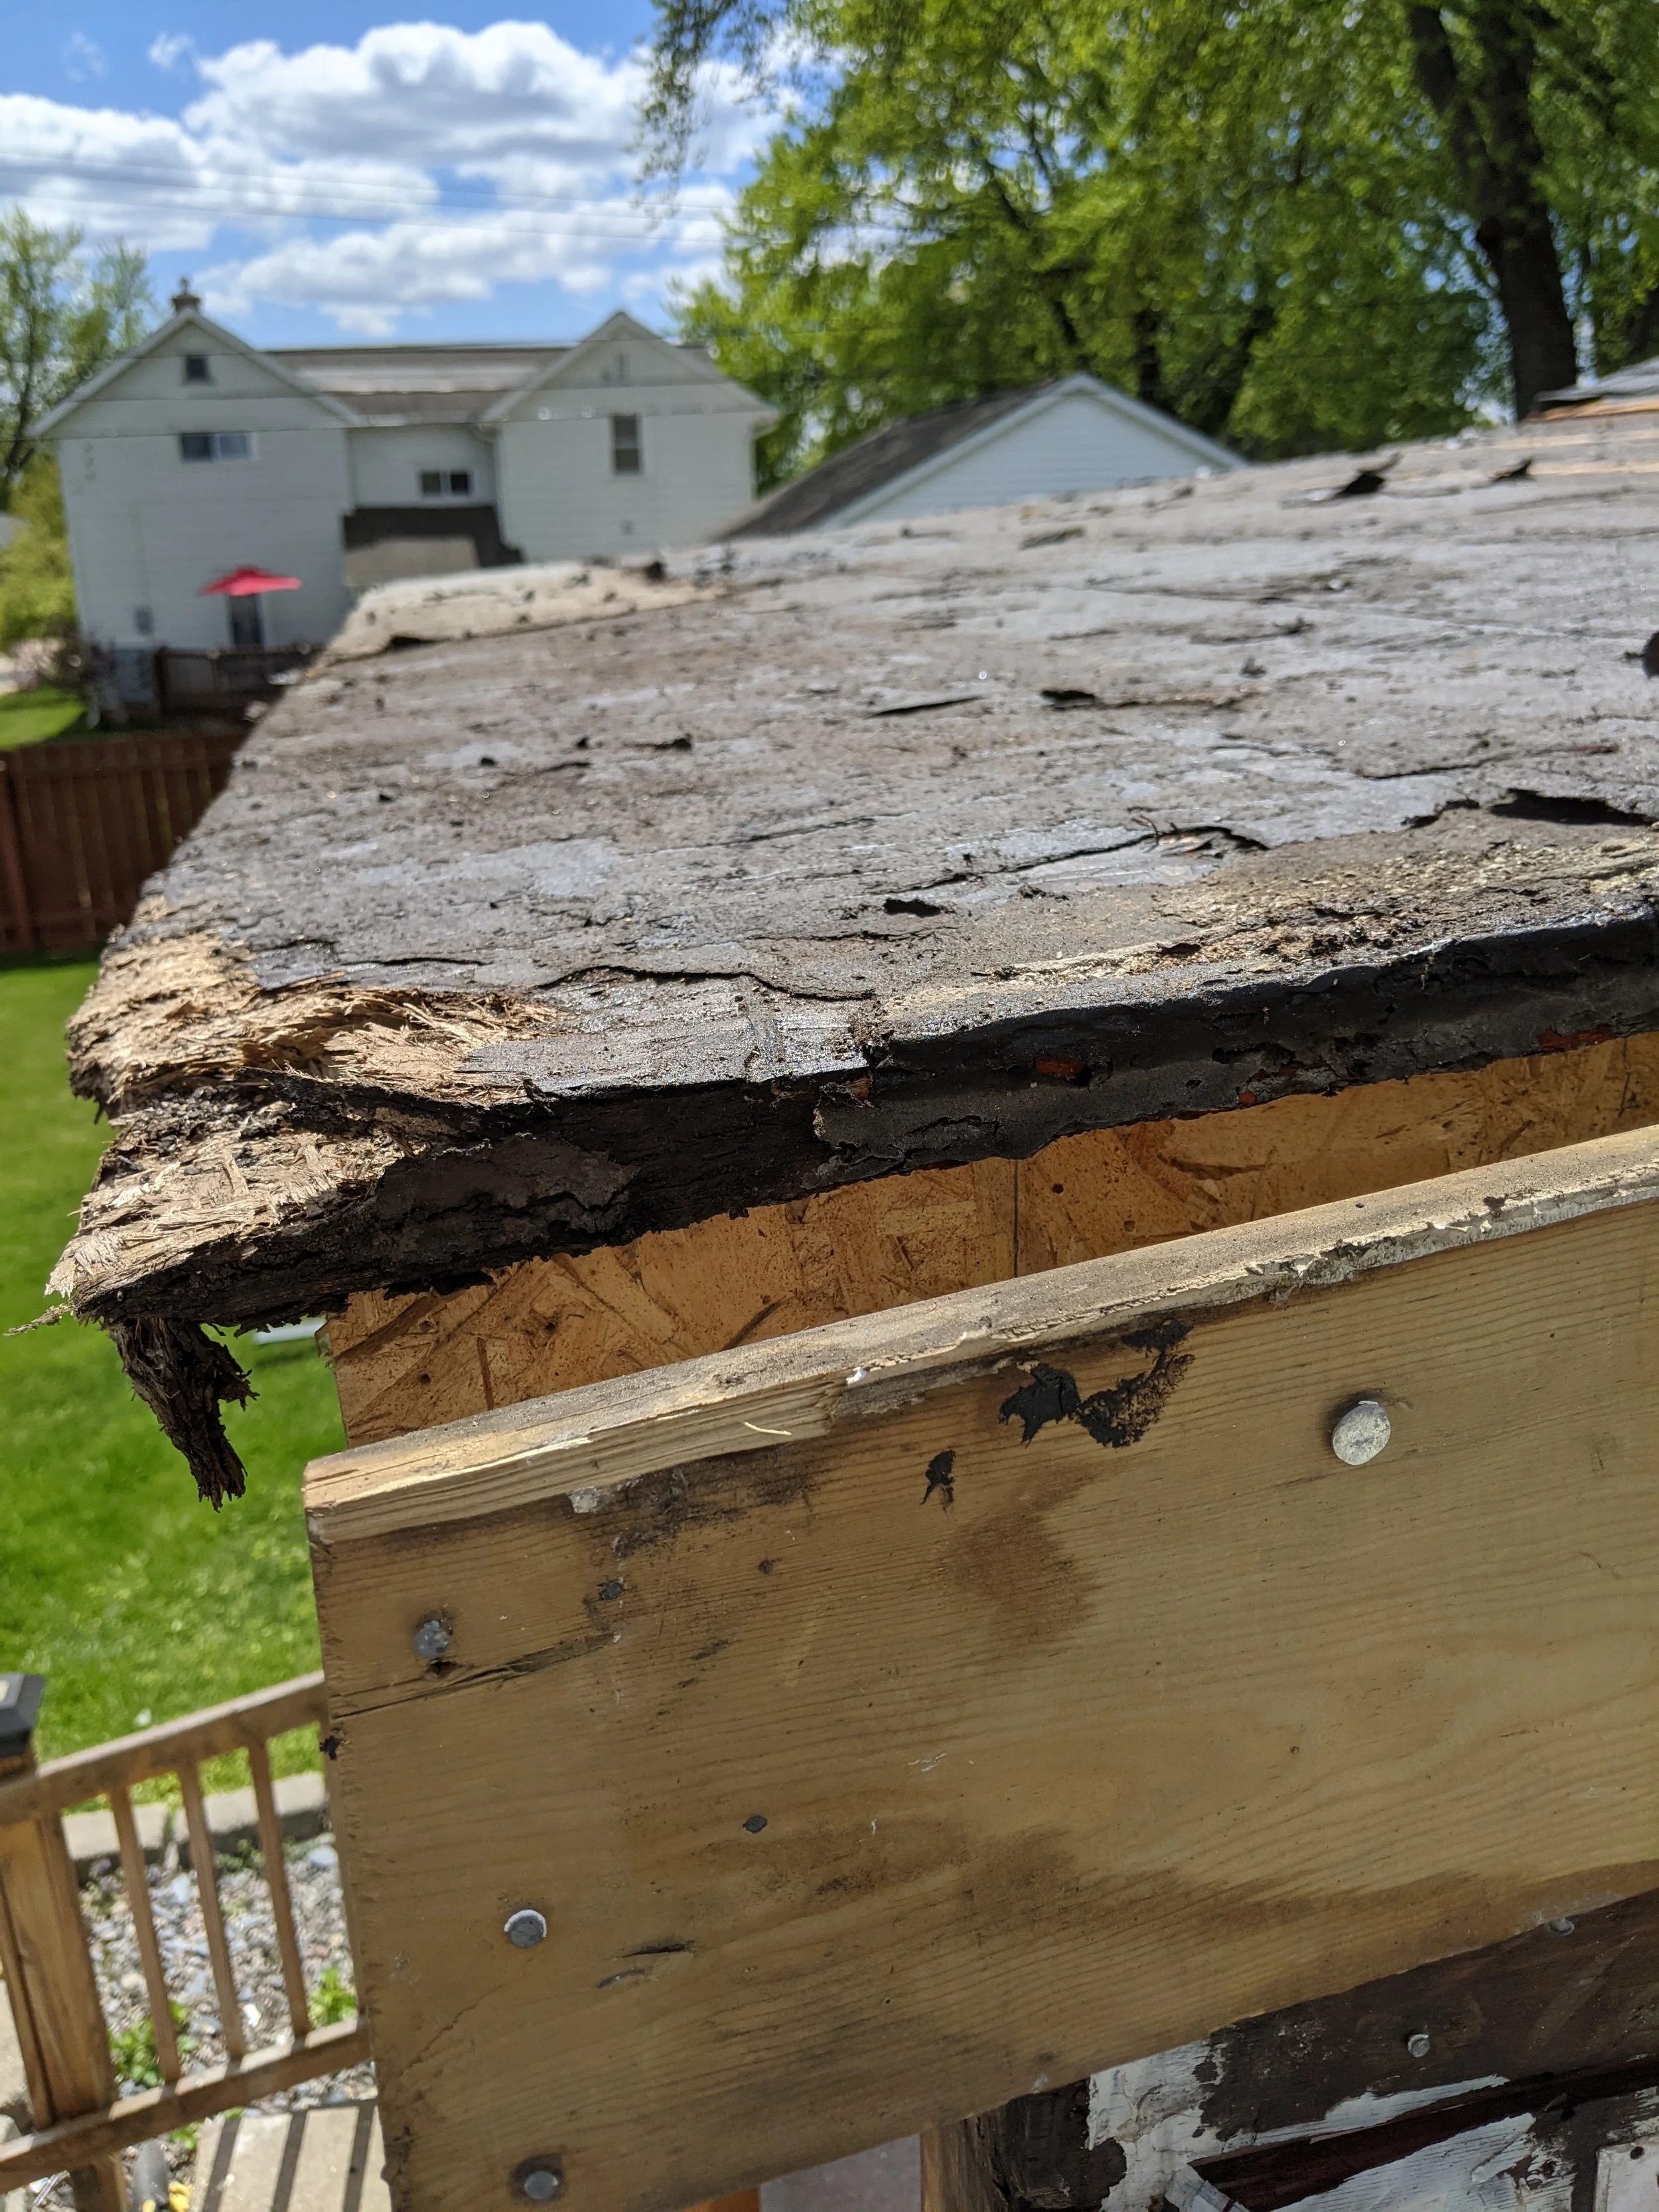
While my house has an asphalt shingle roof, the porch roof was covered with a large piece of rubber called EPDM, not to be confused with BDSM. This stuff is great for low sloped roofs such as the patio had because if installed correctly it is pretty much waterproof. But if not installed correctly then you get what is pictured here: water damage. The rubber roof was installed over an existing asphalt roof, which is a roofing sin because rubber roofs need a smooth surface so that it can be cemented to it. Whoever did this roof is on my shitlist because not only did I have to replace some of the OSB, but I also had to scrape melted shingles off the roof which took forever. Rubber roofs get extremely hot.
So I went through and replaced a good portion of the roof and then installed a new rubber roof. Luckily I had my dad there to help so whenever I got to a ledge he could talk me off of it.
step 2: Spend all your life savings on wood
My plan was to use the existing structure and just wrap everything with new materials. For the exterior walls I used cedar siding, after installing house wrap. For the ceiling I installed mold resistant drywall to the ceiling joists. Although I didn’t plan on water contacting the drywall, it gets humid as hell in the summer so I wanted to play it safe. Over the drywall I installed 1/4” cedar tongue and groove planking. For the posts, facia (vertical outside surface underneath the overhang of the roof) and soffit (horizontal surface under the roof overhang), I used 1x6 cedartone treated lumber. Cedartone lumber is nice because it doesn’t have that ugly green look that regular pressure treated lumber has. Therefore I did not have to stain it. I stained all of my cedar lumber in my garage before installing it. This was a solid day of killing brain cells, but it was much easier to do it this way than stain everything after it is up on the walls and ceiling.


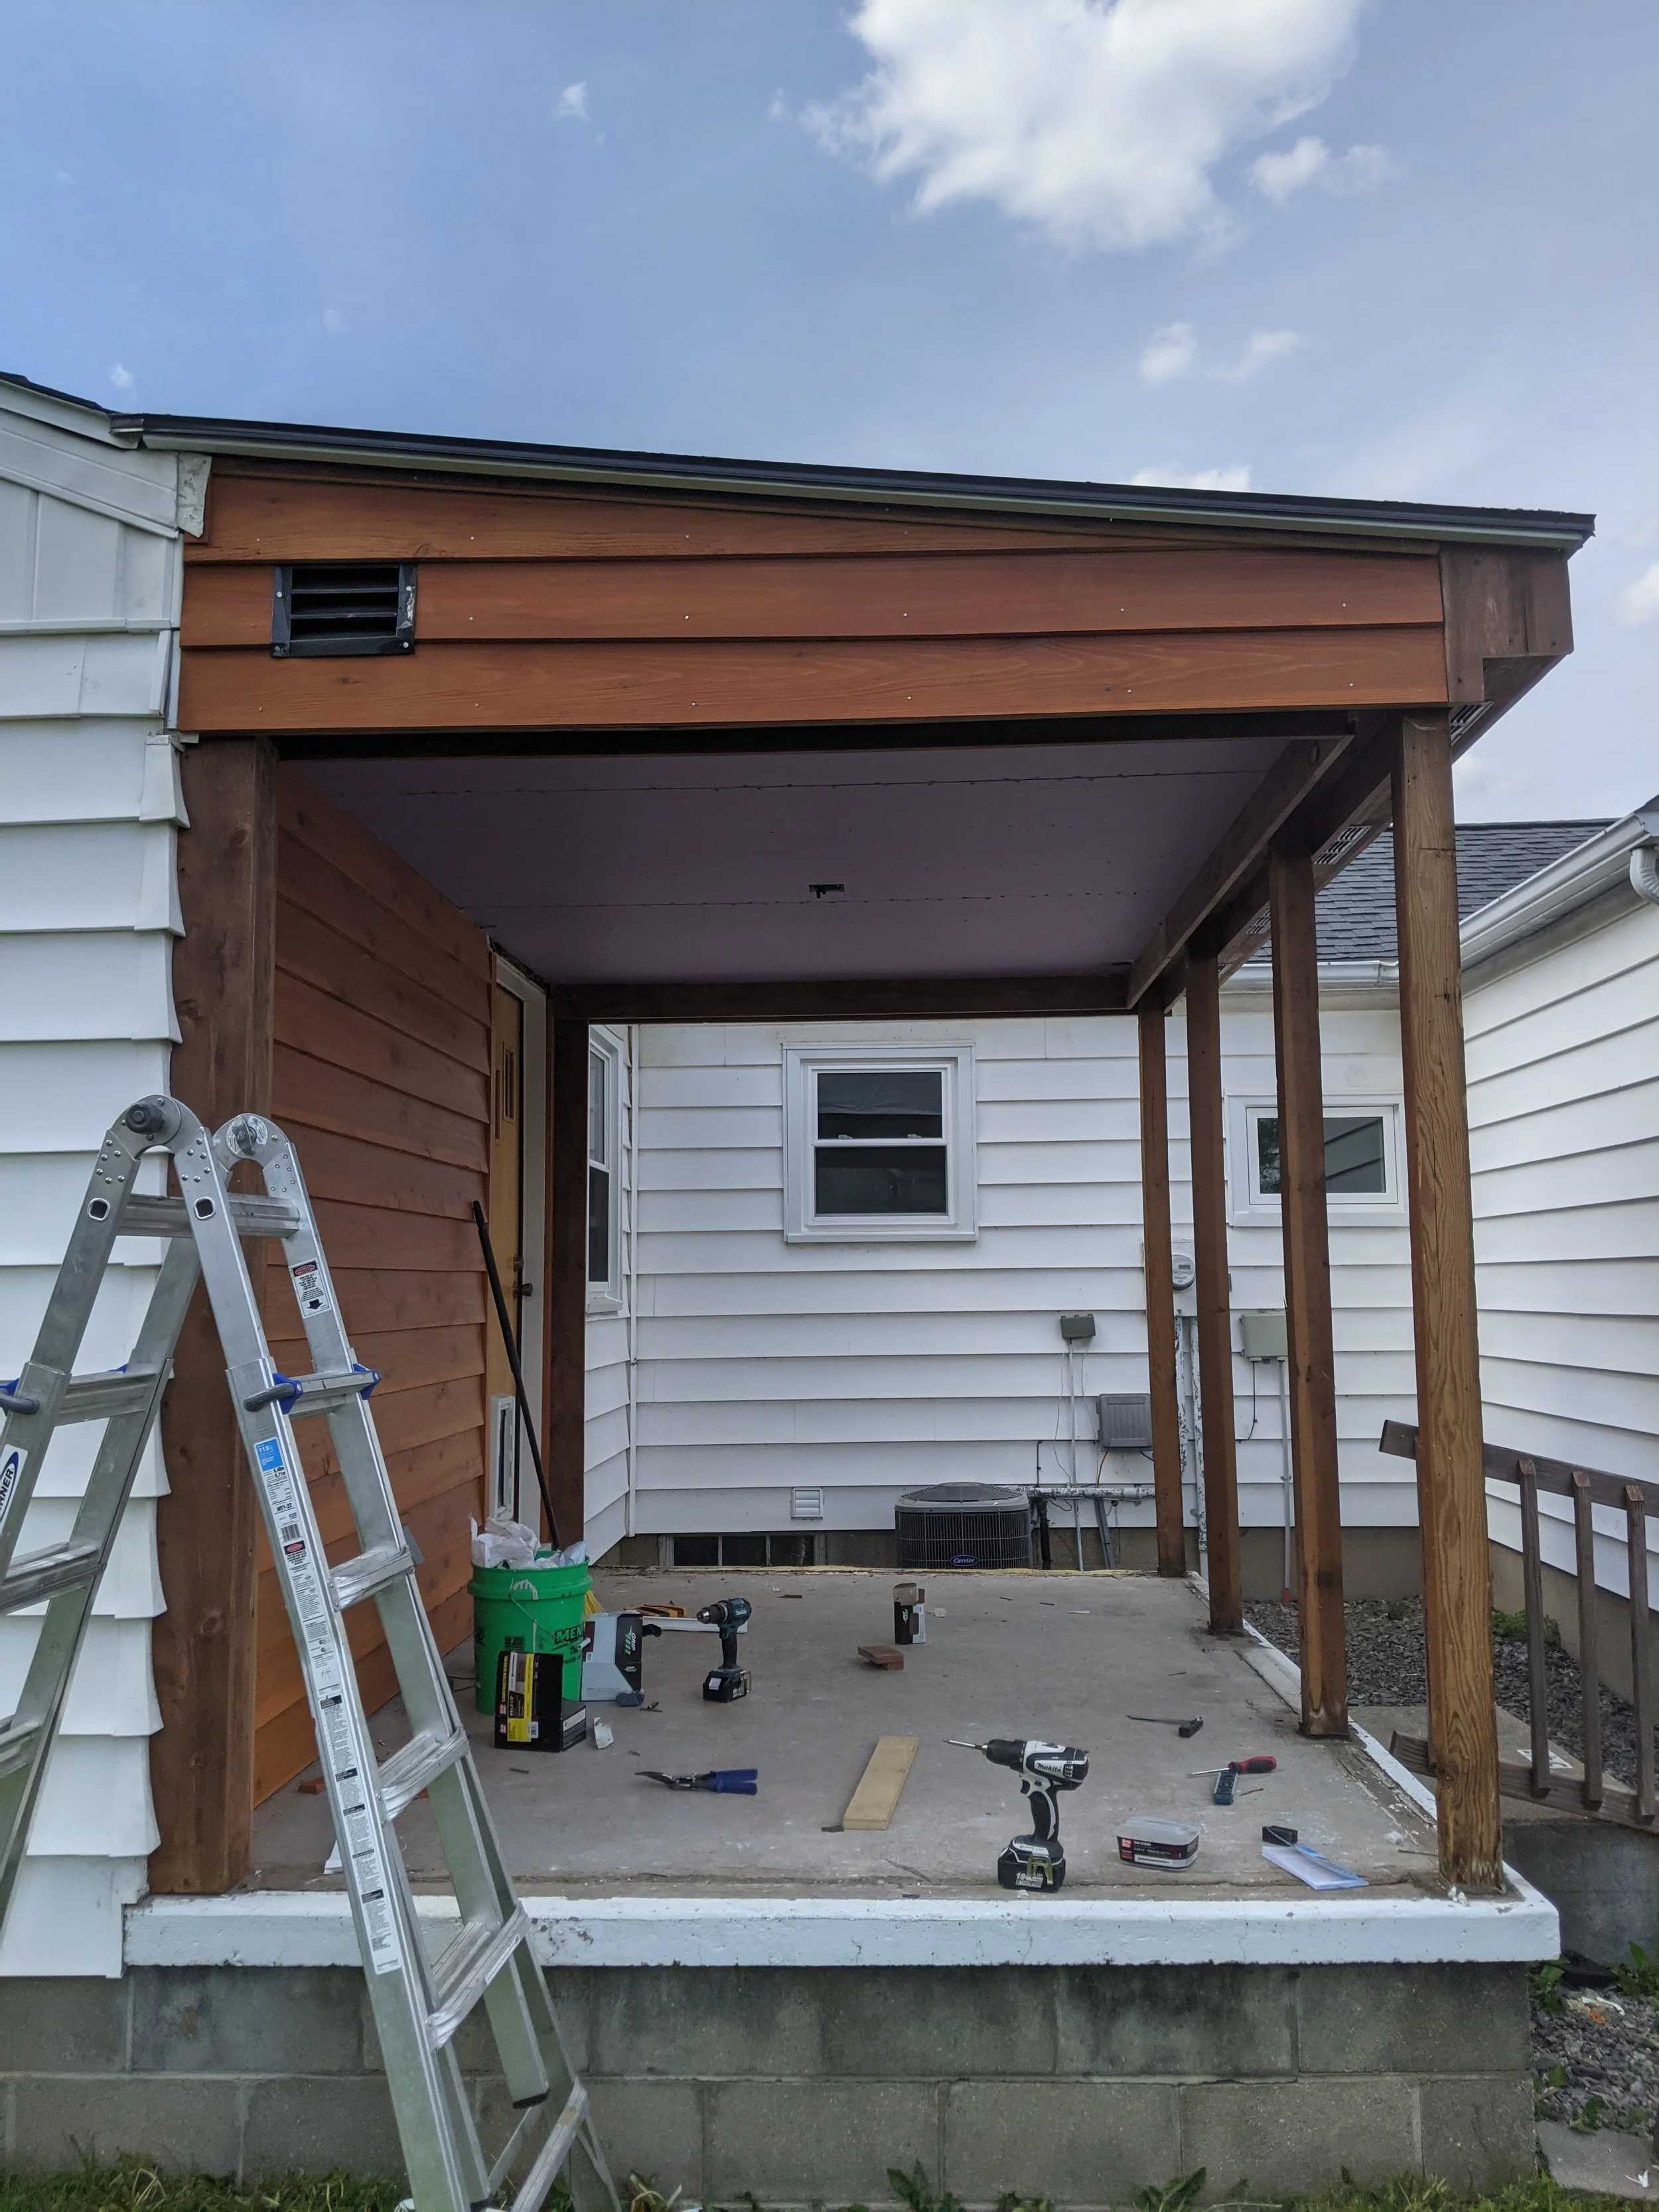
I used the same cedar siding to side the outer walls of the porch roof, securing them with stainless steel nails. The original roof had metal gable vents to ventilate the attic space. I reused these by spray painting them with a Rustoleum hammered metal look. I did the same thing with the gutter and downspout. Anytime Rustoleum would like to sponsor me would be great.
Southern Comfort
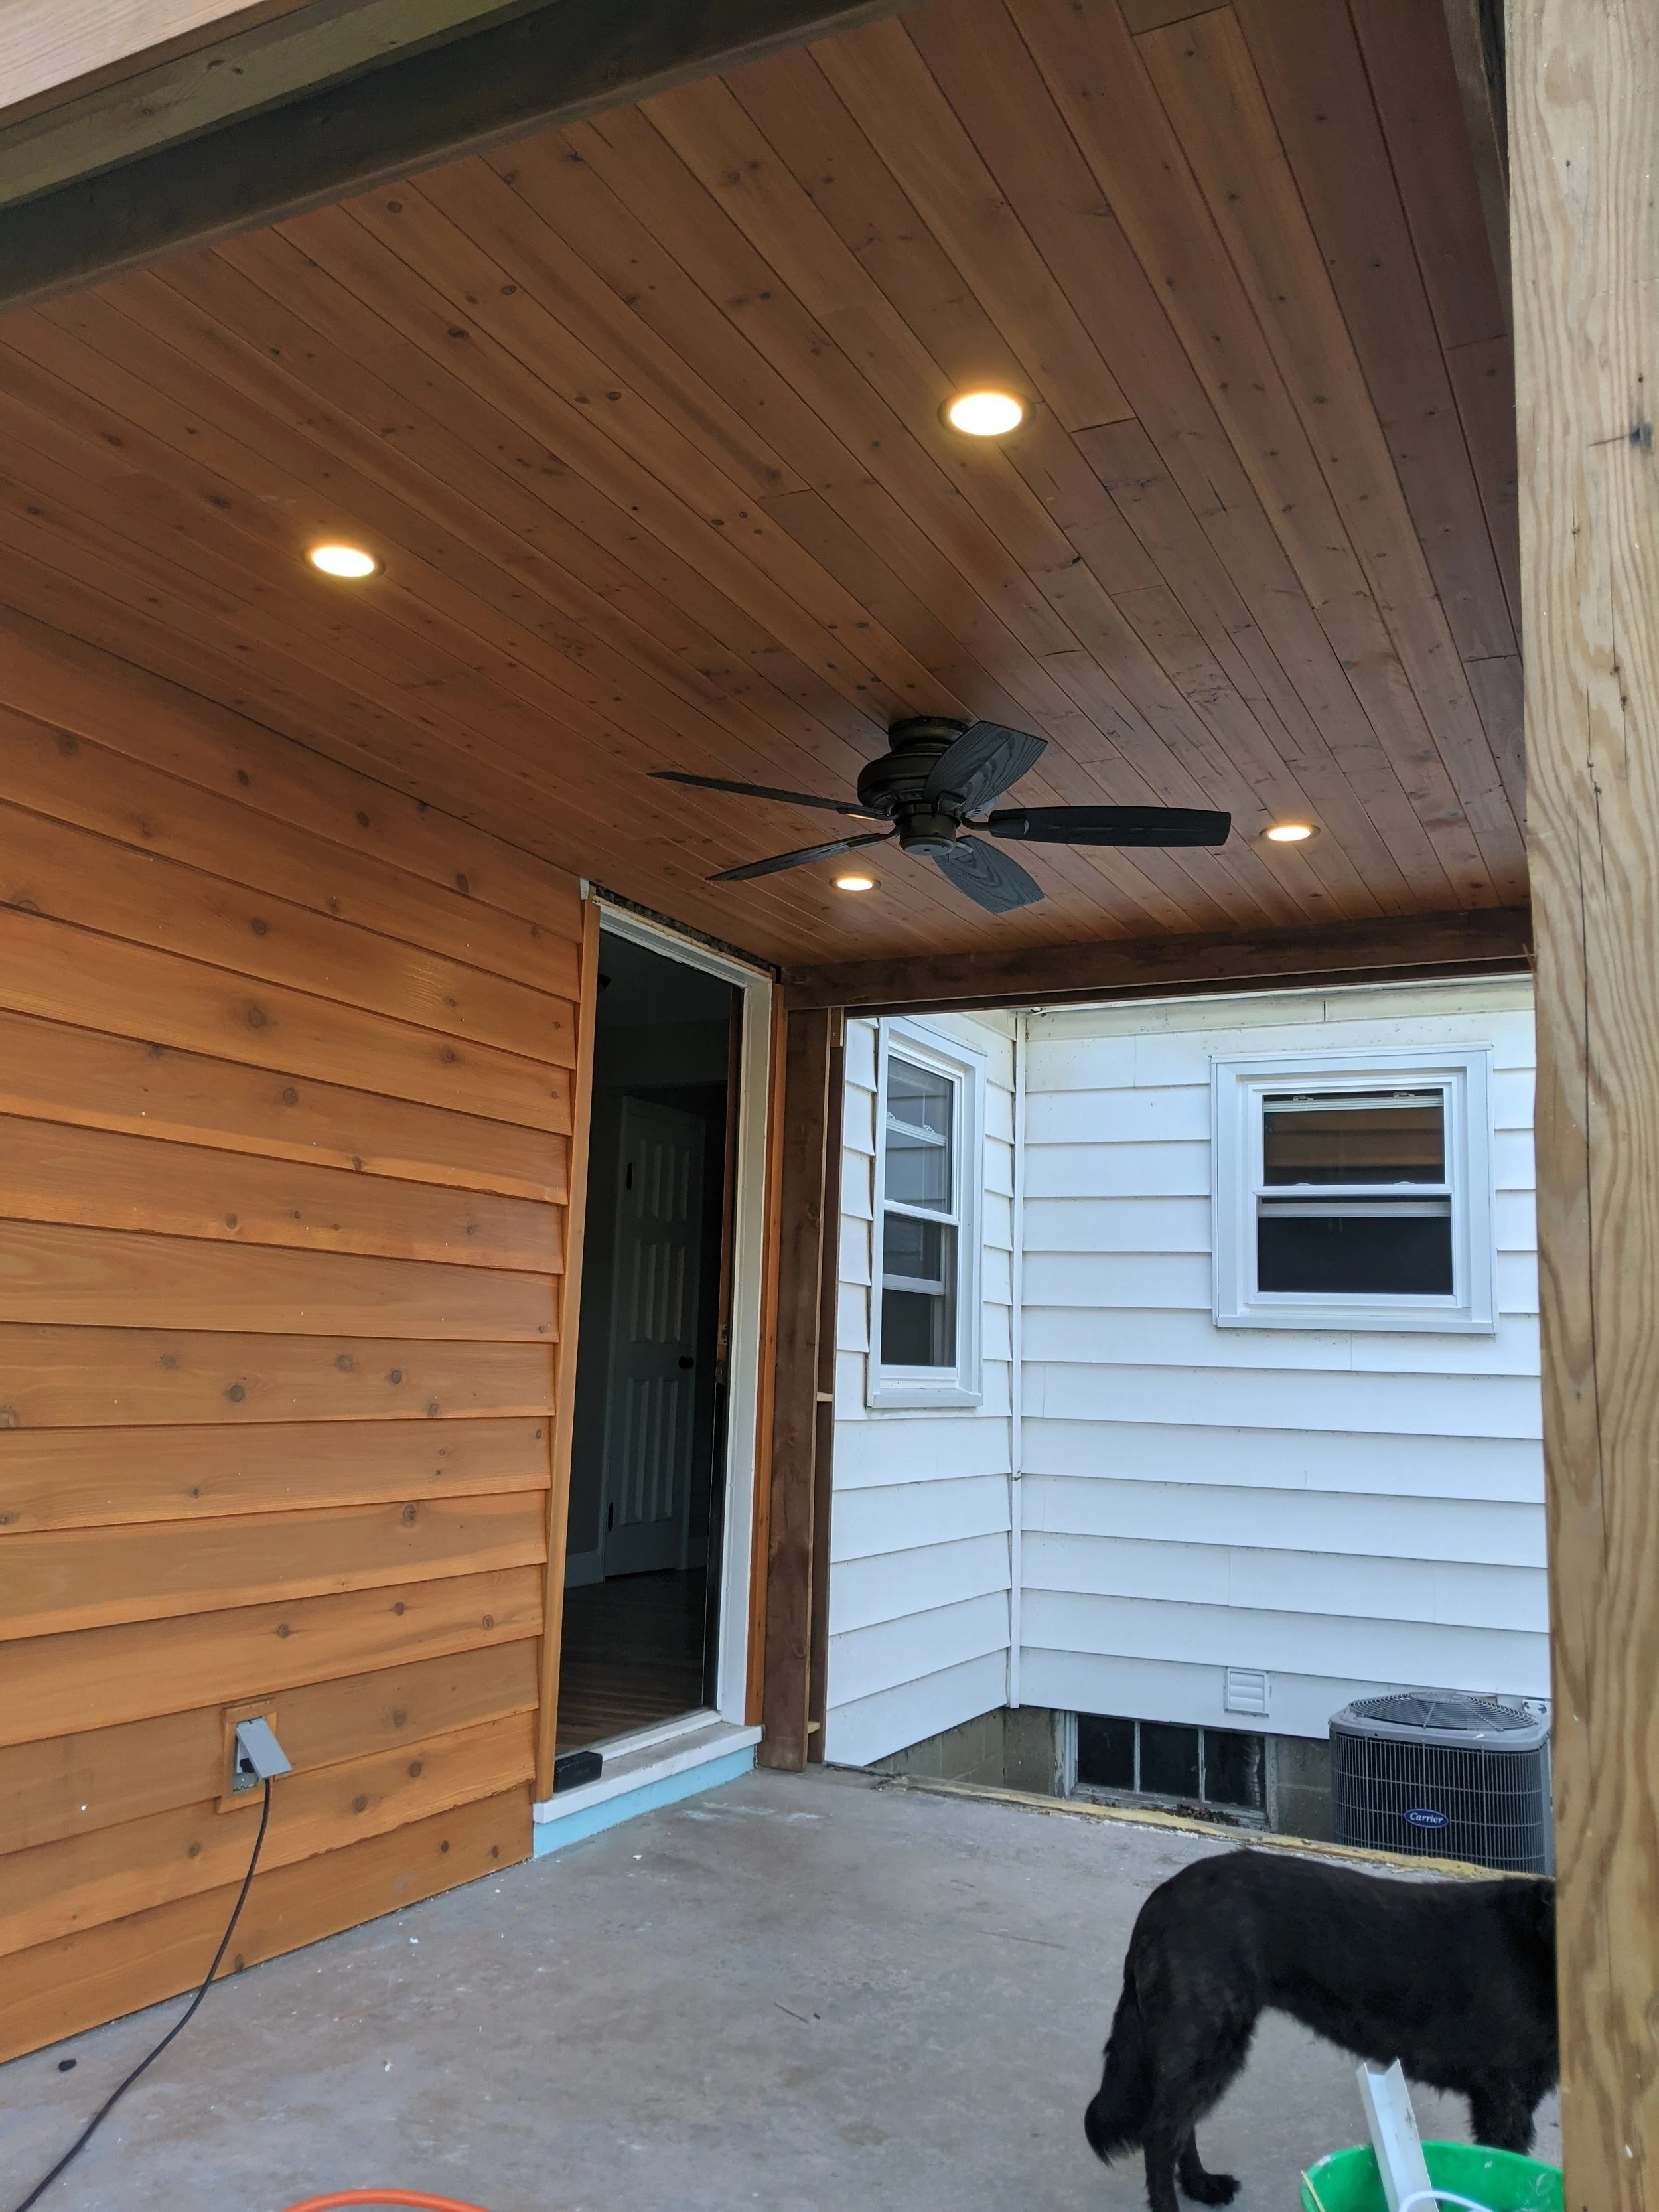
Once I finished the siding, I installed the drywall and then the cedar planking on the ceiling. I used adhesive and stainless brad nails to secure the planking to the drywall.
When I gutted the original room, I had two electrical wires that I had to do something with. One of them powered the ceiling fan in the room and the other powered a floodlight to the backyard. Each already had their own switch inside the house. I knew that one was going to be used for the lights, which were 4 LED lights.
But I had to figure out what to do with the other electrical wire. I could’ve been a savage and just tucked the live wire back in the ceiling like whoever did work on this house before me did. But then I went down South to visit some family to remind them that no matter how far they move they can’t escape me. While down there I noticed 2 things. The first was how much better everything is down there than up here. The second was that it was common for ceiling fans to be installed in their covered porches. The idea of having a fan outside is a little weird in my opinion but my whole life is weird so I decided that I was going to do the same. I chose a flush mounted ceiling fan because my ceiling was already somewhat low. I also made sure it was damp rated.
An important thing when it comes to outdoor electrical fixtures such as ceiling fans and lights is that they must be damp rated. Unless they’re going to come into direct contact with water, then they should be wet rated. No I do not expect water to ever come into the porch and then go upwards to hit the ceiling. But there’s always humidity and condensation. And there’s the fact that anything can happen. Just look at NFT’s. They make no sense, but they’re a thing.
Wrap It
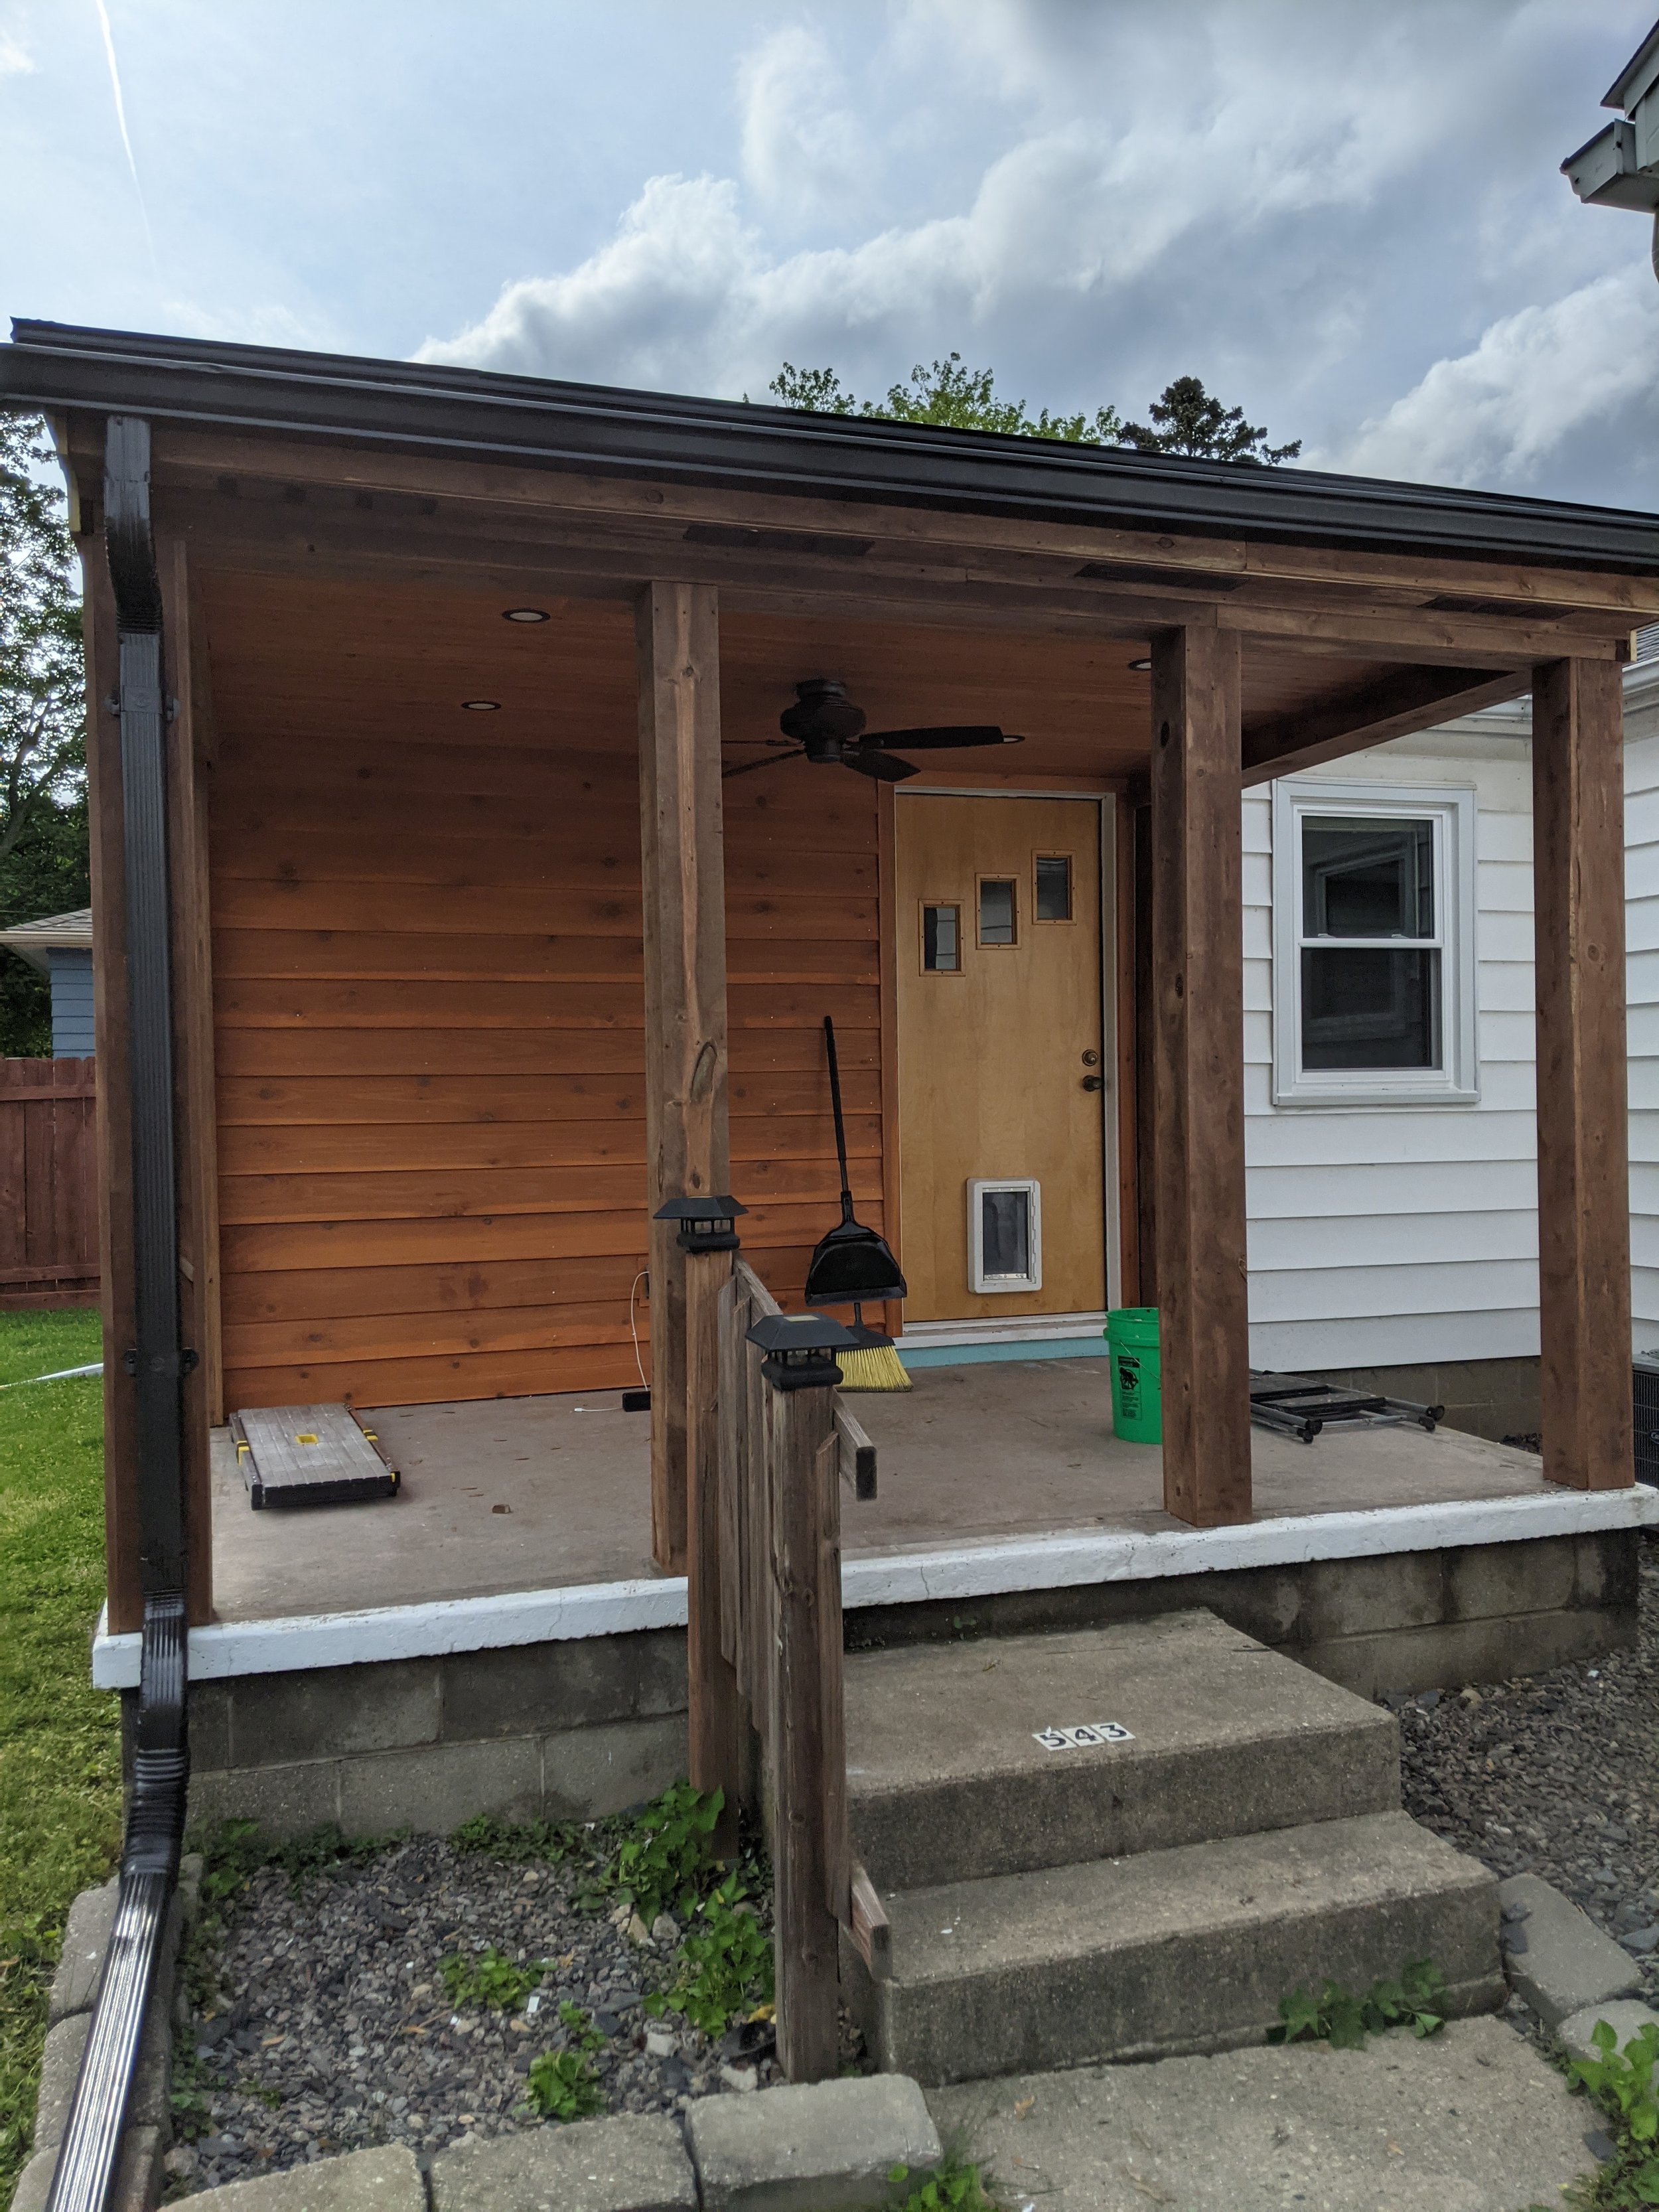
I then went through and wrapped everything else in the 1x6 lumber. I wrapped the 4x4 posts not only for protection but also to make them look more girthy because everyone likes girth. I then reinstalled the gutter and downspout after painting them.

My last step was to paint the concrete. For this I used Rustoleum’s Rock Solid concrete paint, which I highly recommend. It’s not cheap though. And you need a special overpriced roller but it was worth it.
I then spent the last little bit of money I had left over on a fire table which I rarely use. I also built a sofa out of treated 2x4 lumber. And I’m proud to say at the time of this writing I went all in and even bought cushions for the sofa.
From start to finish this took me about 2 weeks to do. It was a lot of work but it was way less work than trying to fix myself instead.