
Eyes up here
Make a reclaimed cedar-lined chest that’s bound to get some stares. Only this time the attention is welcome.
I was shown a reclaimed chest by a relative on Etsy that was listed at over $1,000.00. From the photos it looked like my dog could have put it together and she’s only 8. I’m all for people scamming their way to paradise, but leave my family out of it. So I told them I’d build them a chest for a quarter of that. And my chest would be properly supported. I was given no parameters so I could design and build it the way I wanted to. The only request was that somehow a bear was incorporated. And to make my life a little less dull, I decided I would only make this out of materials I had on hand.
A material boy in a material world


About 3 years ago a friend dumped some wood on me in what I was told was a gift, but I’m pretty sure they just didn’t want to go through the trouble of disposing of it. This included about 30 feet of old pine 8” baseboard trim. It sat in my garage for years irritating the shit out of me. Finally, I found a purpose for it and used it to the make the lid for the chest. The legs and rails of the chest came from the leftovers of some barnwood that I had taken from a downed barn, which were old pine 2x4’s and 4x4’s. The cedar lining was leftovers from my back porch remodel in which I used a large amount of 1/4” thick cedar planking. The rest of the chest came from 1/2” plywood I had leftover from other projects.
To start I came up with some dimensions of the chest. Due to the lengths of the baseboard for my lid I was limited to 48” long. I planned on making the chest 24” wide but I thought that was little overkill so I scaled it down to 20”. I was told that it would be used as a bench to sit on for getting dressed because people can’t do that on their feet anymore. From previous projects, I knew that 18” was a solid height for sitting down and being able to comfortably put socks and shoes on.
A note on reclaimed wood: It can look good, but it is really a hassle to work with. Nothing is square or the same size. And once you make a cut, you now have a fresh edge which completely defeats the purpose. Because of this I had to plan every cut to make sure it wasn’t going to ruin the aesthetics. I also was limited on the machines I could use so I used a lot of traditional hammer and chisel. It helped me to find that manliness I seemed to have lost with my hair.

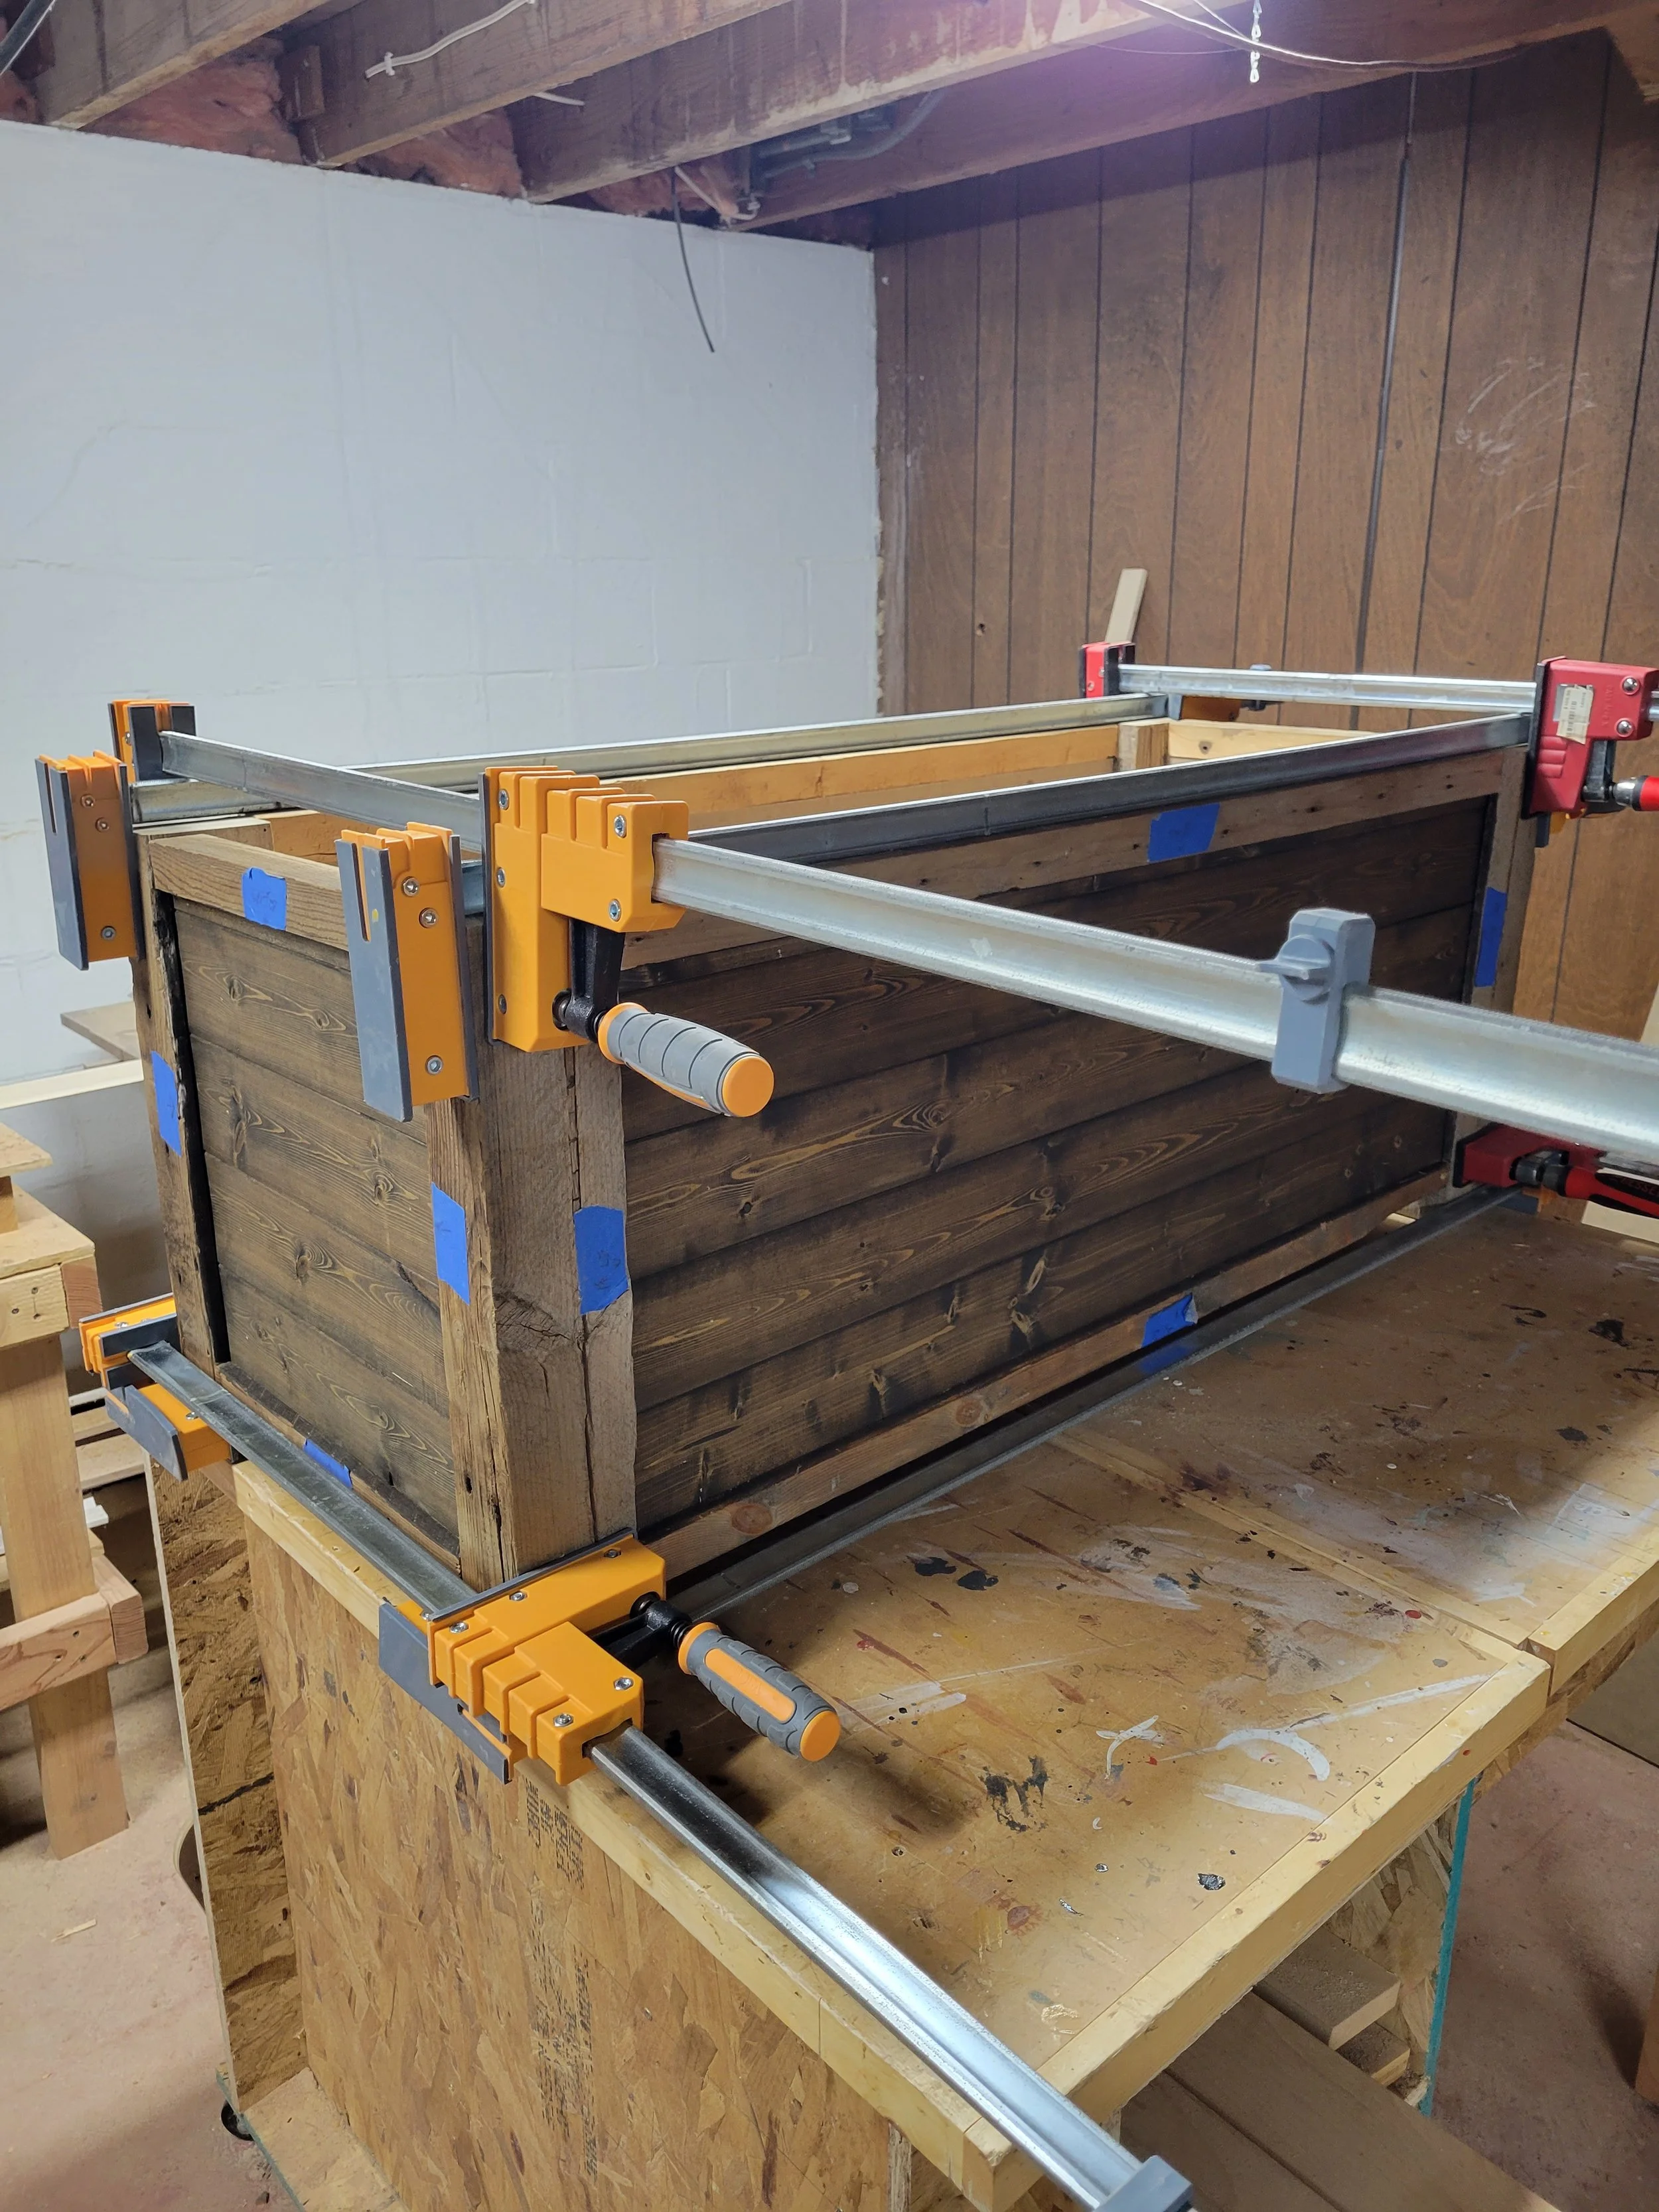
So I had cut my 4x4 legs to height. I then ripped the 2x4’s to make them 1 1/2” x 1 1/2”. The fresh cut faces would face the insides of the chest. I was also going to put plywood panels in the sides that would cover most of the 2nd fresh face. When they were all attached I clamped them without glue to make sure everything was aligned.
Hand Tool Jobs
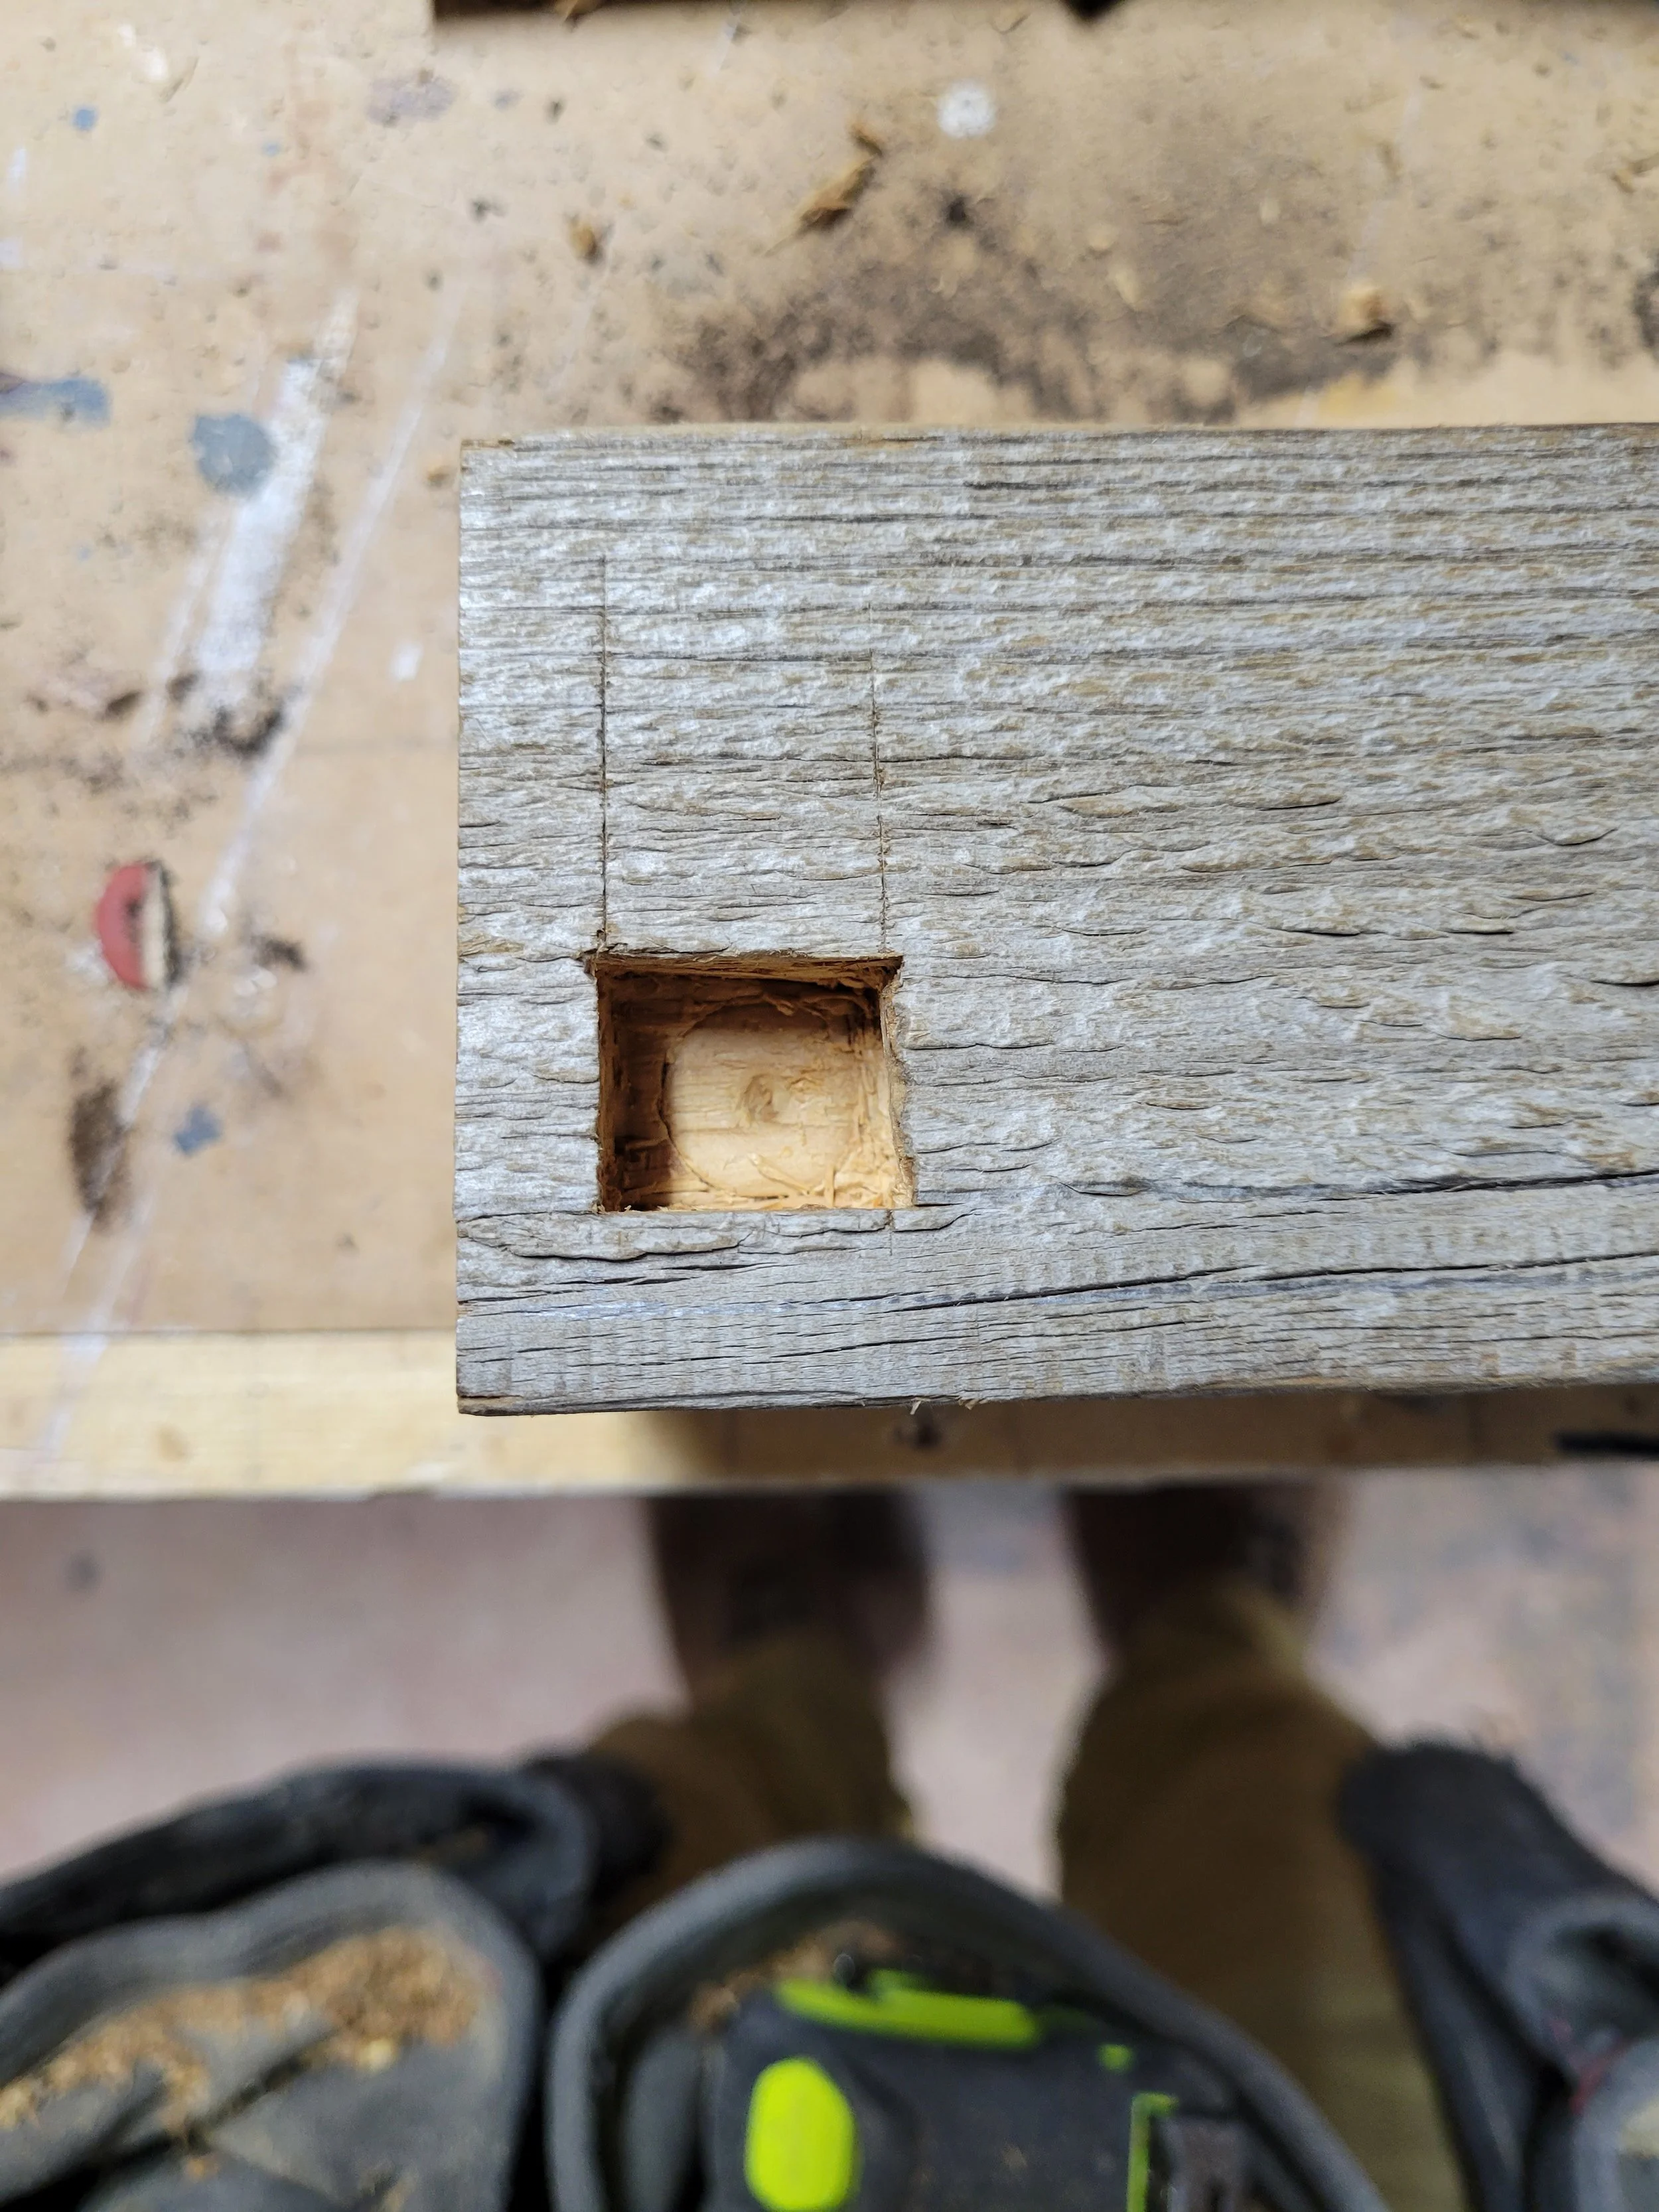
Because all of the wood was slightly different sizes and not truly straight I couldn’t use a table saw like I normally would to make some joints. Instead I had to use a drill, hammer and chisel to make mortise and tenons. A mortise (or the recess) was cut into the legs where each rail (2x4) would attach. I also cut a tenon (the phallic extension on the 2x4) to fit snugly inside the mortise. I used my bandsaw to cut the tenons. This was the most time consuming part of the project.
Skip a few steps
If you’ve read any of my blogs, you know that I’m awful at this.
I forget to document a couple steps and I’m not about to dismantle the box for the 2 people that read this (hi mom and dad). So I’ll go over them without photos…
To enclose the box I created panels that consisted of 1/4” pine planking I had leftover from a past project that was glued to plywood sheets. In total they were 3/4” thick. To attach them I used a router to make grooves into the 2x4s and 4x4s that the panels would sit in. I stained the panels before I attached them so that I didn’t have to deal with getting stain where I didn’t want it. Once this was done I then glued up all pieces with clamps. I was doubtful this would glue up to a square chest so I made a sacrifice to the wood gods before the glue up. And the gods favored me giving me a square chest. A win for the pagans.
If you’re wondering what’s with the painter’s tape… I used this to label every piece and to tell me where my cuts should be located. I was using the last of my wood stockpile so I couldn’t afford to cut in the wrong spot or to glue something in backwards. I found that since using painters tape to label my pieces I’ve made a couple less mistakes than I would have without it.
Put a lid on it
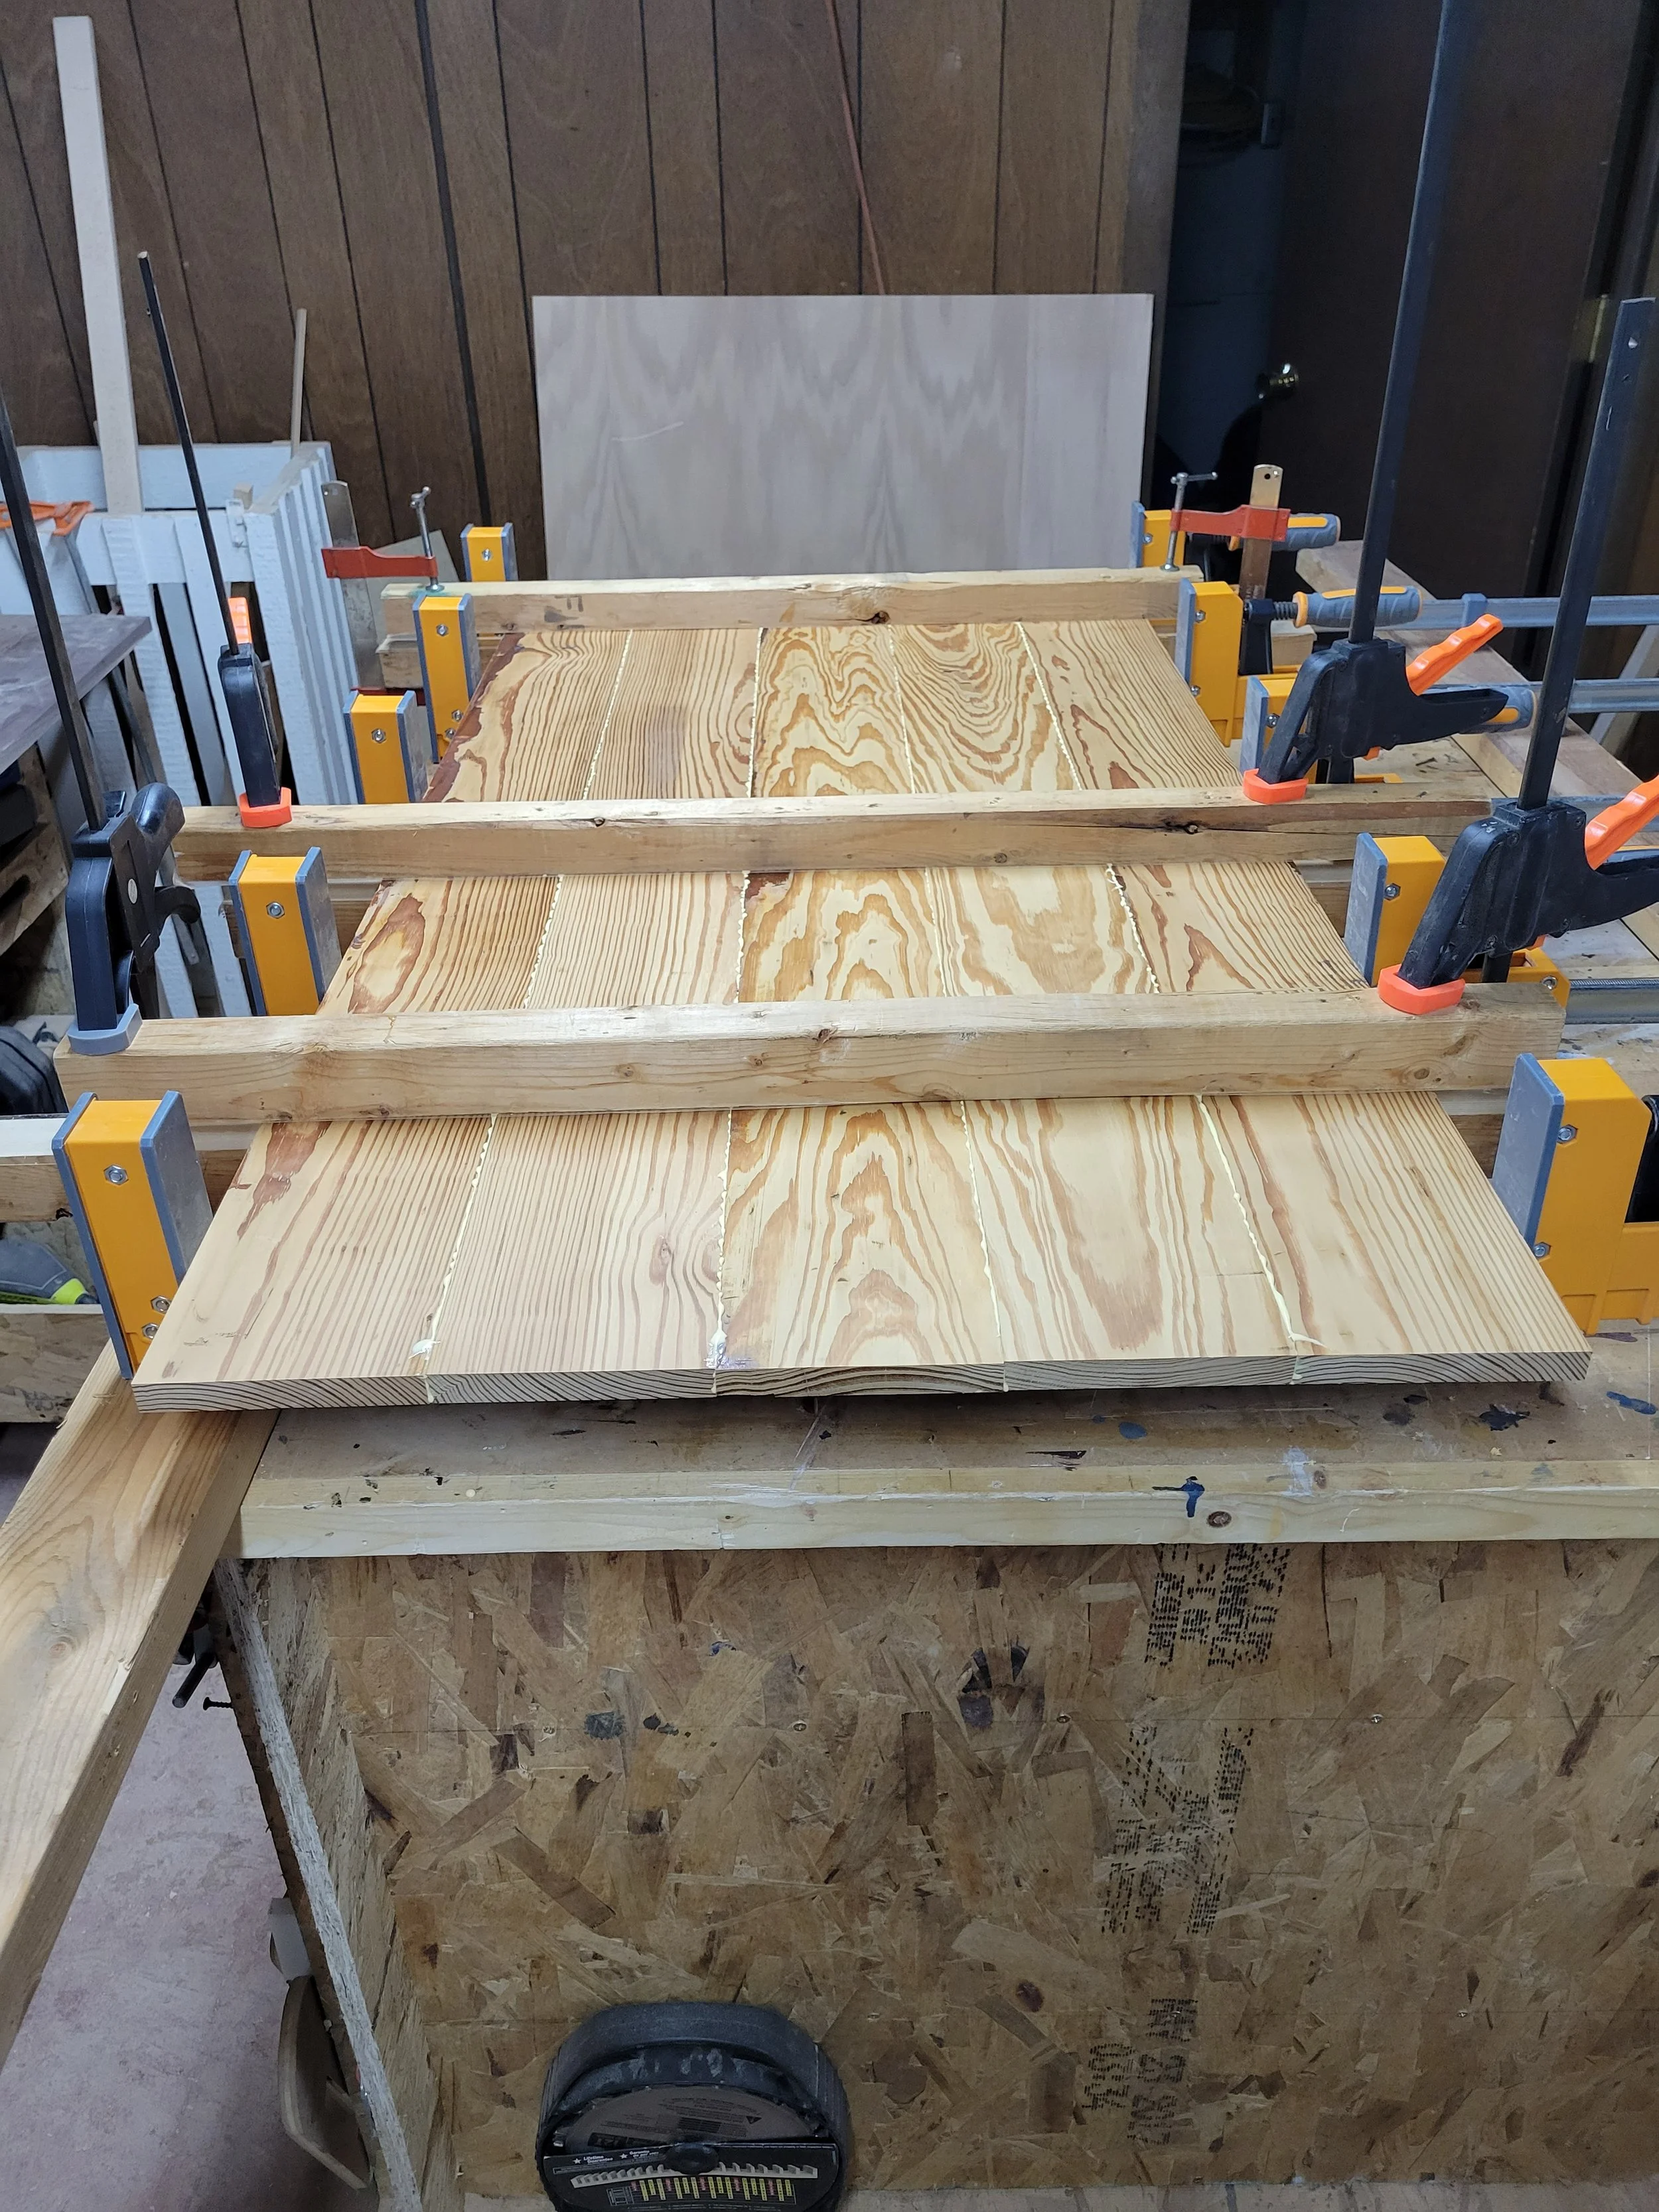
If I learned anything from women it’s that you need to base your top size on your chest dimensions. This is why I built the chest first and then the top. The first thing I did was cut the patterned moulding off of the top of the baseboards to get just flat boards. Then I ran them through my planer to get rid of the finish. I don’t recommend this method because it is not good on your planer blades but I didn’t have much material so I risked it. Then I glued the boards up using cauls to keep them flat.
If you look closely you’ll see that on the ends of each board the grain makes a semi circle pattern. Notice that in my glue up the semi circles alternate between facing up and facing down. I did this intentionally to reduce the chance that the top warps. If your semi circles all face the same way you’ll most likely get a warped top in the future. This is one of those things that I could go into depth on but I’d bore your more than you already are. So just trust me, semi circles alternating.
After gluing, I cut the top to size so that it overhung the chest about 5/8”. Honestly, I chose this because I couldn’t choose between 1/2” and 3/4” overhang so I picked the middle. I sanded the top and installed it to the chest using a piano hinge. I wanted to do this before I applied the finish to make sure everything worked and I didn’t have to mark up the finished boards. I then removed the top.
When you Just can’t finish
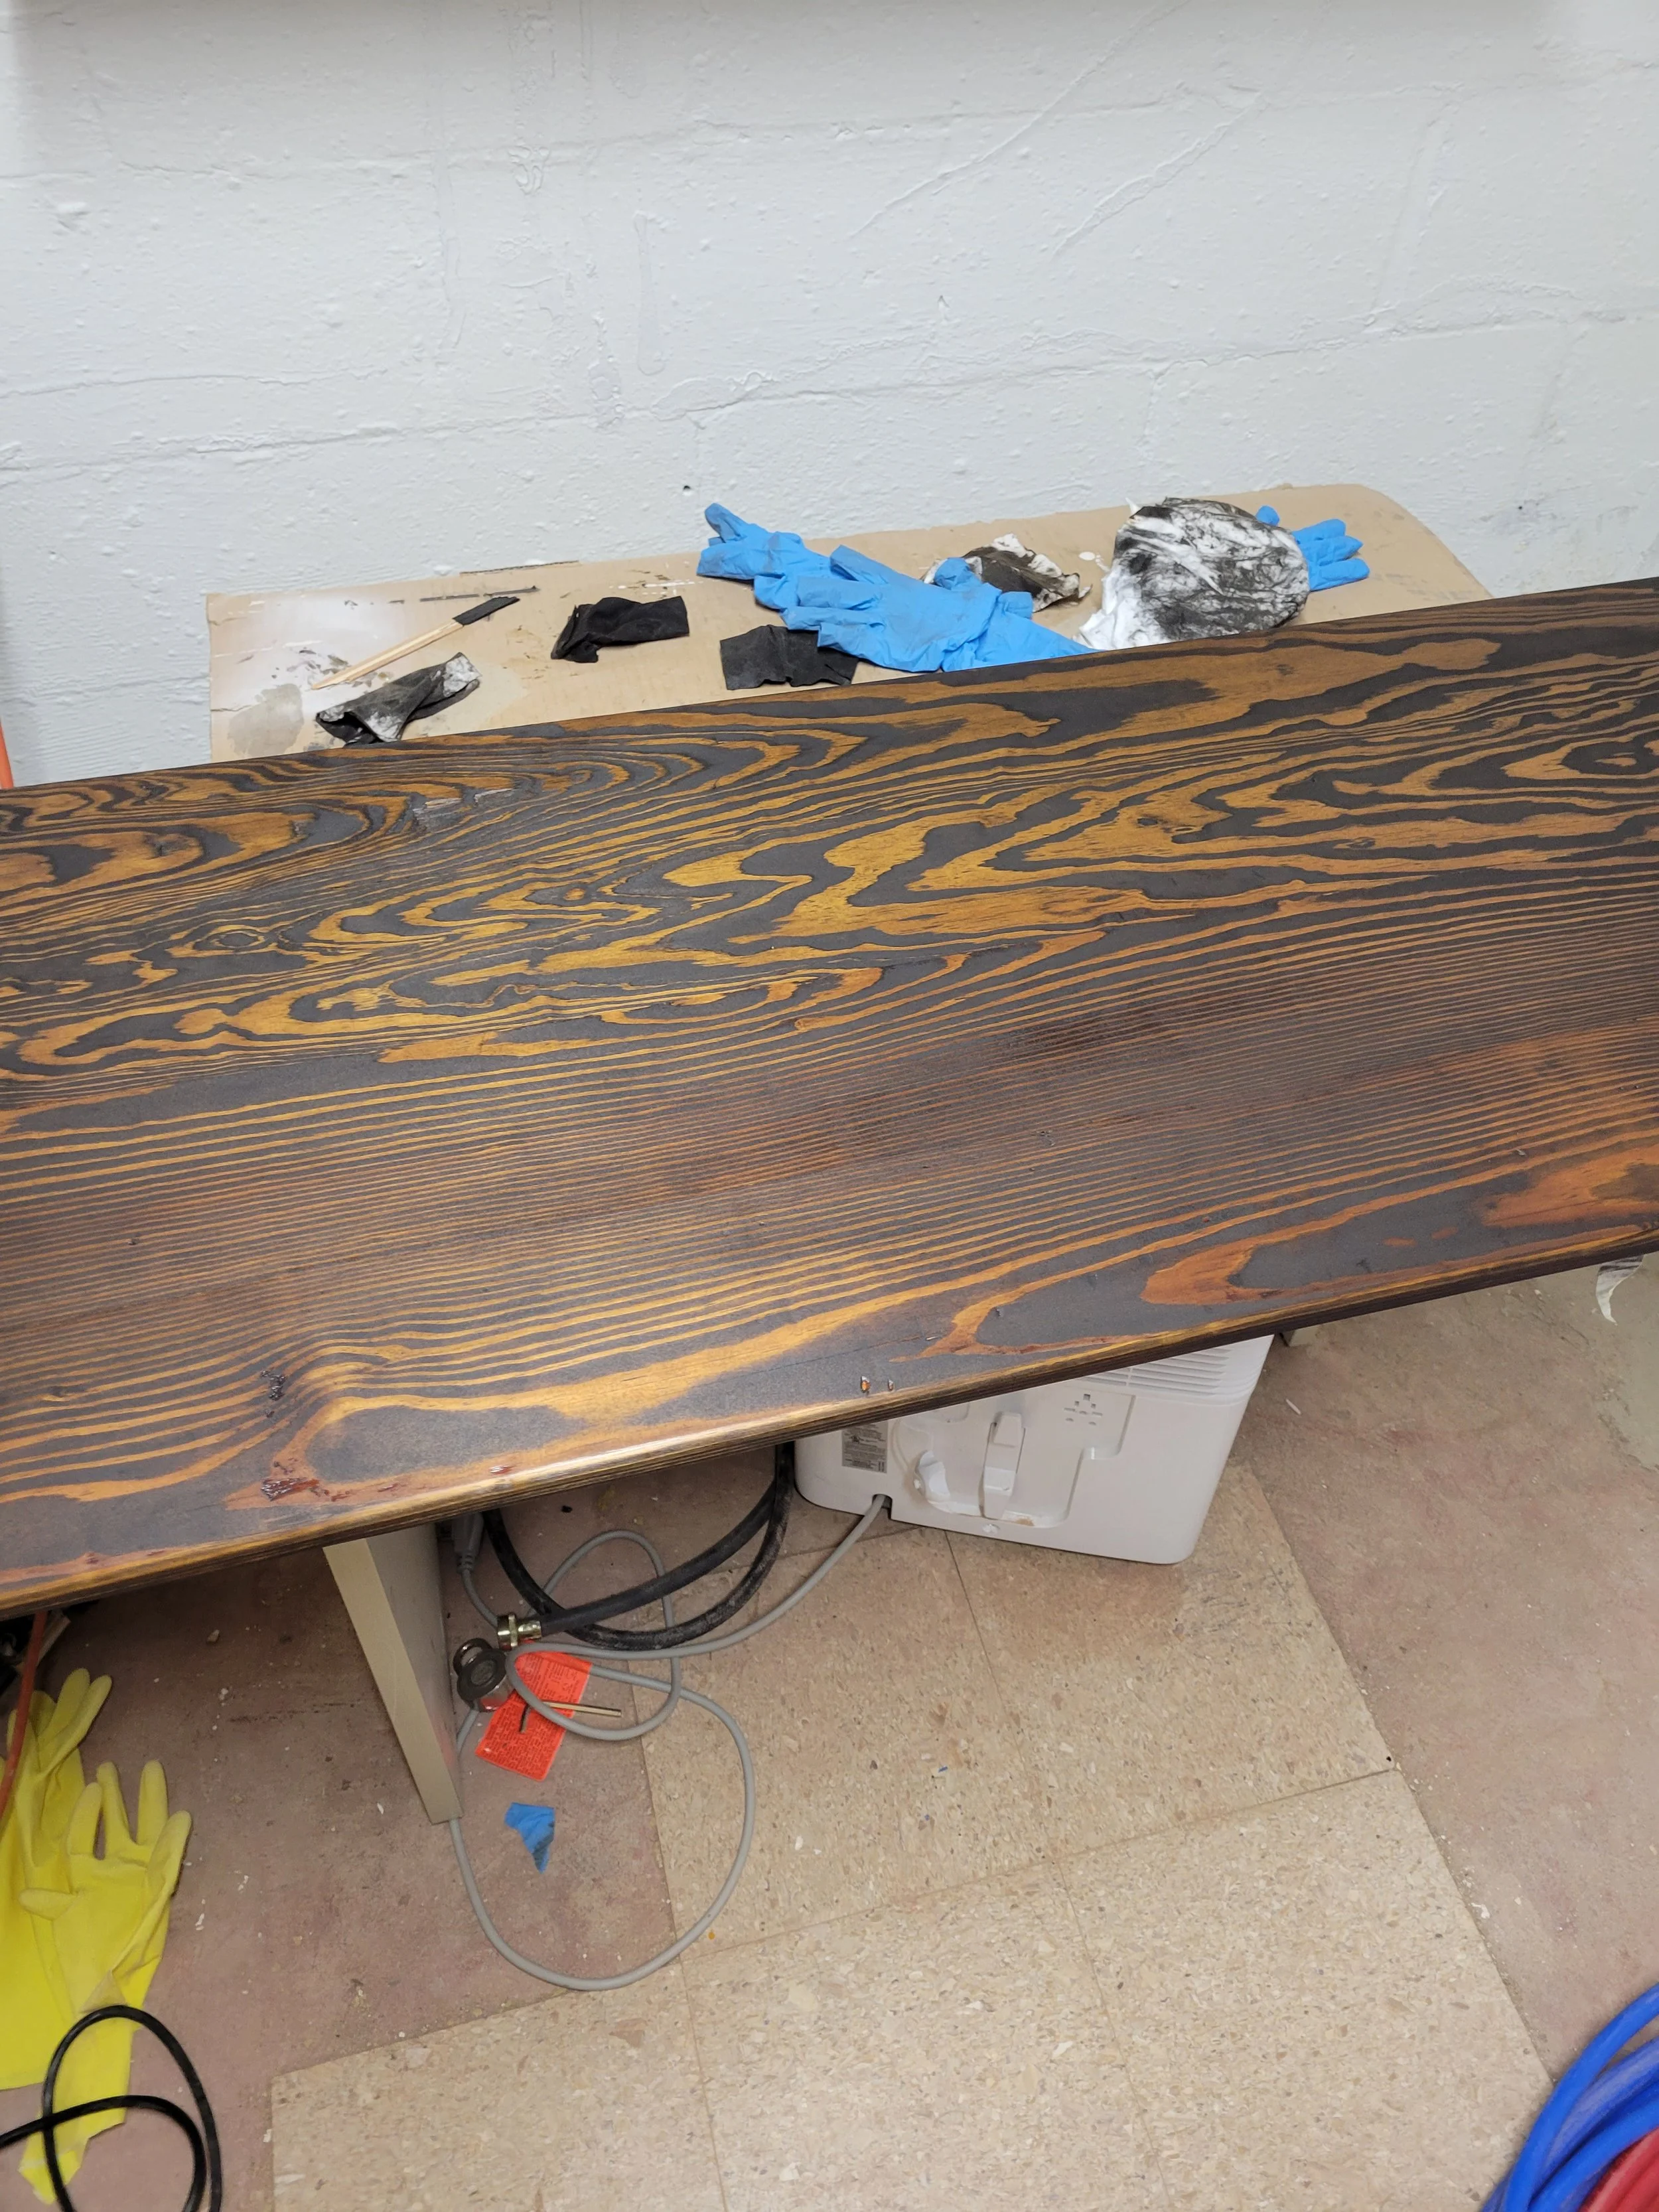
The hardest part of this project, as with other things in my life is finishing. I used a test piece with a stain for the top and liked the results. When I went through and finished the whole top I hated it. You’ll see that it was a zebra pattern of black and amber colors, which came from a brown oil based stain. I then went through an existential crisis and spent a solid two days of applying various stains, waxes, coffee, vinegar, and combinations of all those and still didn’t get the color I wanted.
Then I tried one last thing, torching the MF’er. This is actually a Japanese practice called Shou-sugi-ban and was originally used to weatherproof siding and a variety of other purposes.

So I got out my propane torch and gave it a go. I should note that I did this after violently sanding the previous stain.
After it was torched I used a wire brush and also violently brushed back the char until it was more a medium brown color. The photo is pre-brushing.
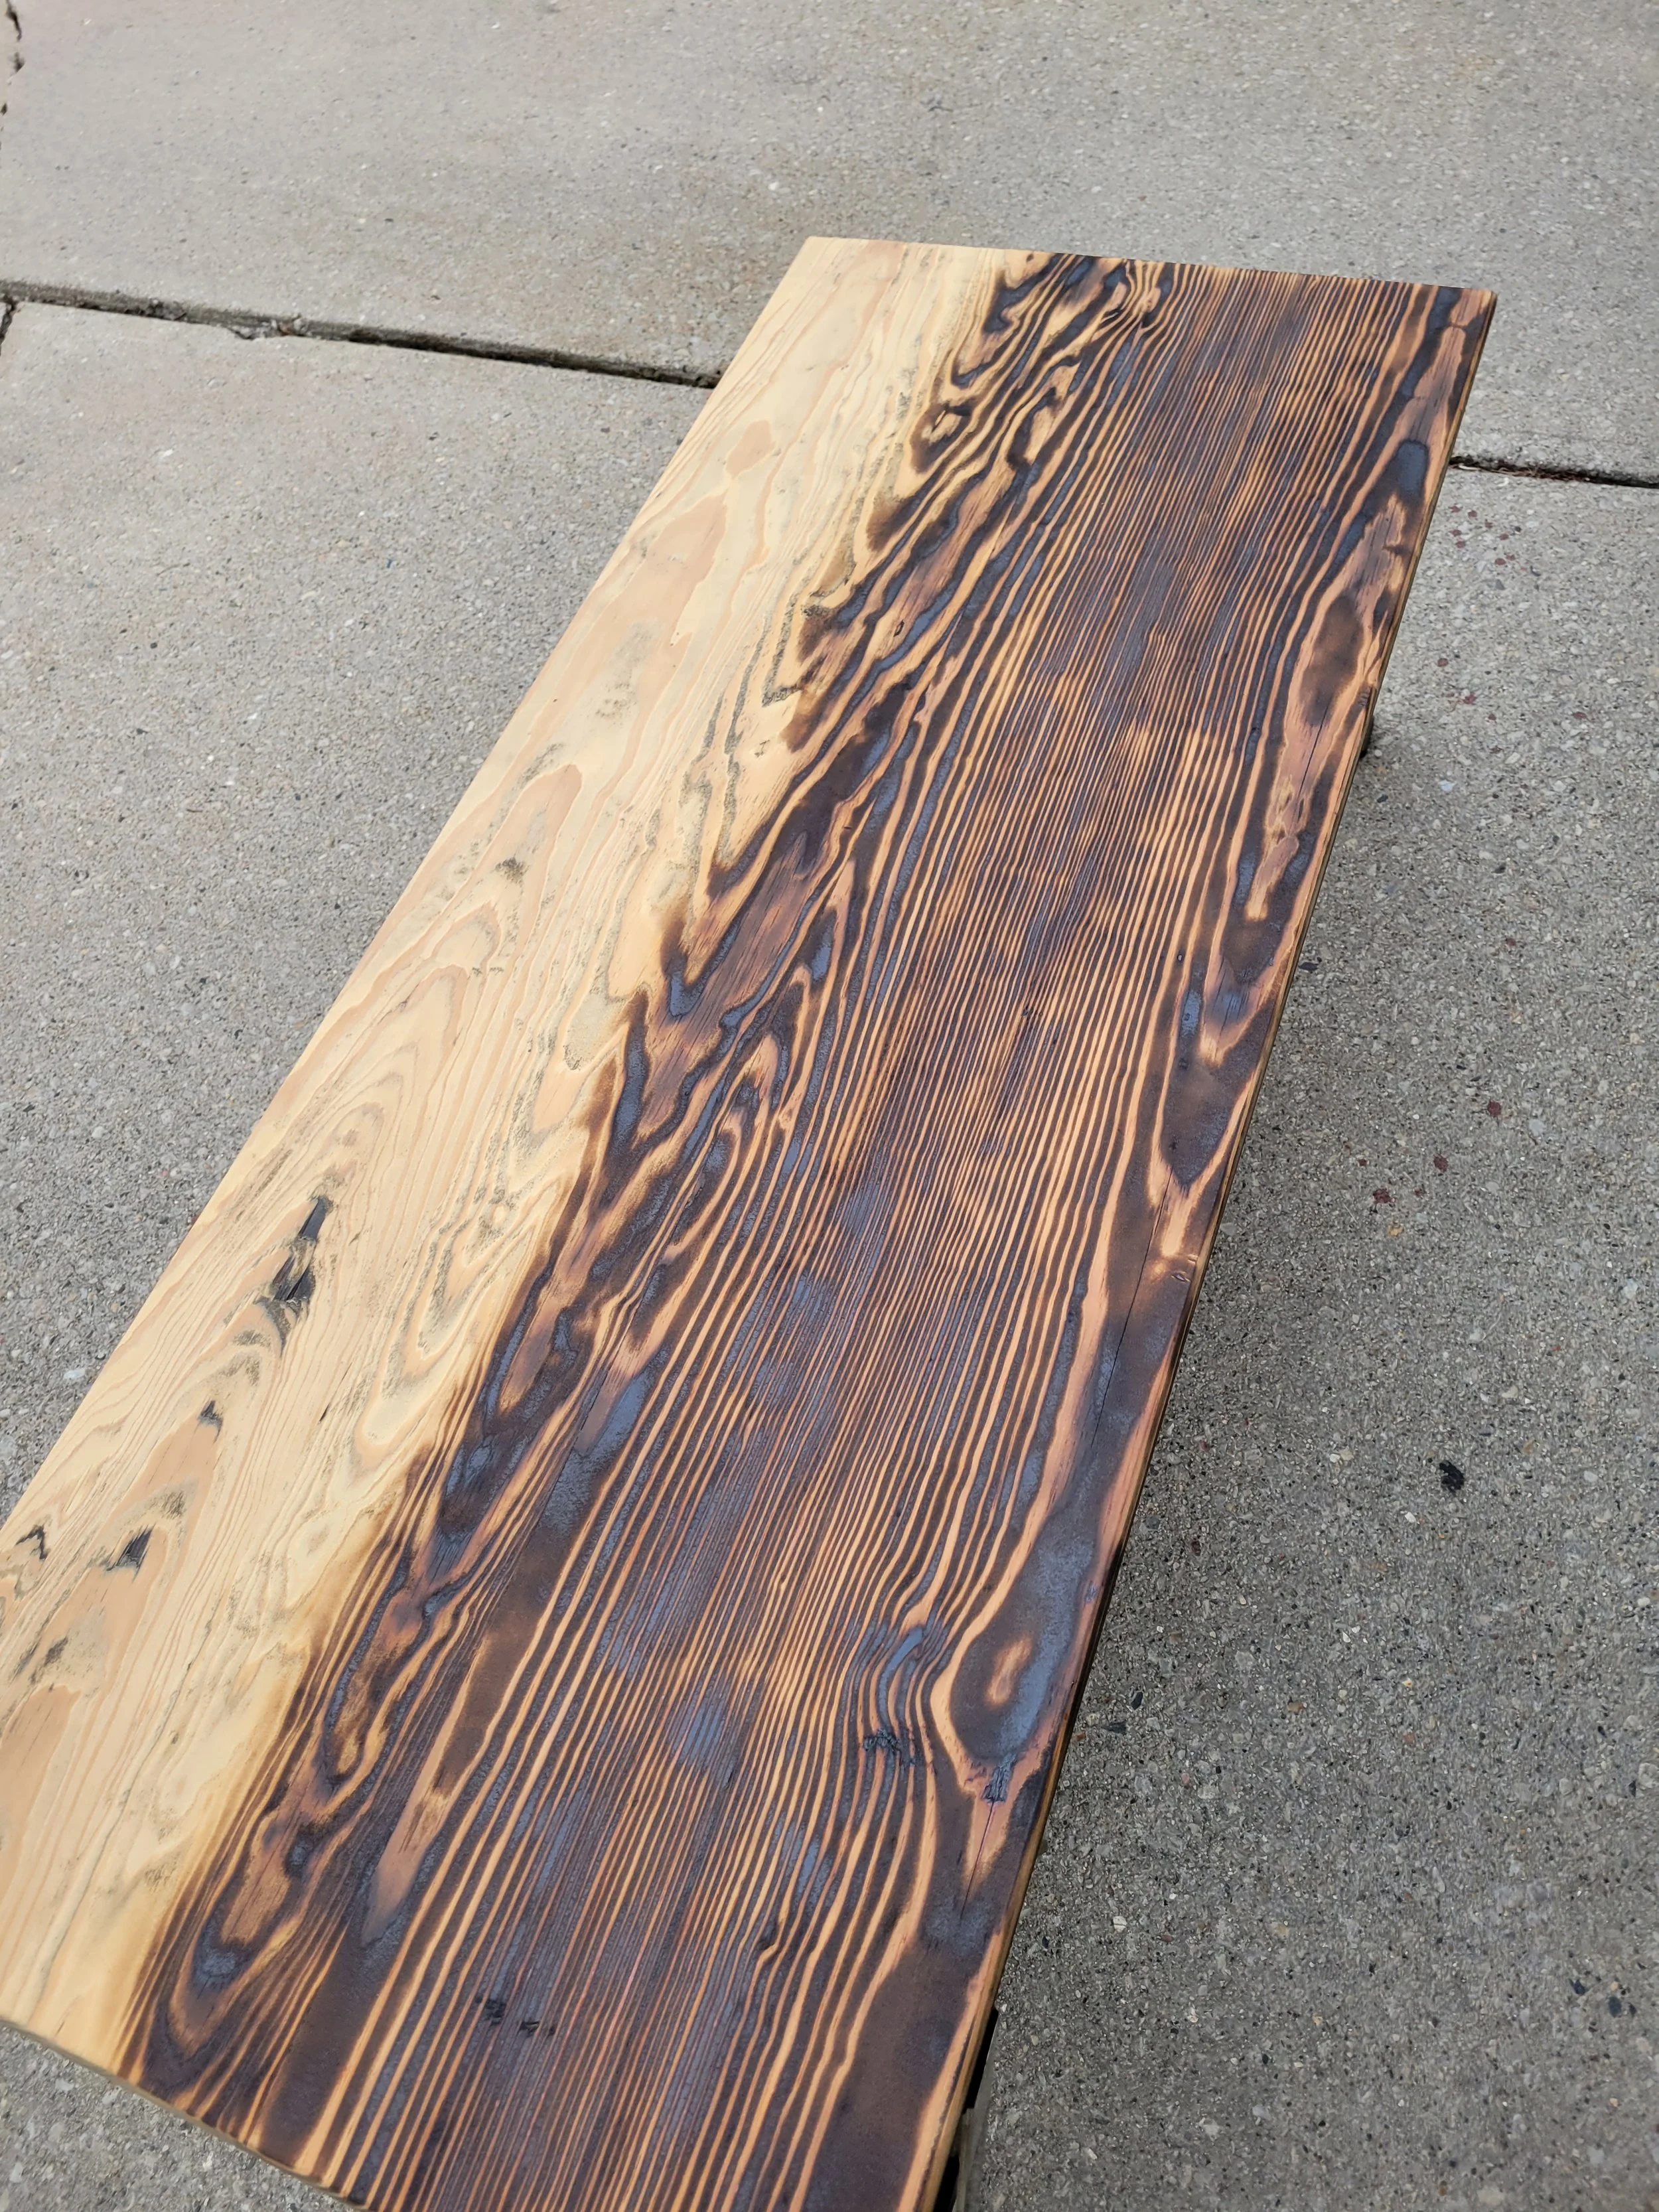
Here’s a comparison of what the wood likes during the torching process.
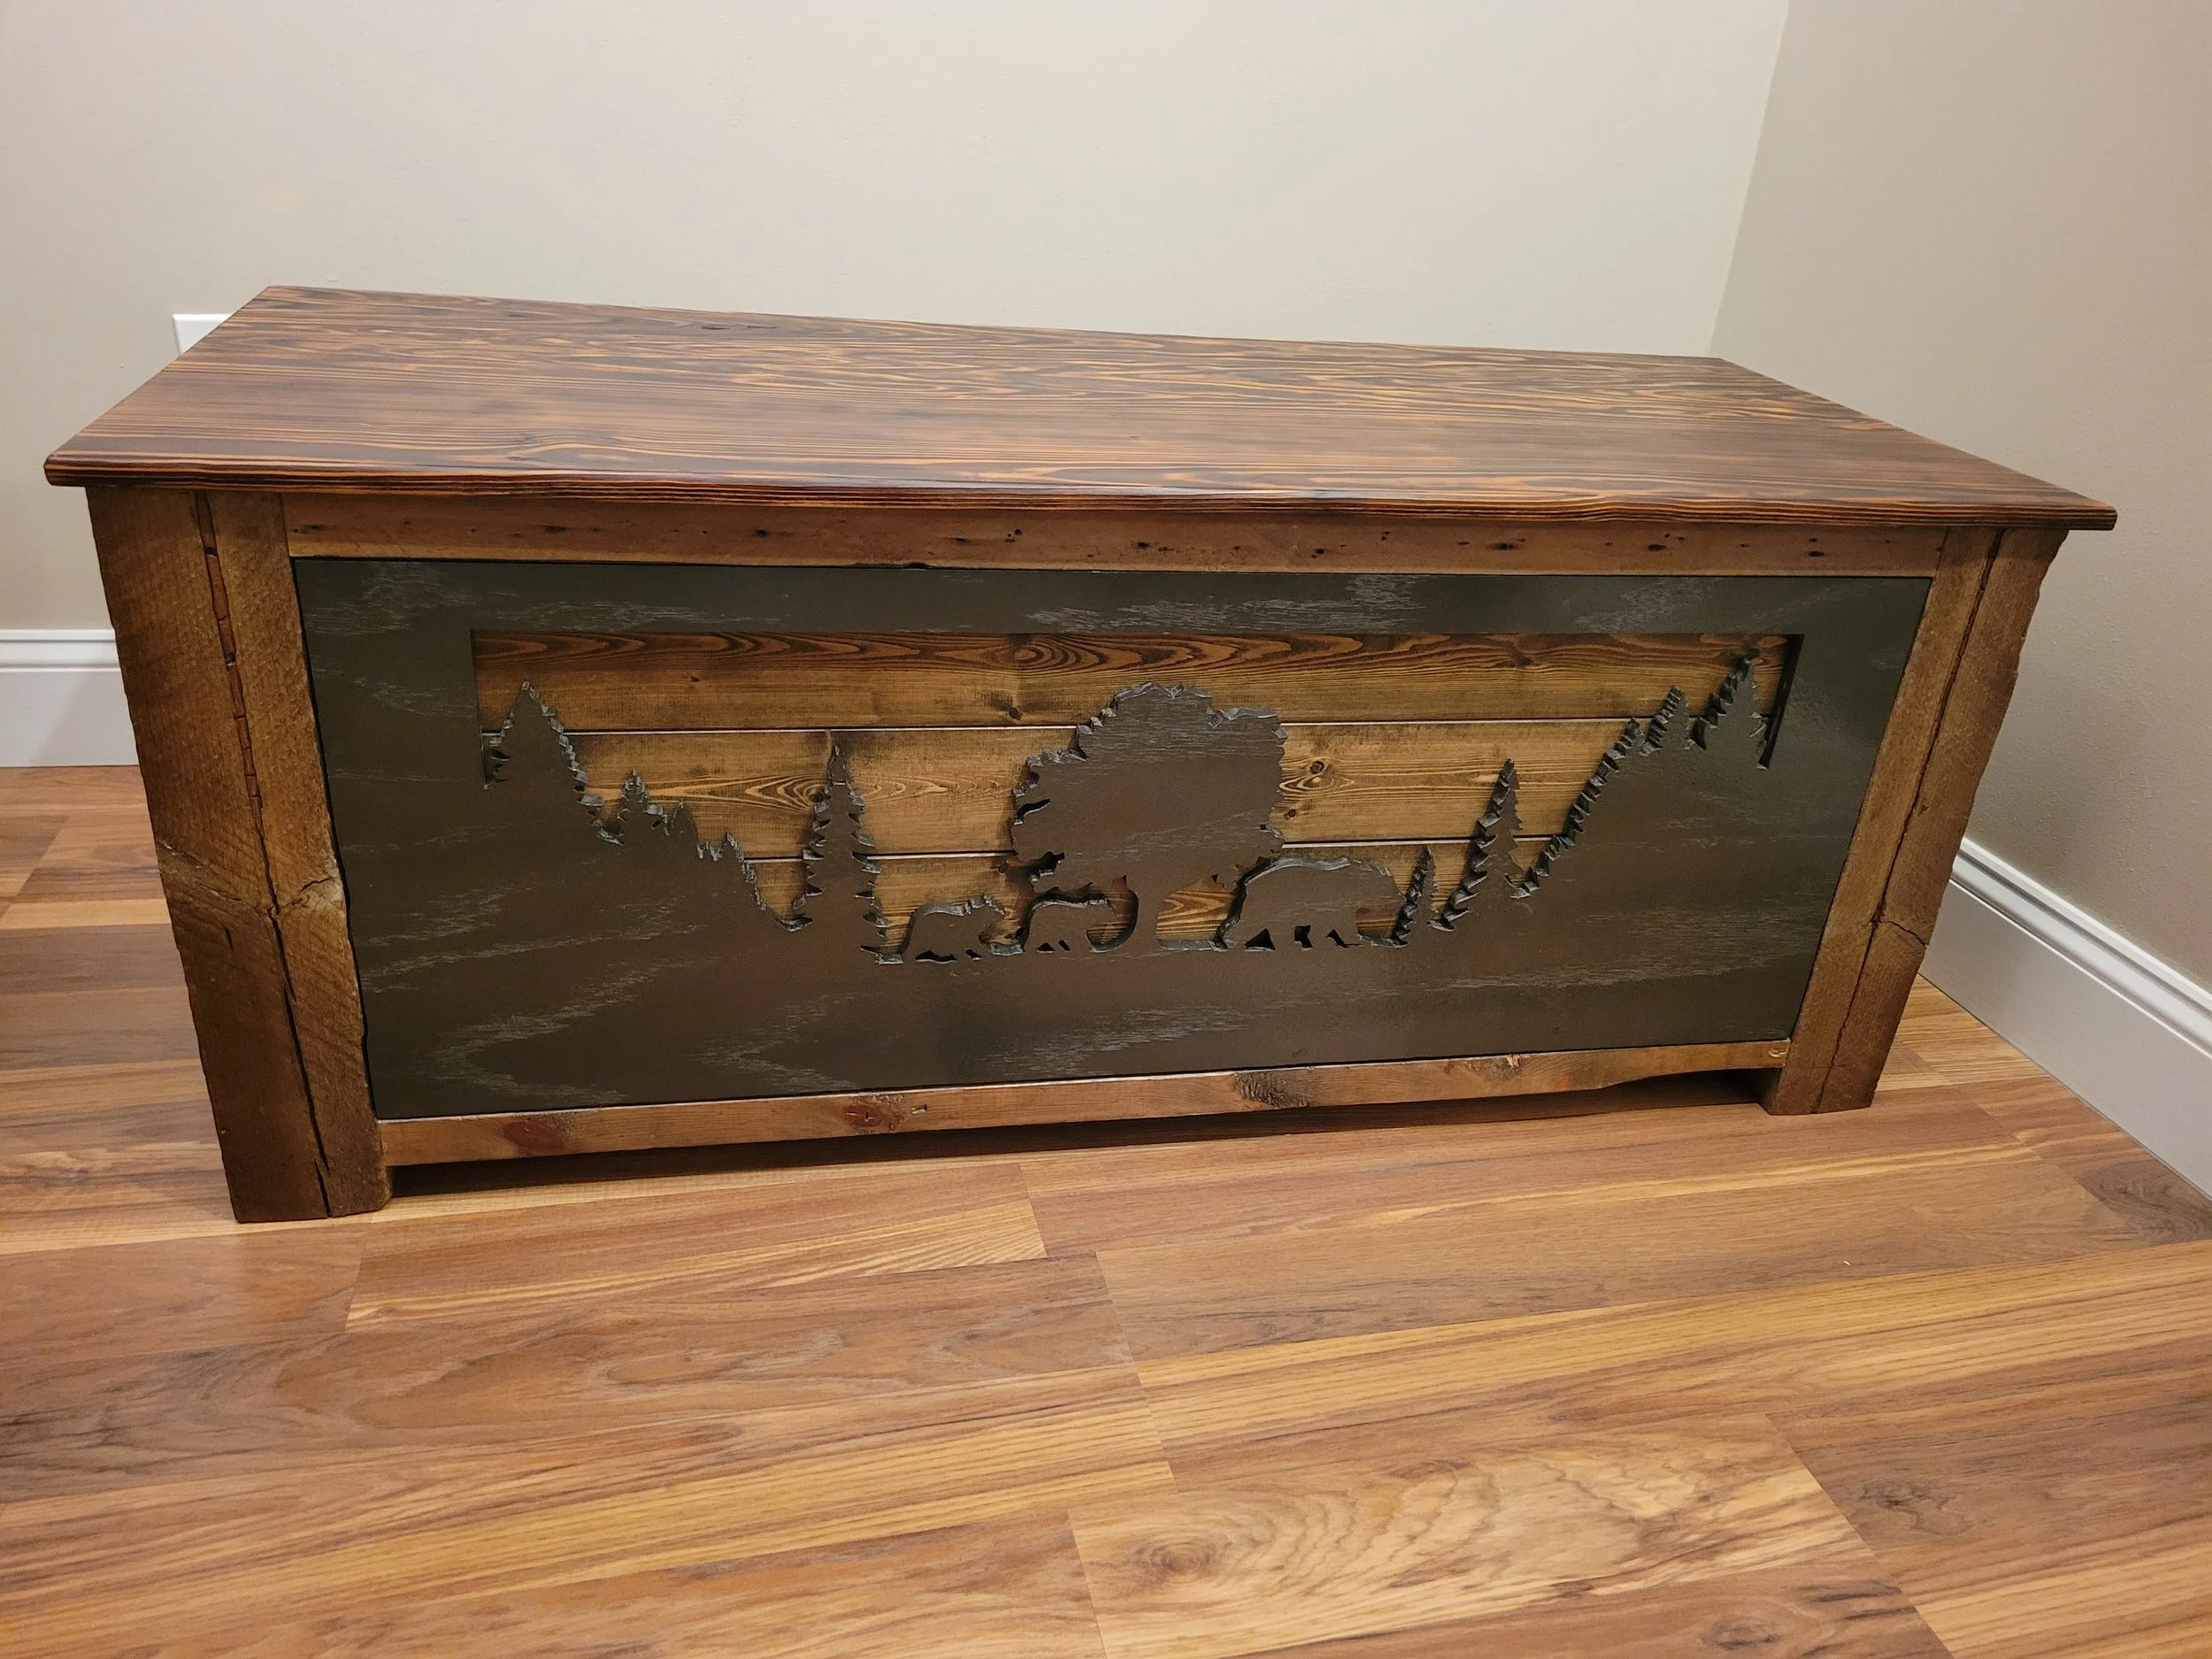
Bear Grilles

It was requested that I incorporate a bear into the chest. I liked this idea so I decided I was going to make a sort of grille out of plywood that would go over the front of the chest. I was going to cut out a silhouette of a bear and forest landscape in this grille. I then used the google machine, without incognito mode for once, and found a stock photo of a mama bear with two cubs walking by some trees. To make the image longer I combined another image of forest landscape. I used MS word to make the image span over 5 sheets of paper which brought me to the length I needed, about 40”.

I printed the images and placed them on the plywood, taping everything down. To cut out the silhouette I drilled some starter holes and used my jigsaw with a plywood blade as well as a scroll saw for the finer cuts.
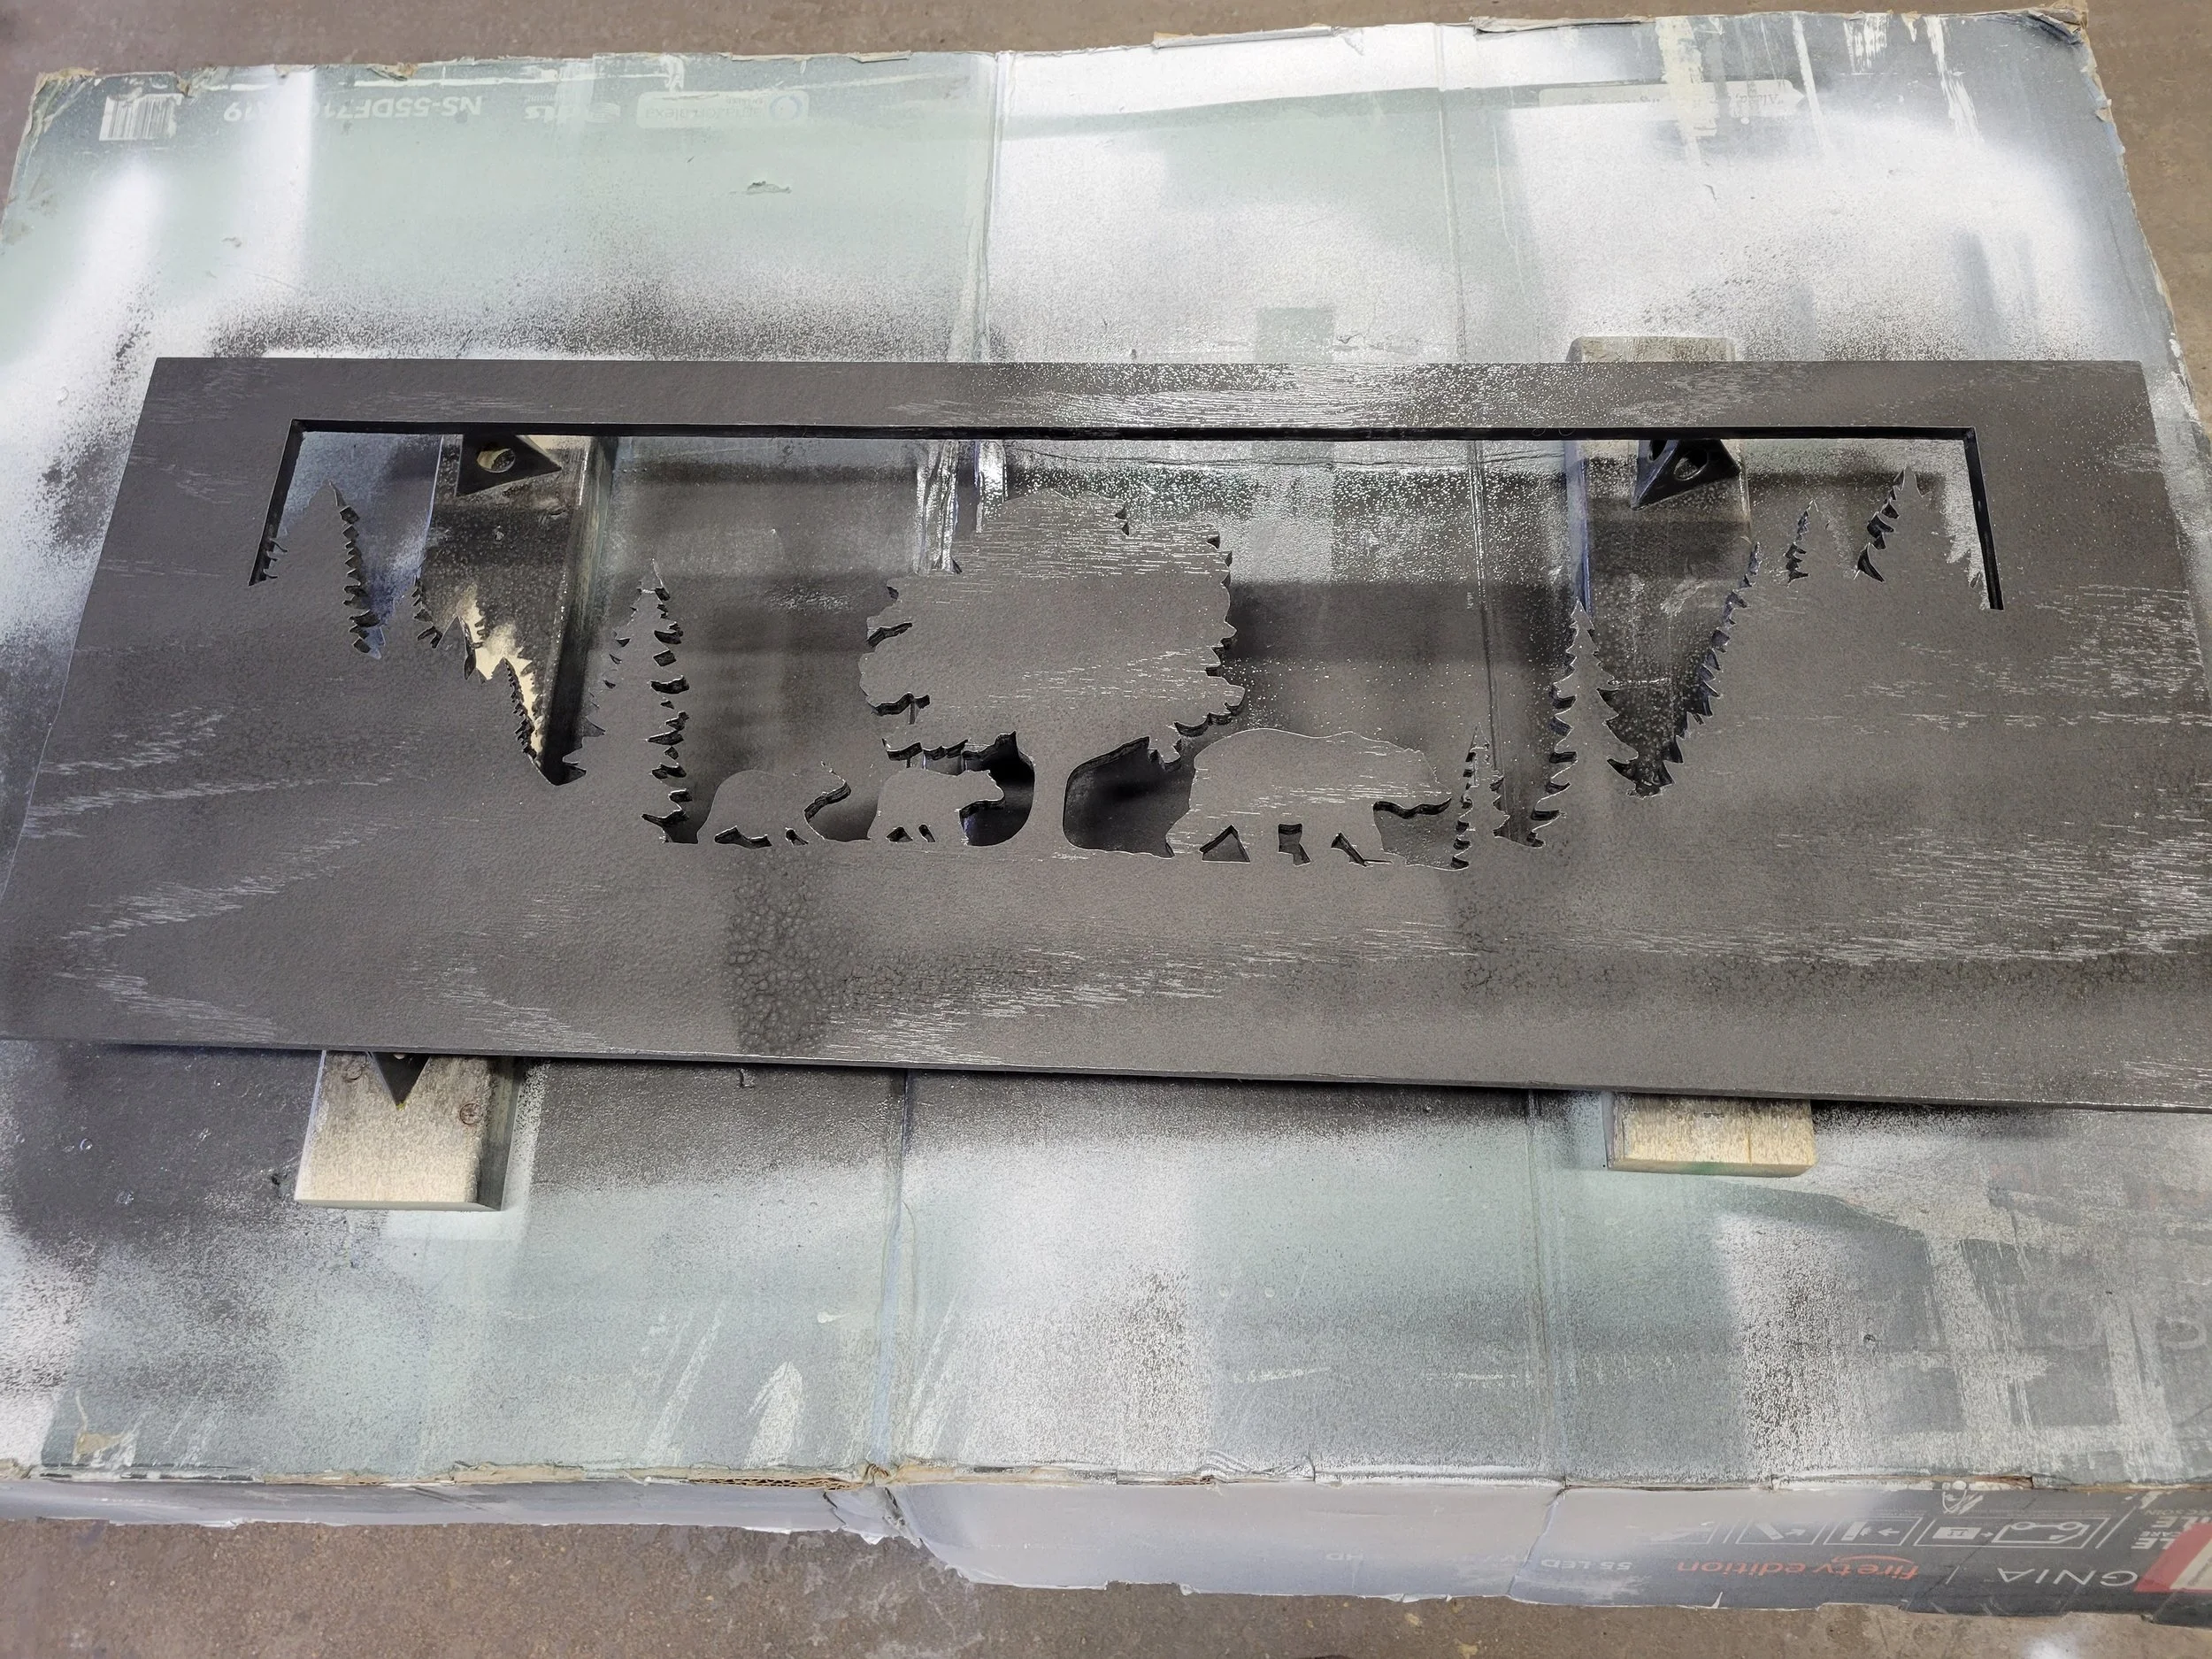
Once it was cut out I lightly sanded the edges and then applied Rustoleum hammered metal spray paint to get the appearance of a metal insert.
It’s what inside that counts

To line the chest I used 1/4” cedar planking I had leftover from a past project. I had to sand the stain off each board to get the raw wood so that you could smell the cedar. If you can’t smell it, it doesn’t count. I used a finish nailer to attach the pieces to the inside of the chest.
After this, I applied two coats of polycrylic to the outside pieces of the chest and to the top. Once this was done, I tacked the grille onto the front using a pin nailer so you wouldn’t see the holes. I then immediately started thinking about all the chest jokes I could make for this blog.
And here are some leaked photos of my chest:


