
I need my space
Your personal bubble is getting bigger. make space for it.
Feeling cramped? Or like there’s not enough space for you in this world? It may be time to go underground and make a safe space for yourself. But where do you begin? By reading this walkthrough and then ignoring everything I say.
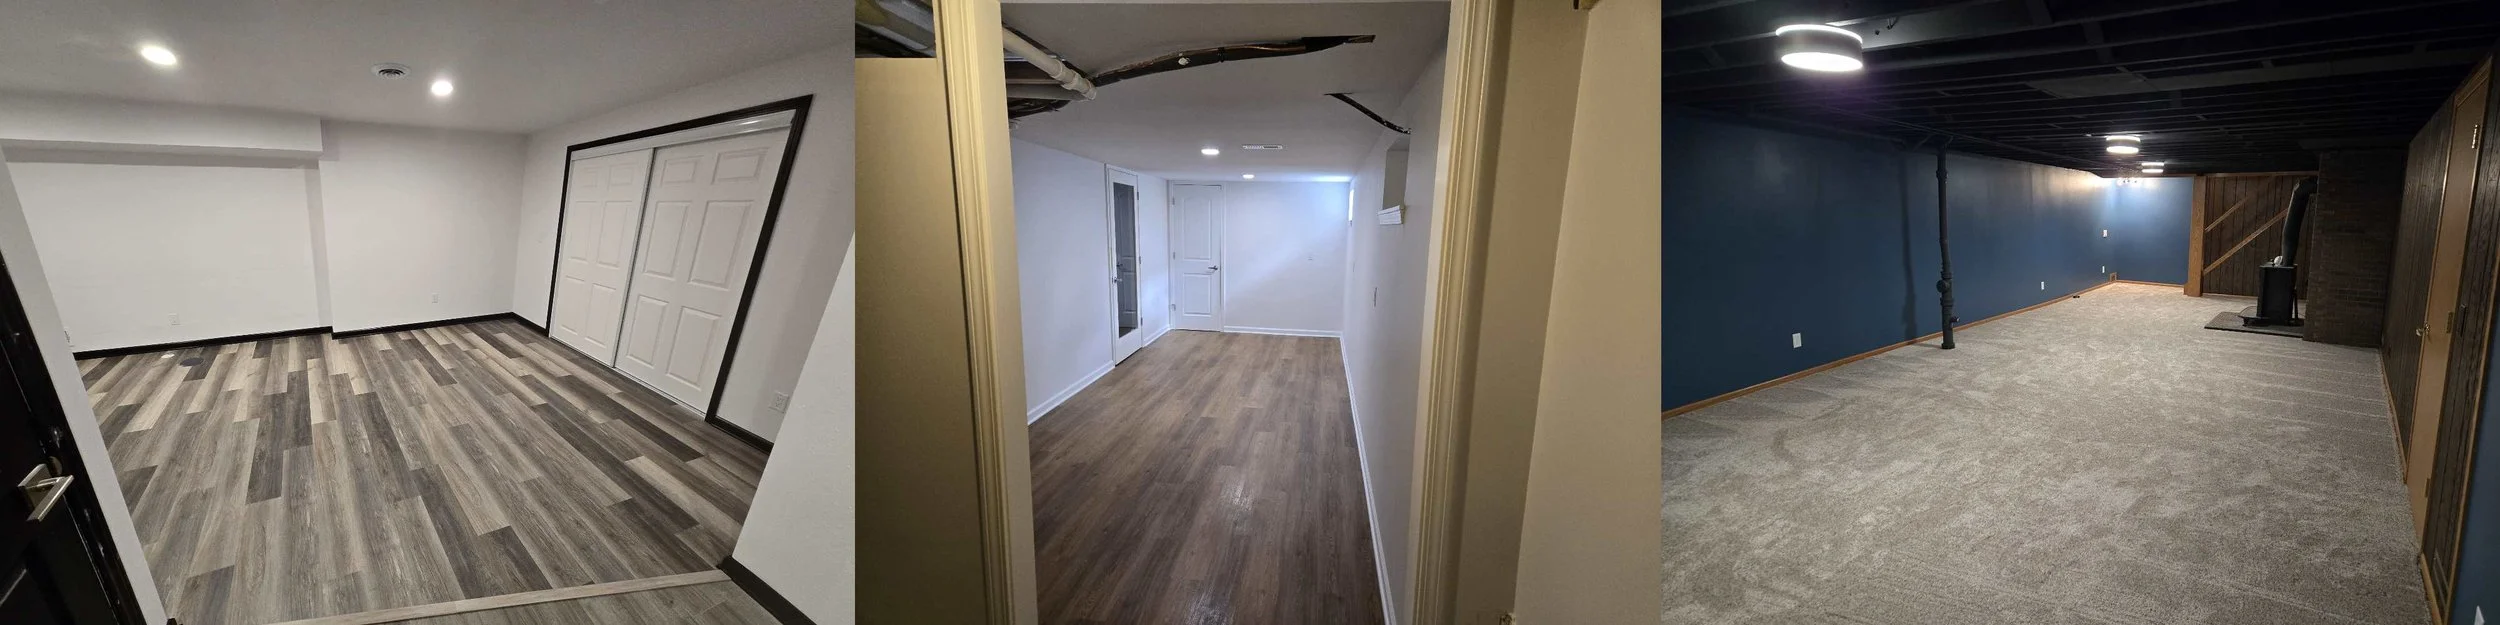
For the last couple of months I’ve been finishing basements, which is something that I would’ve never guessed I would be doing. But I also never would’ve guessed that anyone would be reading this, and here we are. The thing about finishing a basement is that there are many ways to do it and it can be overwhelming. I’ll be talking about three basements that I have recently finished and I have finished them three different ways. So I’m here to show you your options. Because, unlike my dating life, there are options.
A Jumping Off Point


Each basement started out differently. The first one began with demolishing a couple of walls to make more space. The second one was already 75% framed and 25% drywalled. The third was completely blank except for one paneled partition wall. But no matter what state your basement is in, the first step is always to make sure it is dry. Finishing a damp basement is just like moving in with your significant other: it’s great at first but eventually it falls apart, starts to smell, and you end up regretting it. A good moisture test is to live in the house for at least a year to observe any water coming through the walls or floor, especially after a heavy rain. A quicker test is to tape clear plastic to the concrete wall and floor for a week and see if any condensation builds up. No matter what the results are though, you’re going to want a dehumidifier to help keep your finished space dry.
It’s a Cover Up

If you have an old basement you probably do not have a flat floor. Also you may have asbestos. If your floor was covered in adhesive tile, especially 9”x9” tile it’s a real possibility. In this basement, there was mastic left over from when the tile must’ve been removed. I recommended the homeowner have it tested and it hit for asbestos.
Between the asbestos, the fact that this floor was 3” out of level (it was sloped to a floor drain), and was nowhere near flat, the best option was to cover it all up with self leveling underlayment. I’m not going to sugarcoat it… it’s a ton of awful work and it’s easy to mess up so I’d think twice before tackling it yourself. And no, I won’t do it again.
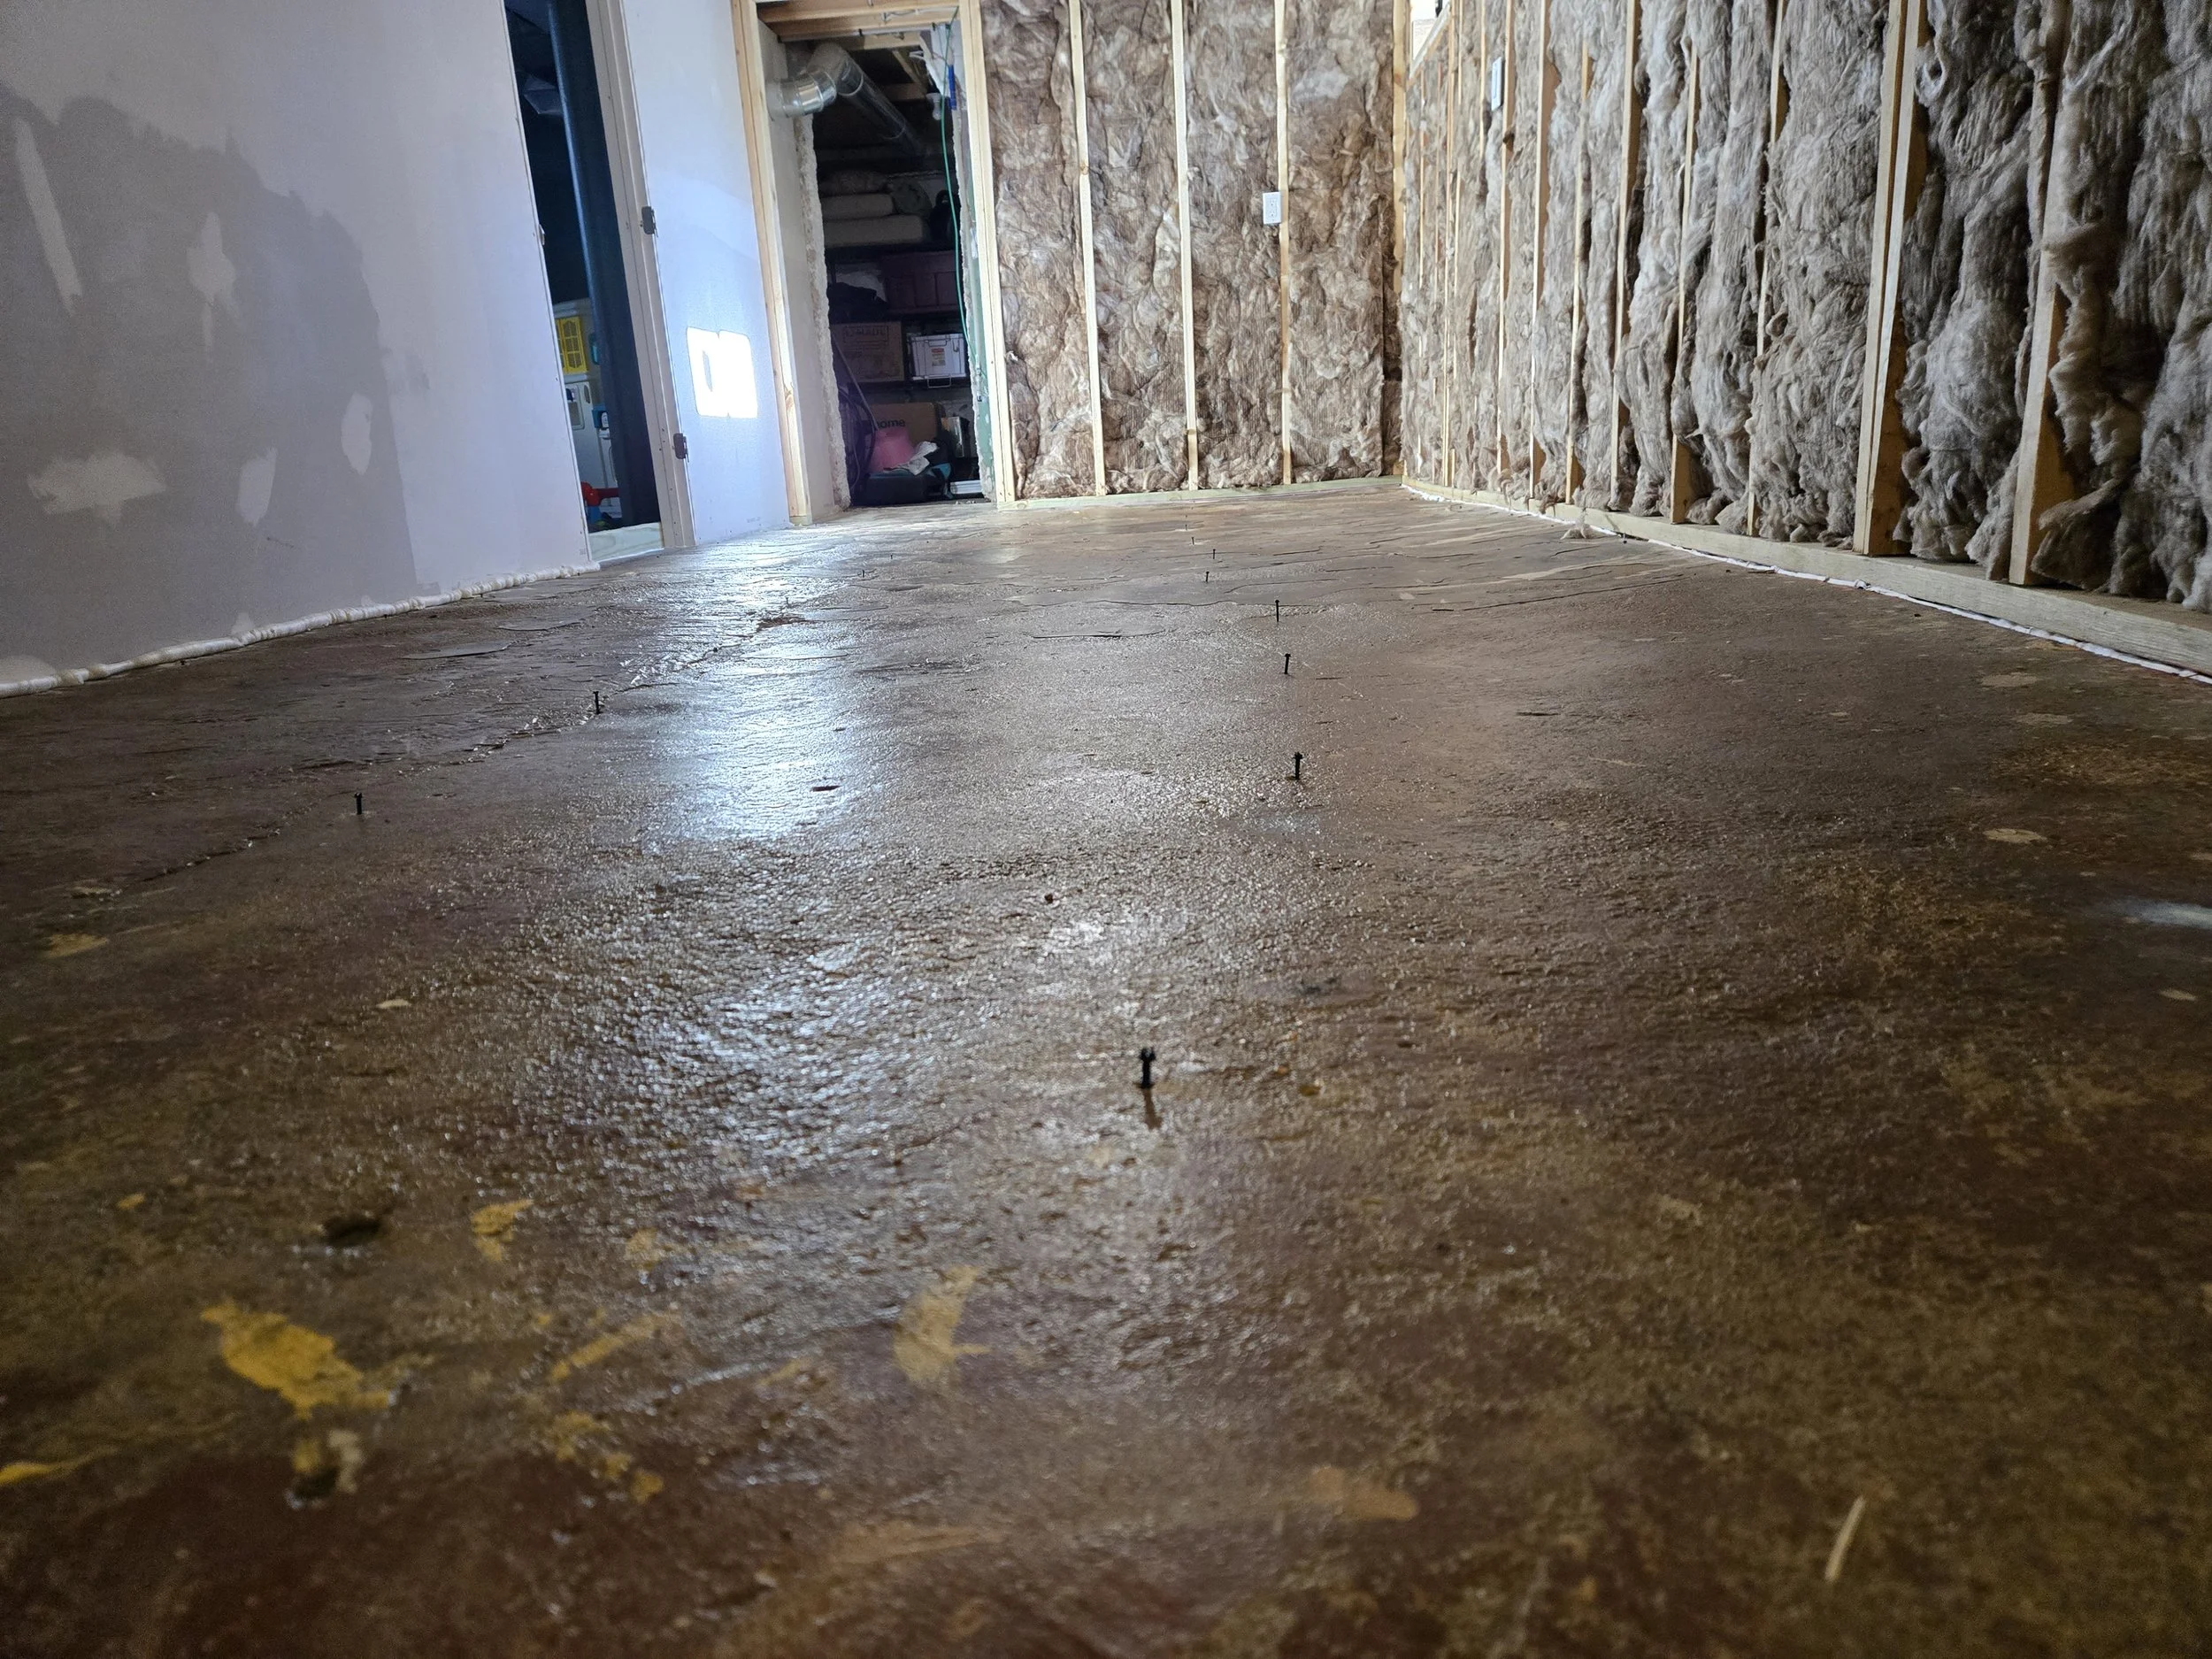
If you decide to level your floor anyways I’ll share how I did this one seeing as it shockingly turned out great. I broke the floor up into a grid made of 2’ squares. I then set a laser level at the highest part of the floor to set my level. I then set tapcon screws every 2’ at the level height. This way when I poured the underlayment I knew I had to cover the top of the screws. This prevented any dips or humps that I would’ve had to fix afterwards before laying the flooring.
You’re going to want to seal the bottom of any walls with either spray foam or sill seal taped to the wall. I used a combination of both. In any doorways, I placed a 2x4 and caulked the bottom. This particular floor required 25 bags of underlayment, at 50lbs each bag. I had someone mix while I poured because this stuff sets up so quickly that I wouldn’t have been able to keep up by myself. And also I have the back of an 80 year old. While it would’ve been better to pour the floor before any framing, I had to wait for my helper to become available because I only know one person in this whole world. This is why you see the walls framed and insulated. You’ll also see the step up that was created. After the floor was poured I made an inclined transition - it’s not a ramp so don’t call it that - so that nobody would trip.


Insulate Yourself
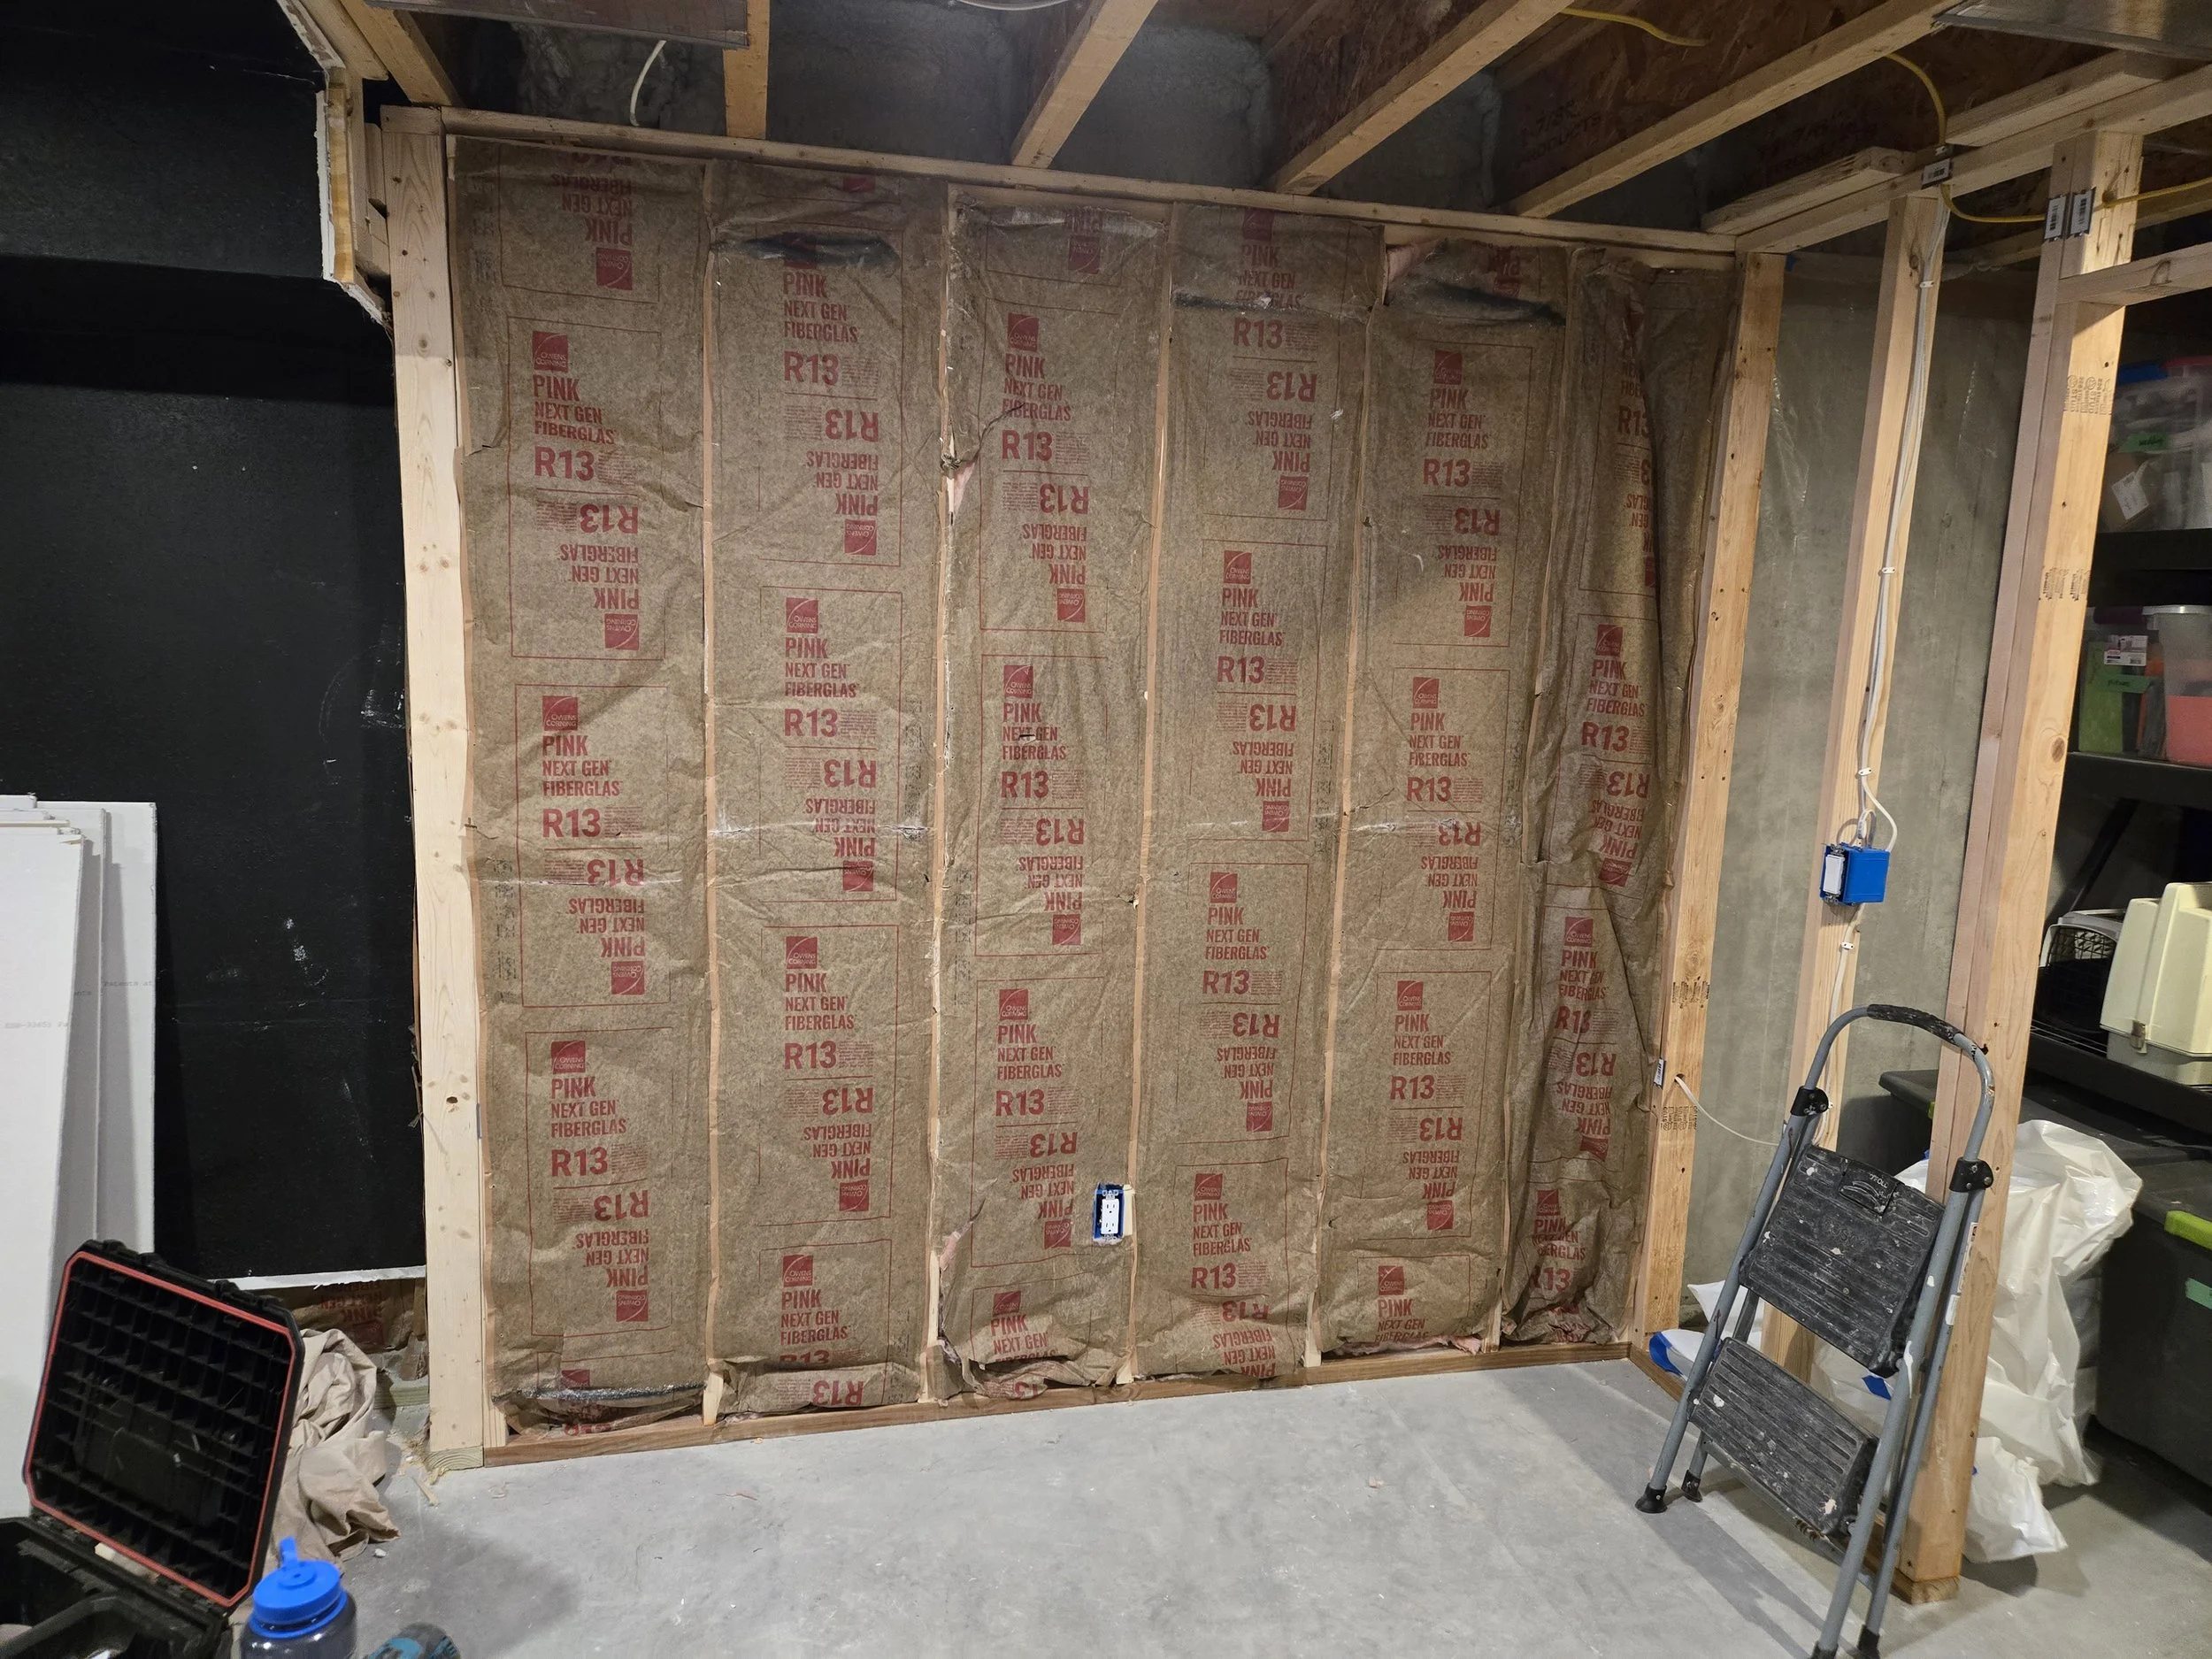
I did two methods of insulating the basement walls. The first, and cheapest, way was to just insulate between the studs. It’s not my preferred method I was comfortable doing it for this basement for two reasons: I knew that this house was a relatively new build by a large builder in the area and that they insulate the exterior of the foundation walls, and I saw that the previous owner did it this way for the rest of the basement so there was no point in upgrading 5% of the total basement wall area.
If you choose to go this route you’re going to want to space your studs at least 1” off the basement wall for an airspace so that any moisture coming from the concrete doesn’t move into the framing. I would go with unfaced batt insulation. The only reason I used kraft faced in this situation was because that was in the wall that I took down and I’m all for reusing materials.

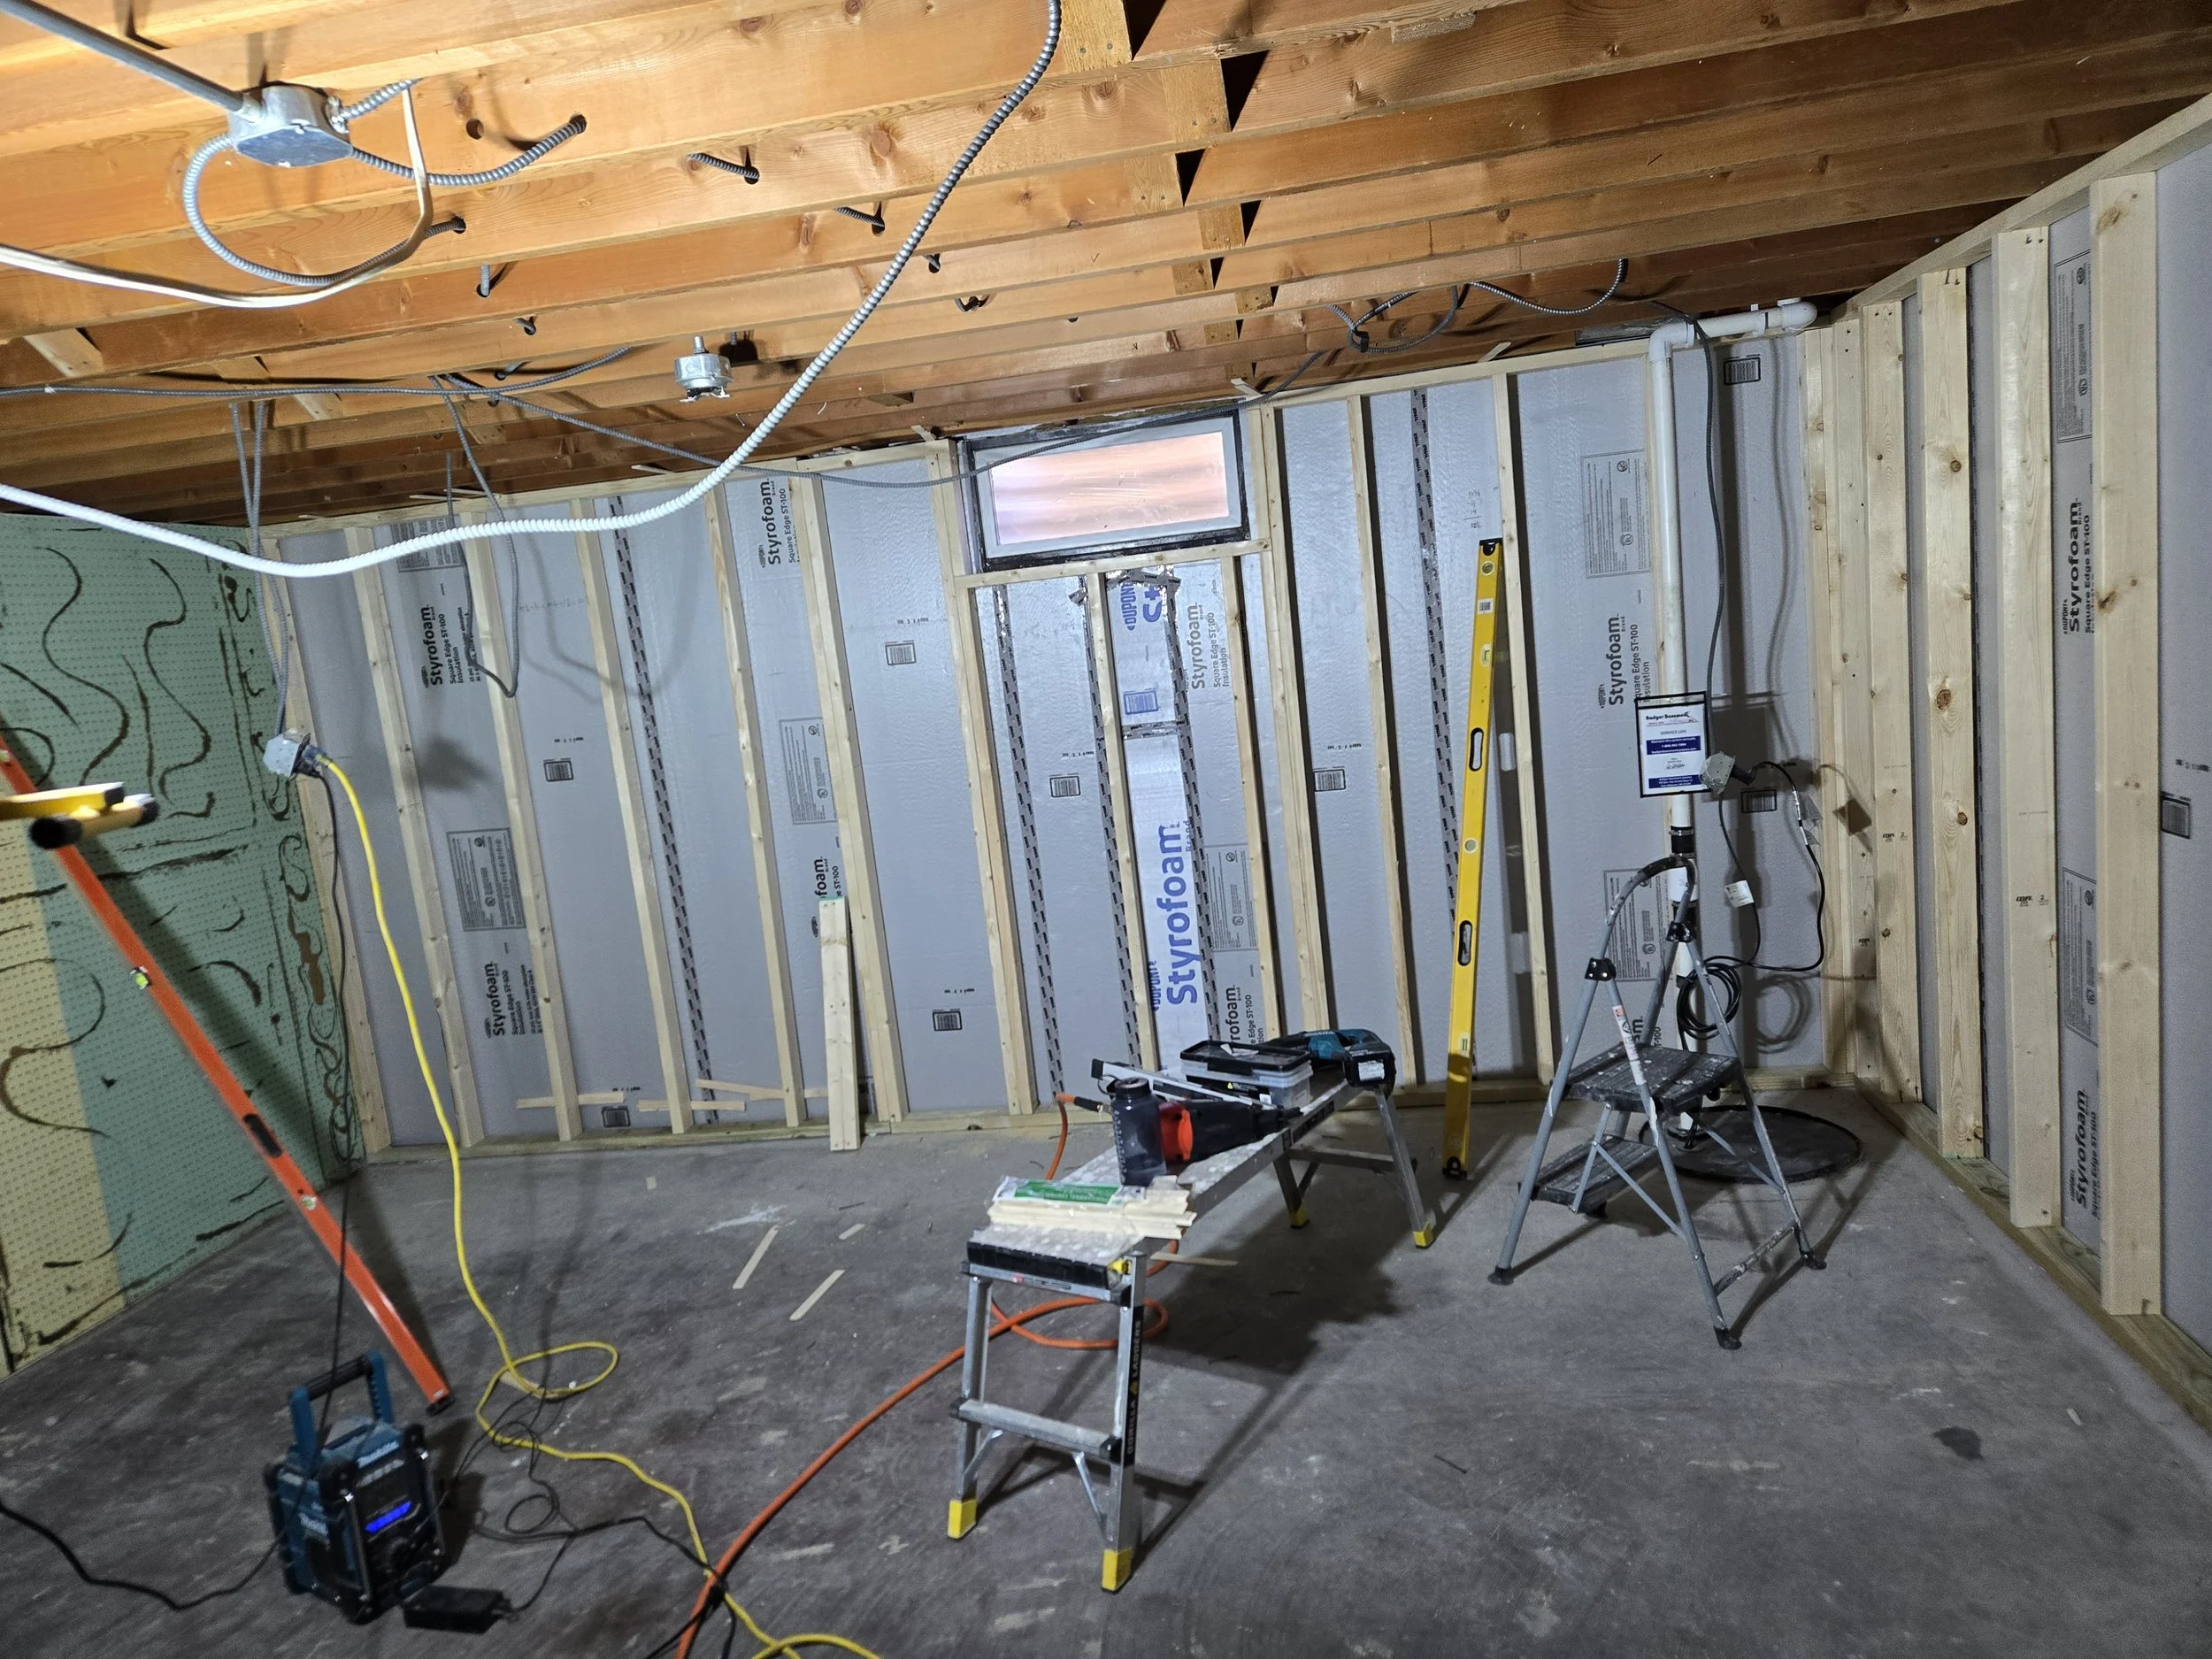
The best way to insulate the exterior walls is to use rigid foam board of at least R5 value. I glued the panels to the foundation wall and sealed all seams with moisture barrier tape to prevent any moist air leakage. We don’t like leakage. Rigid Foam is considered a vapor barrier when installed in this manner. I then insulated the stud walls with R-13 (unfaced) batt insulation. In Wisconsin, code describes this method as acceptable. Now you know that I’m not making this shit up.

Don’t forget your rim joist. Now is the time to insulate the space between where your floor joists and above the foundation. This is one of the most common areas of air leakage and heat loss. With the scrap foam board you can cut out sections and glue them to the rim joist. Then use spray foam to seal the edges. If you really want to get some R value you can then use your batt insulation scraps and stick them into the joist bays too.
Just a simple but possibly important thing to bring up. Rigid foam is generally considered flammable and should be covered with framing, drywall, or other approved fireblocking materials. But for those of you that like to live dangerously, I say you do you.
Standoffish
Even if you used foam board insulation I still recommend standing off your framing from the exterior wall at least 1/2”. This gives you a little wiggle room for any unevenness in the exterior wall or if they are not plumb.
For your sill plate, make sure you use treated lumber or have a vapor barrier between the concrete and untreated wood. Also make sure you lay out your studs on center so that when you install the drywall you don’t have to cut pieces. If someone else is doing the drywall and you want to make their life hell then don’t worry about it.
I stick frame basement walls by laying out my sill and top plates before anything else. I then set the the sill plate to the floor with adhesive and/or tapcon screws. I then use my laser level to find plumb on the structure above so I know where to fasten my top plate. Then it’s just a bunch of chopping up wood studs and toenailing them in.
Once you’ve finished framing and questioning why you decided to do this, you’re going to want to install any of the electrical components. I Highly recommend a professional does it for you but I also know from personal experience that it’s much more exciting if you do it yourself and you go to bed every night wondering if you’re going to wake up to your world burning around you.

And then it’s just a matter of insulating between the studs. If your walls aren’t against the foundation walls you can use some cheap housewrap to help keep the insulation from falling through.
Hanging Yourself
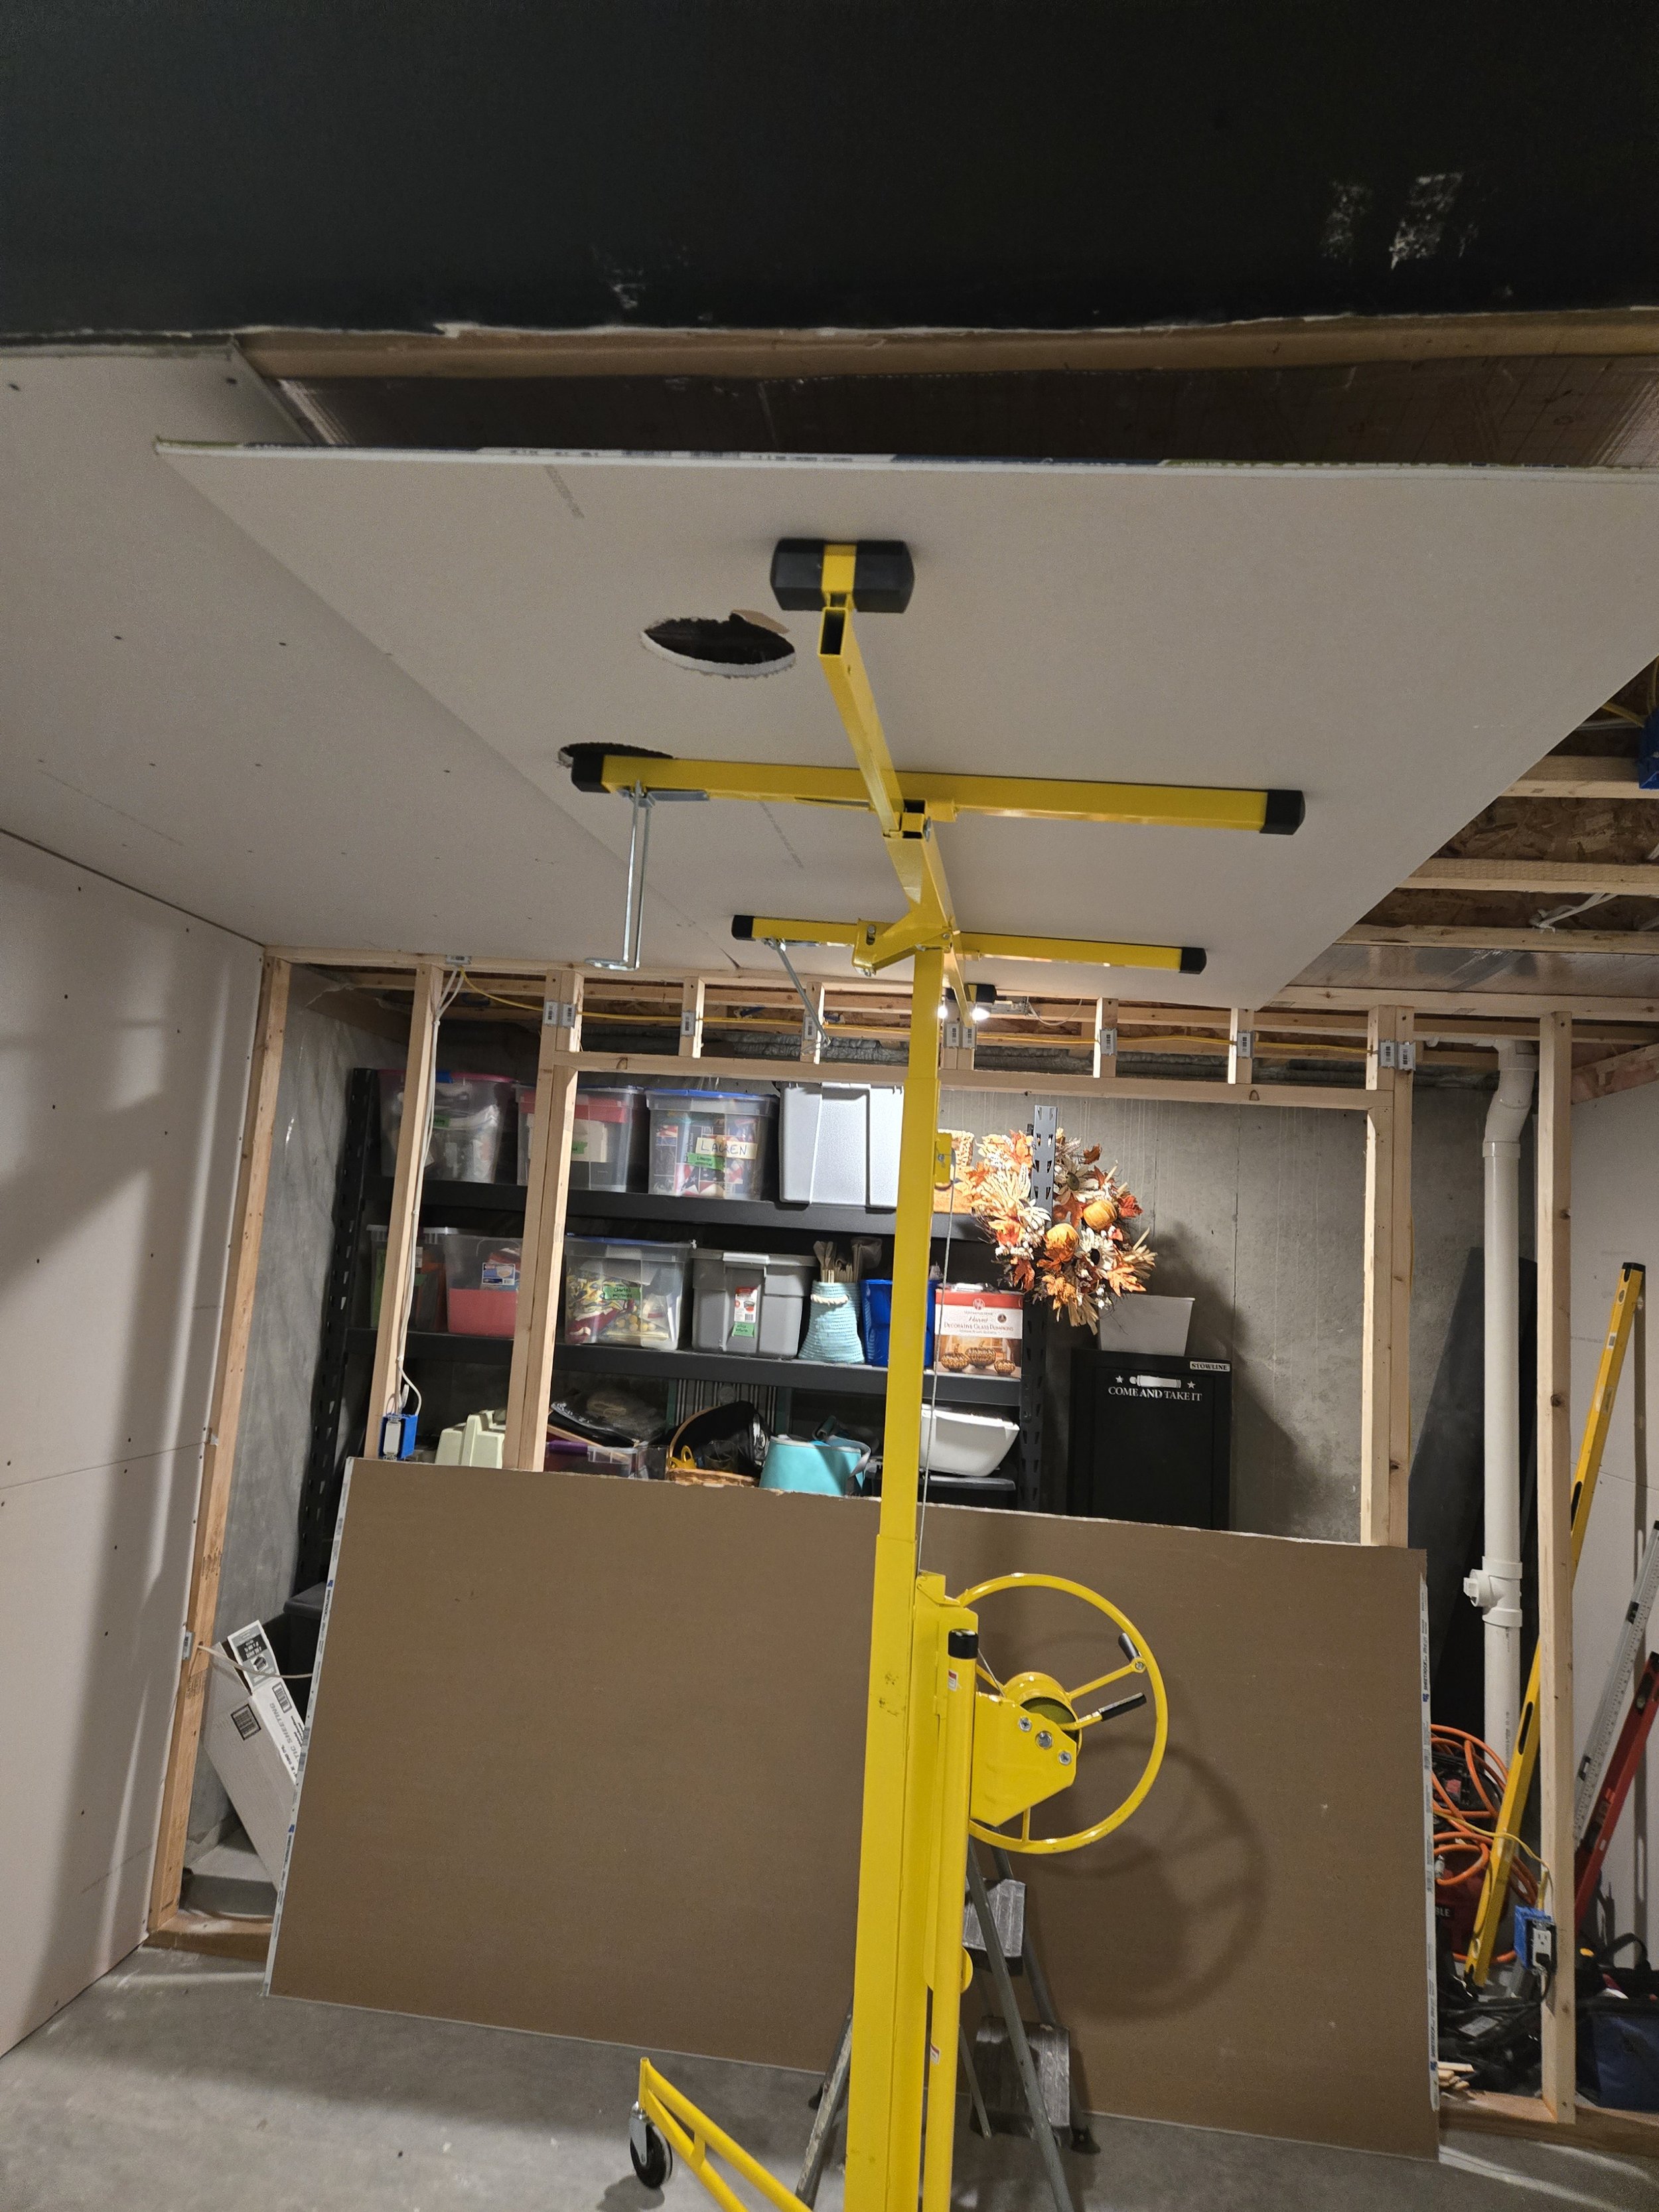
You may be brave enough to hang drywall by yourself. Or if you’re like me you’re just alone and have no other option. But don’t worry, if you’re doing the ceiling all you have to do is invest in a panel lift. You can also pretend it’s another person and talk to it if you’d like. It’s a win-win.
There is a lot of debate over which direction to hang drywall. The ceiling drywall is going to lay perpendicular to the ceiling joists. But as far as the walls go, you have two options. You can hang it horizontal or vertical. I’ve done it both ways and for what my opinion is worth (which is not much) I would say it depends on the framing. If the framing is installed accurately on center and not bowed all over the place, I prefer to hang my walls vertically. As much as I love butts, I do not like them in drywall because they take more effort to mud. Hanging the drywall vertical will eliminate butt joints. However, if the framing is a hot mess then it will probably be better in the long run to hang the drywall horizontally. This helps compensate for any unevenness in the framing and you don’t have to make lengthwise cuts if the framing isn’t on center.


As far as the taping and mudding goes, I’m not about to give any advice because I am far from a professional. I will however leave this link to a video that really helped me refine my technique. Watch it a couple of times and take what you want from it.
No More Facials

Drywalling ceilings suck. If you don’t mind exposing your ceiling it may be worth considering making friends with someone with a paint sprayer to paint the ceiling. (I have a paint sprayer and more than a few open slots for friends by the way). If making friends is difficult for you, it’s about a $250 investment in a lower-end paint sprayer. That’s a lot of money but also that means you don’t need to buy a panel lift, let alone tape and mud the ceiling. But then again what fun is it if you’re not getting a facial from the mud dripping from the ceiling.

Also consider what utilities you have mounted below your floor joists when you’re deciding to drywall or paint the ceiling. this person wanted the ceiling drywalled and it was more than irritating to drywall behind and around everything.
To the Window…


The way you approach the window is going to depend on how much you want to spend vs how nice you want it to be. The cheap way is to drywall the returns to the window. The pricier way is to install wood returns. Either way I would recommend installing a wood sill instead of just a piece of drywall. Unless you’re a savage. Also note that if you drywall the returns you’re going to be taping and mudding some inside and outside corners so if you suck at drywall it may be better to bite the bullet and trim it out.
Rough It Up
If you’re doing your drywall I strongly recommend throwing some texture on the walls after drywalling. A little bit of texture goes a long way to hiding any imperfections, and I’m all about hiding my imperfections. You can add a sand additive to your primer for a slight texture, or you can buy a texture sprayer and compound and spray your own texture.
Once the drywall is textured and primed, then you’re ready to paint. I hate painting and won’t give any advice other than to spend the extra money on good paint and err on the side of a lower sheen. I use flat for the ceilings and won’t go above an eggshell for walls.
Keep the Moist out

When it comes to the finished floor you have a number of options. The most common in my experience are luxury vinyl plank (LVP) and carpet. No matter what you choose just make sure you don’t forget about the moisture barrier. I’m not opposed to cheaping out on finishings for a basement. If you’re trying to impress someone I doubt it’s going to be with your basement. But the one thing to not skimp on is the floor underlayment. It is worth the extra money to get a nice underlayment with a built in moisture barrier and some sound reducing properties. This helps with the annoying clicking of vinyl plank directly on concrete. You want all seams to be taped whether it be with the built in adhesive in the underlayment or tape such as housewrap tape.

A lot of people hate on laminate for flooring in a basement and I agree with the reasoning that it is easily damaged by water. However, I put some clearance priced commercial laminate in my basement because it was cheap and I am always rolling heavy woodworking equipment around so I couldn’t use vinyl plank without breaking every edge. It’s been a couple years and I’ve had one or two minor water issues but the flooring still looks great. And I owe it all to putting down a good quality underlayment first. I would still say laminate isn’t my first choice for a basement but I wouldn’t rule it out.
trim it out


If you went with carpet flooring you’re going to want to install your trim first spaced 3/8” above the concrete so that the carpet installer can tuck the carpet under the baseboard. If you choose just about anything else you’ll install the trim after the floor. I install any doors at this time as well so that the jambs can rest on top of the floor.
When it comes to trim material, it know it can be very tempting to get the cheap and already painted MDF. Resist. It’s just going to be another let down in your life. MDF absorbs water like a sponge and then swells. Over time your trim is going to start looking gross and you’re going to have to dump it. Just save yourself the hassle and get solid wood or PVC. I prefer solid wood because it’s easier to paint and I think it looks better.
hope you like worms
One last bit of advice is that with every basement there is going to be a can of worms just waiting to be opened. With these three basements I’ve had to do some minor electrical, plumbing, and HVAC. This has ranged from adding a light to moving an HVAC to editing a water line so that the owner’s bidet doesn’t burn their b-hole with hot water. If you’re handy enough to do all of this then good for you. I’m not sure what you need me for. More likely though you’re going to have to hire a professional or find a friend who can help you out. Just be prepared for a little hardship and disappointment. At this point in my life I’ve learned to always expect disappointment.