
Get Bent
So you’ve just been DOGE’d and now you’re living out of your camper. You feel like you’ve been wasting space your entire life and you refuse to waste anymore of it. But you also refuse to do anything without style. If some park ranger is going to find your body in the back of your camper you want to at least make that ranger say “wow, that’s a nice looking camper.” Keep reading to see all the features I added to this once sad teardrop trailer. Features like pull out countertops, curved cabinets, and some artwork that will really make that ranger’s jaw drop.
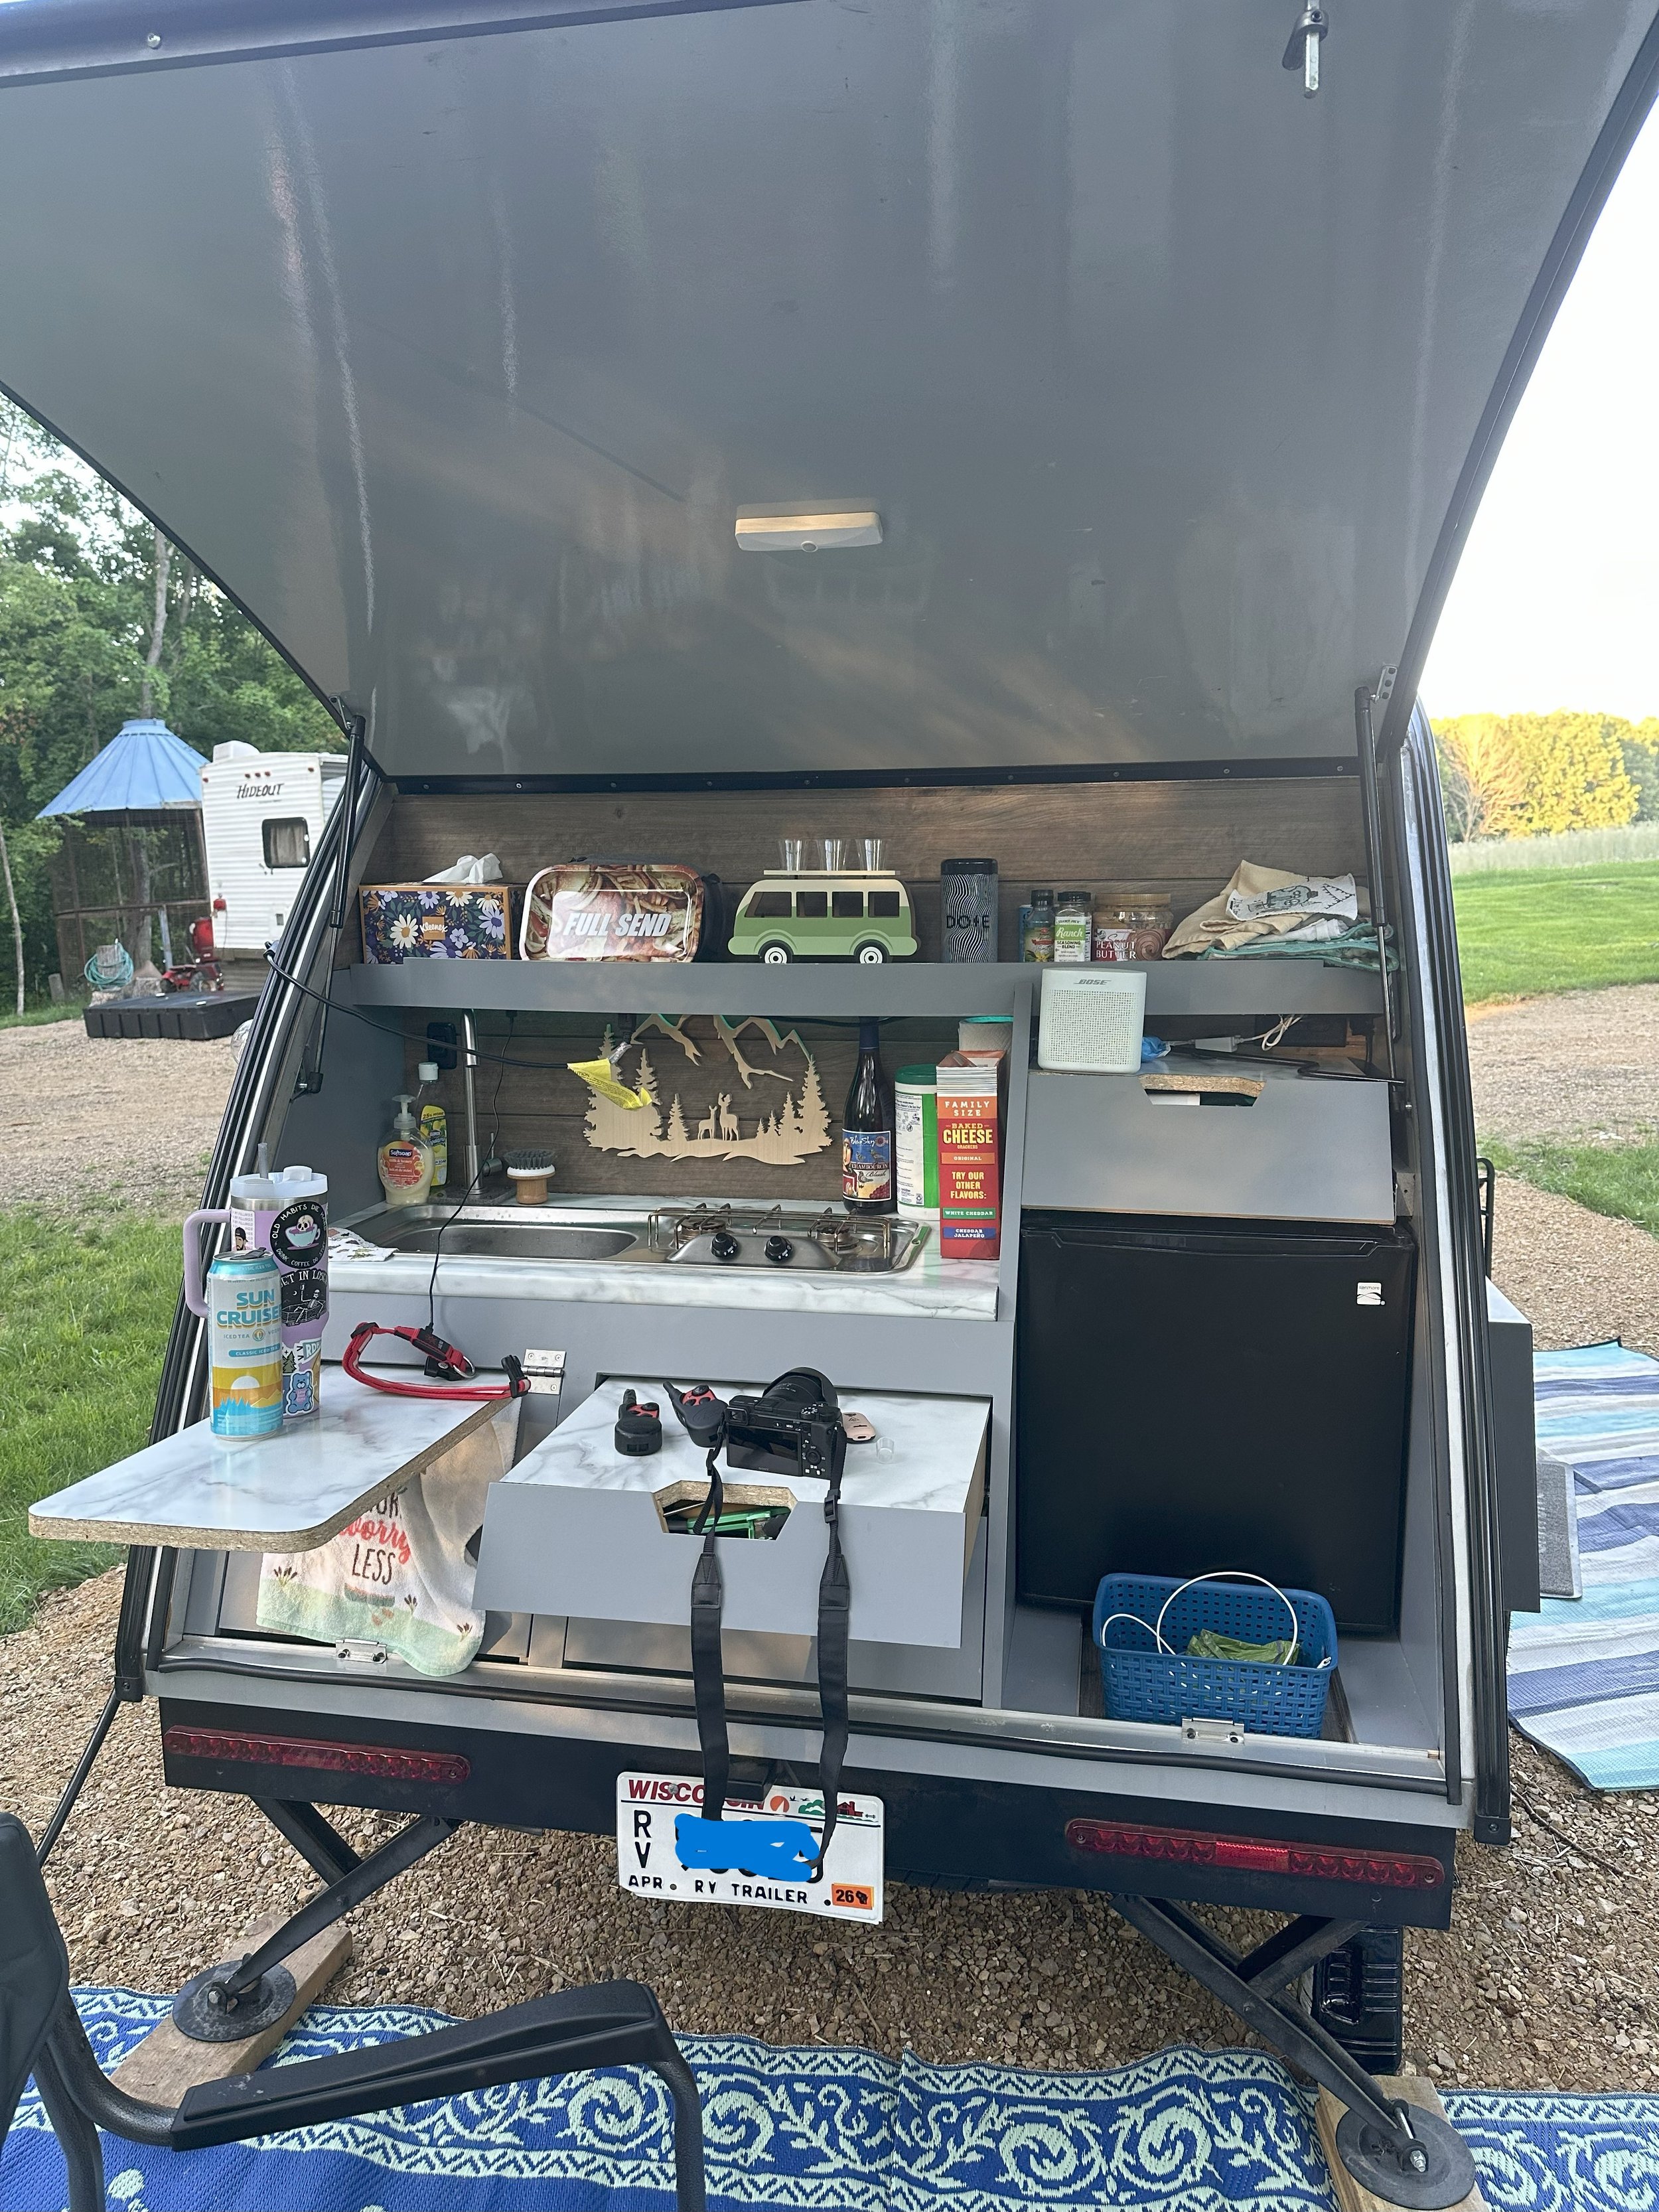
My dental hygienist, with her hands in my mouth, asked if I’d redo the kitchenette of her Bushwhacker teardrop camper trailer. Not one to say no to people in positions of power, I agreed. I was given full reign with two requests: make a mini-fridge fit that at the time certainly did not, and add countertop space to.
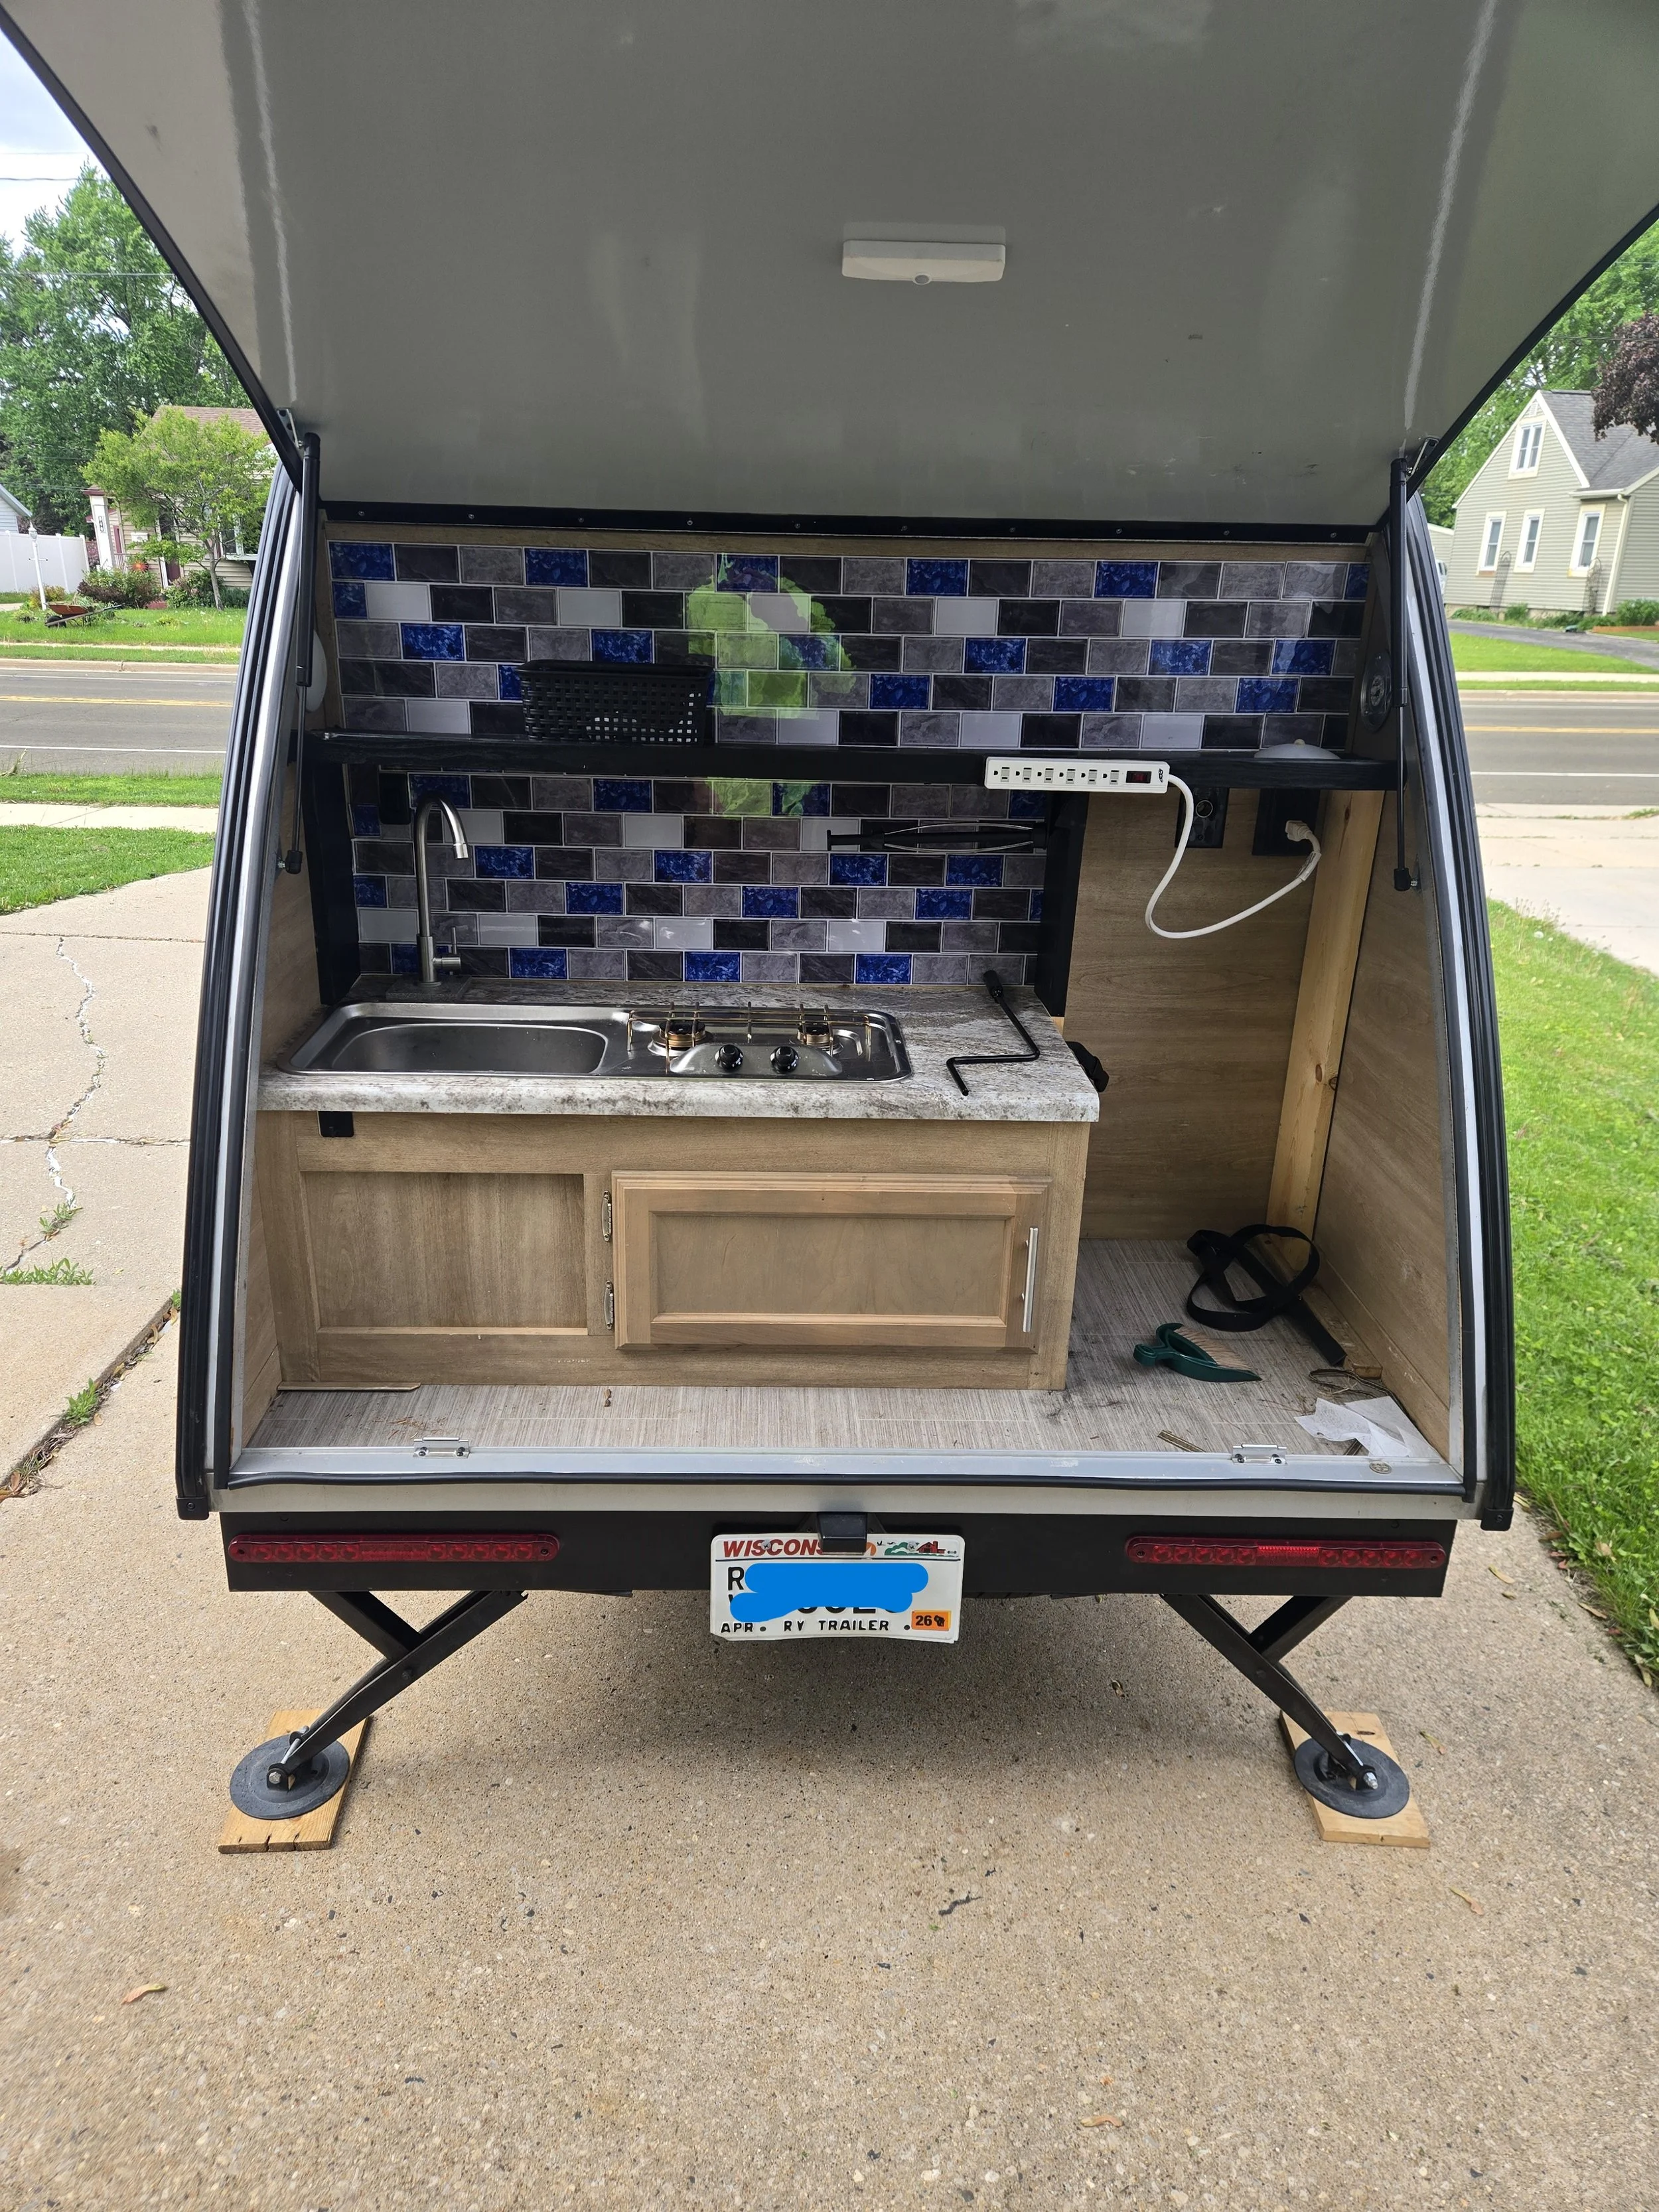
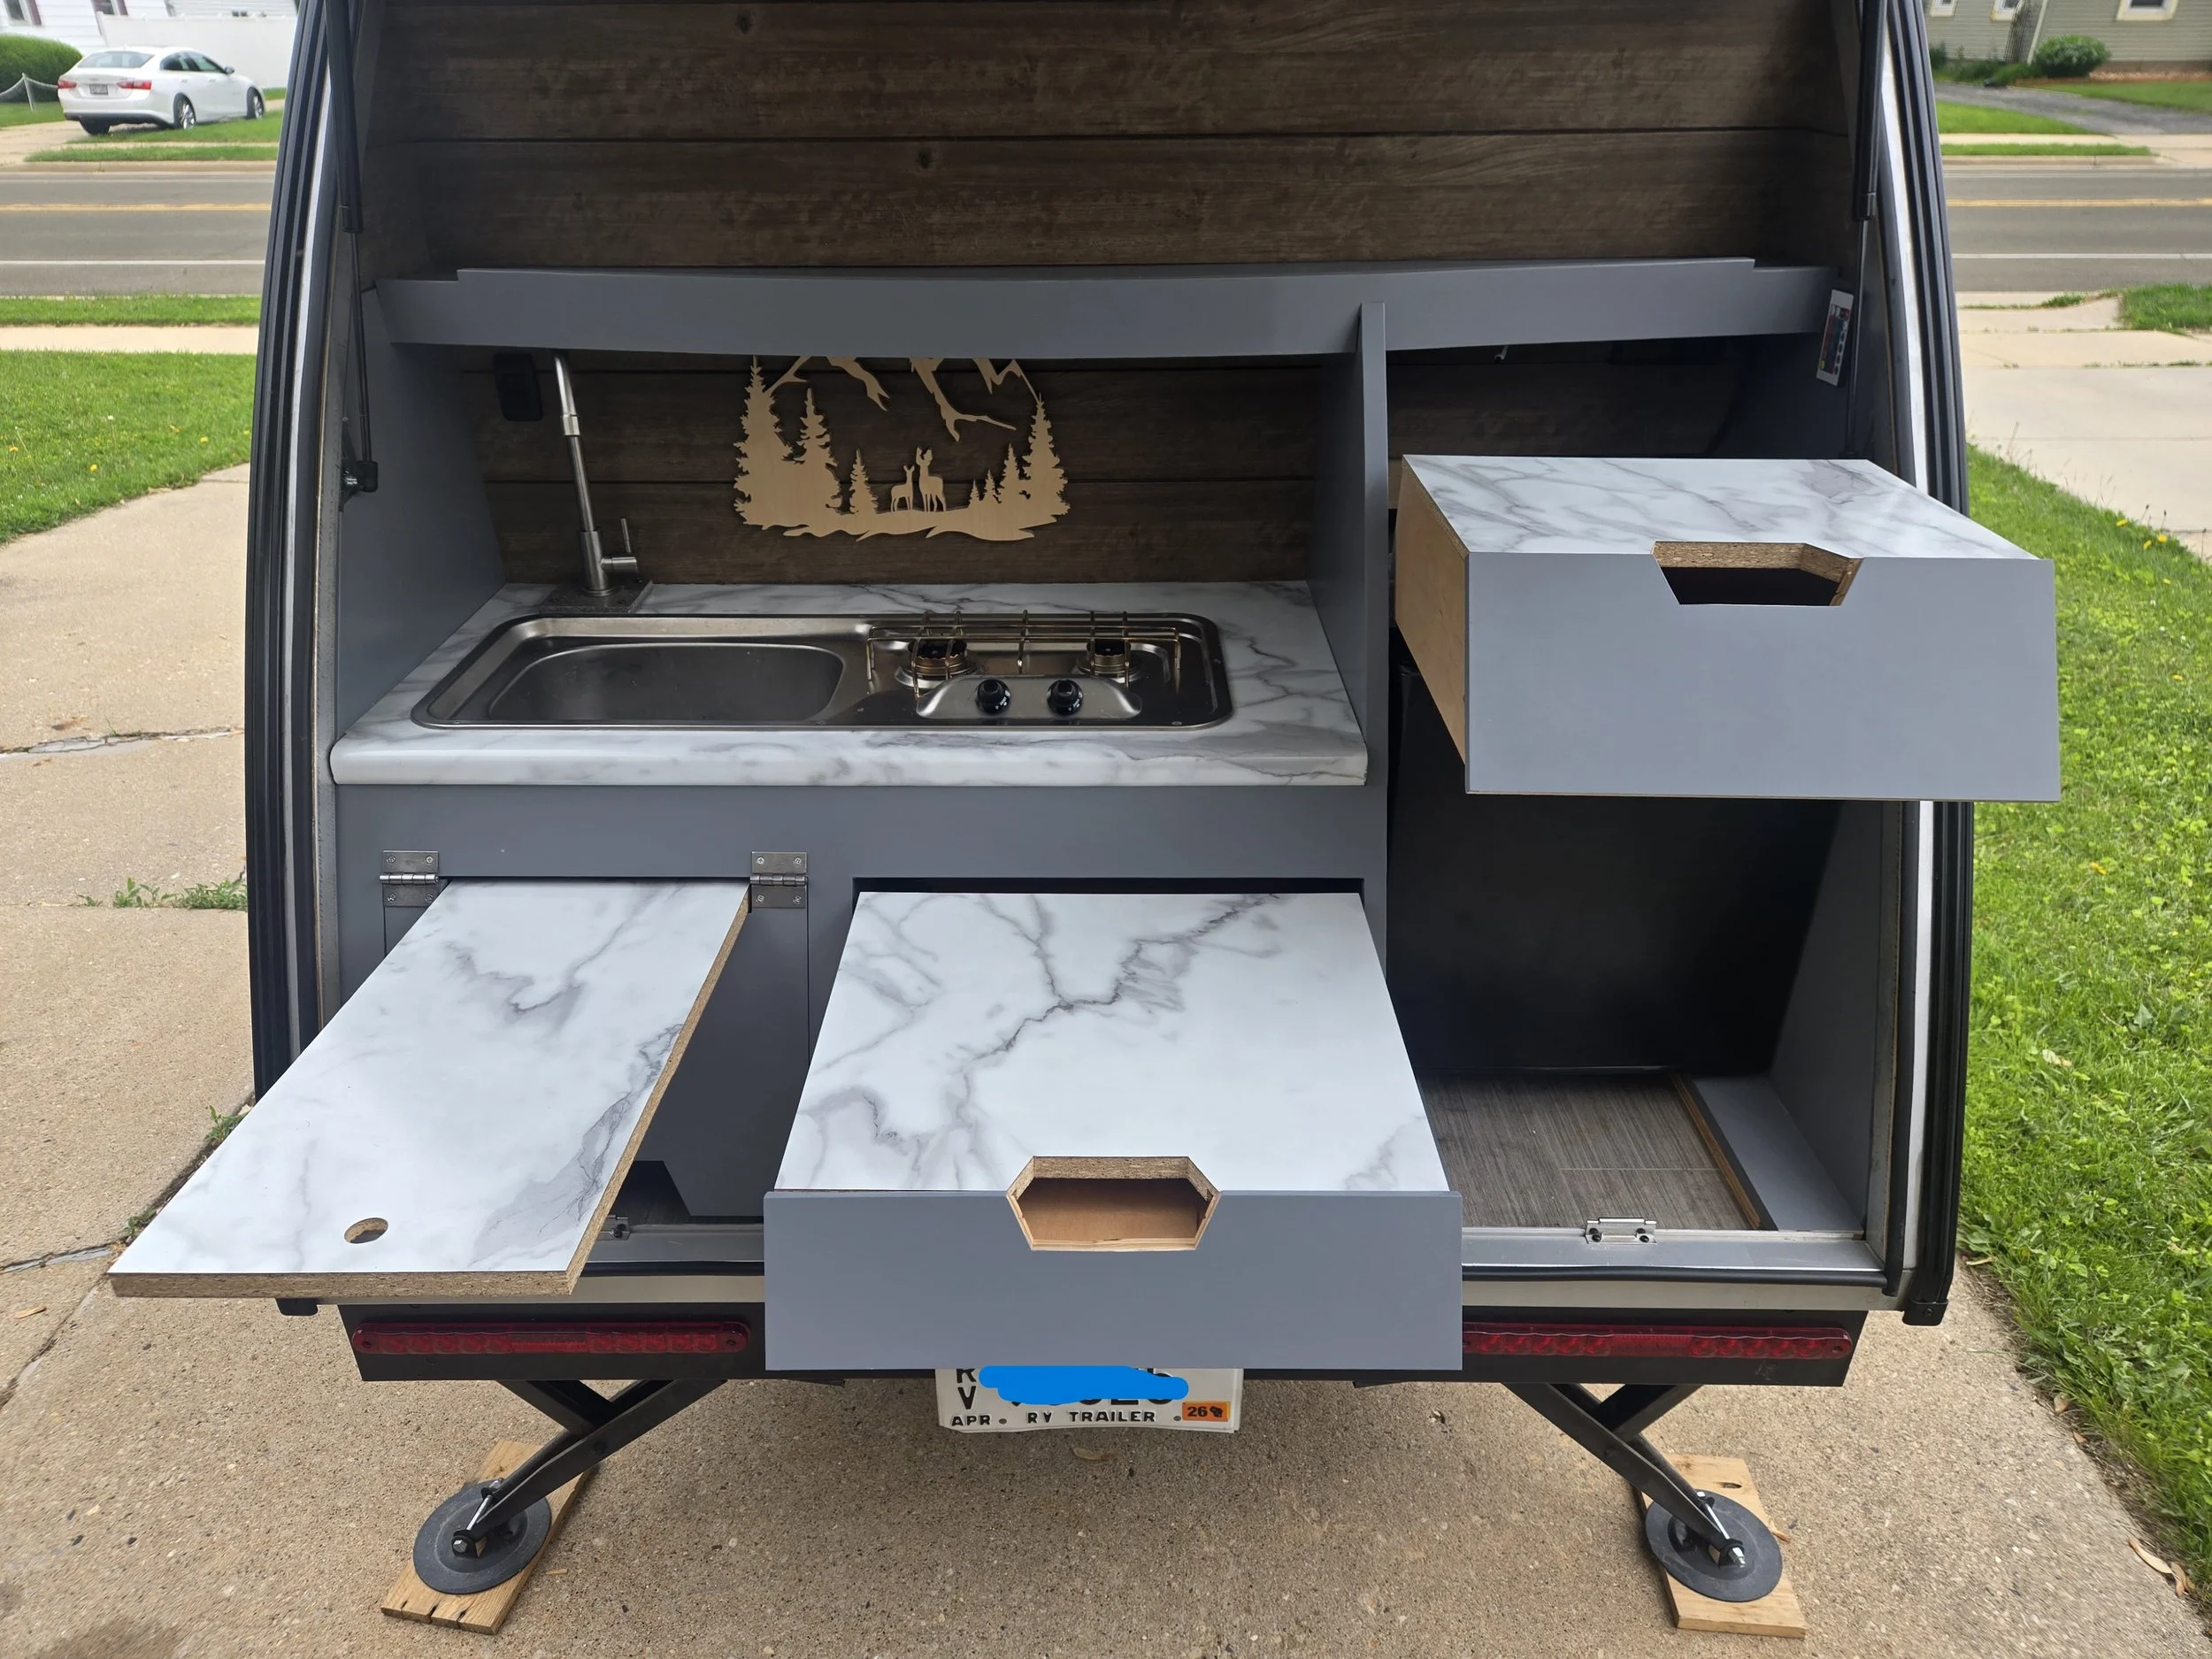
This is how the trailer was delivered to me. It was cheap, boring, and inefficient. And although I may be cheap and boring, I am definitely not inefficient. Instead of all the wasted space at the front of the cabinet I decided I would make curved cabinets that could fill all of the space in the back supplemented by some pull out countertops.
Make It Fit

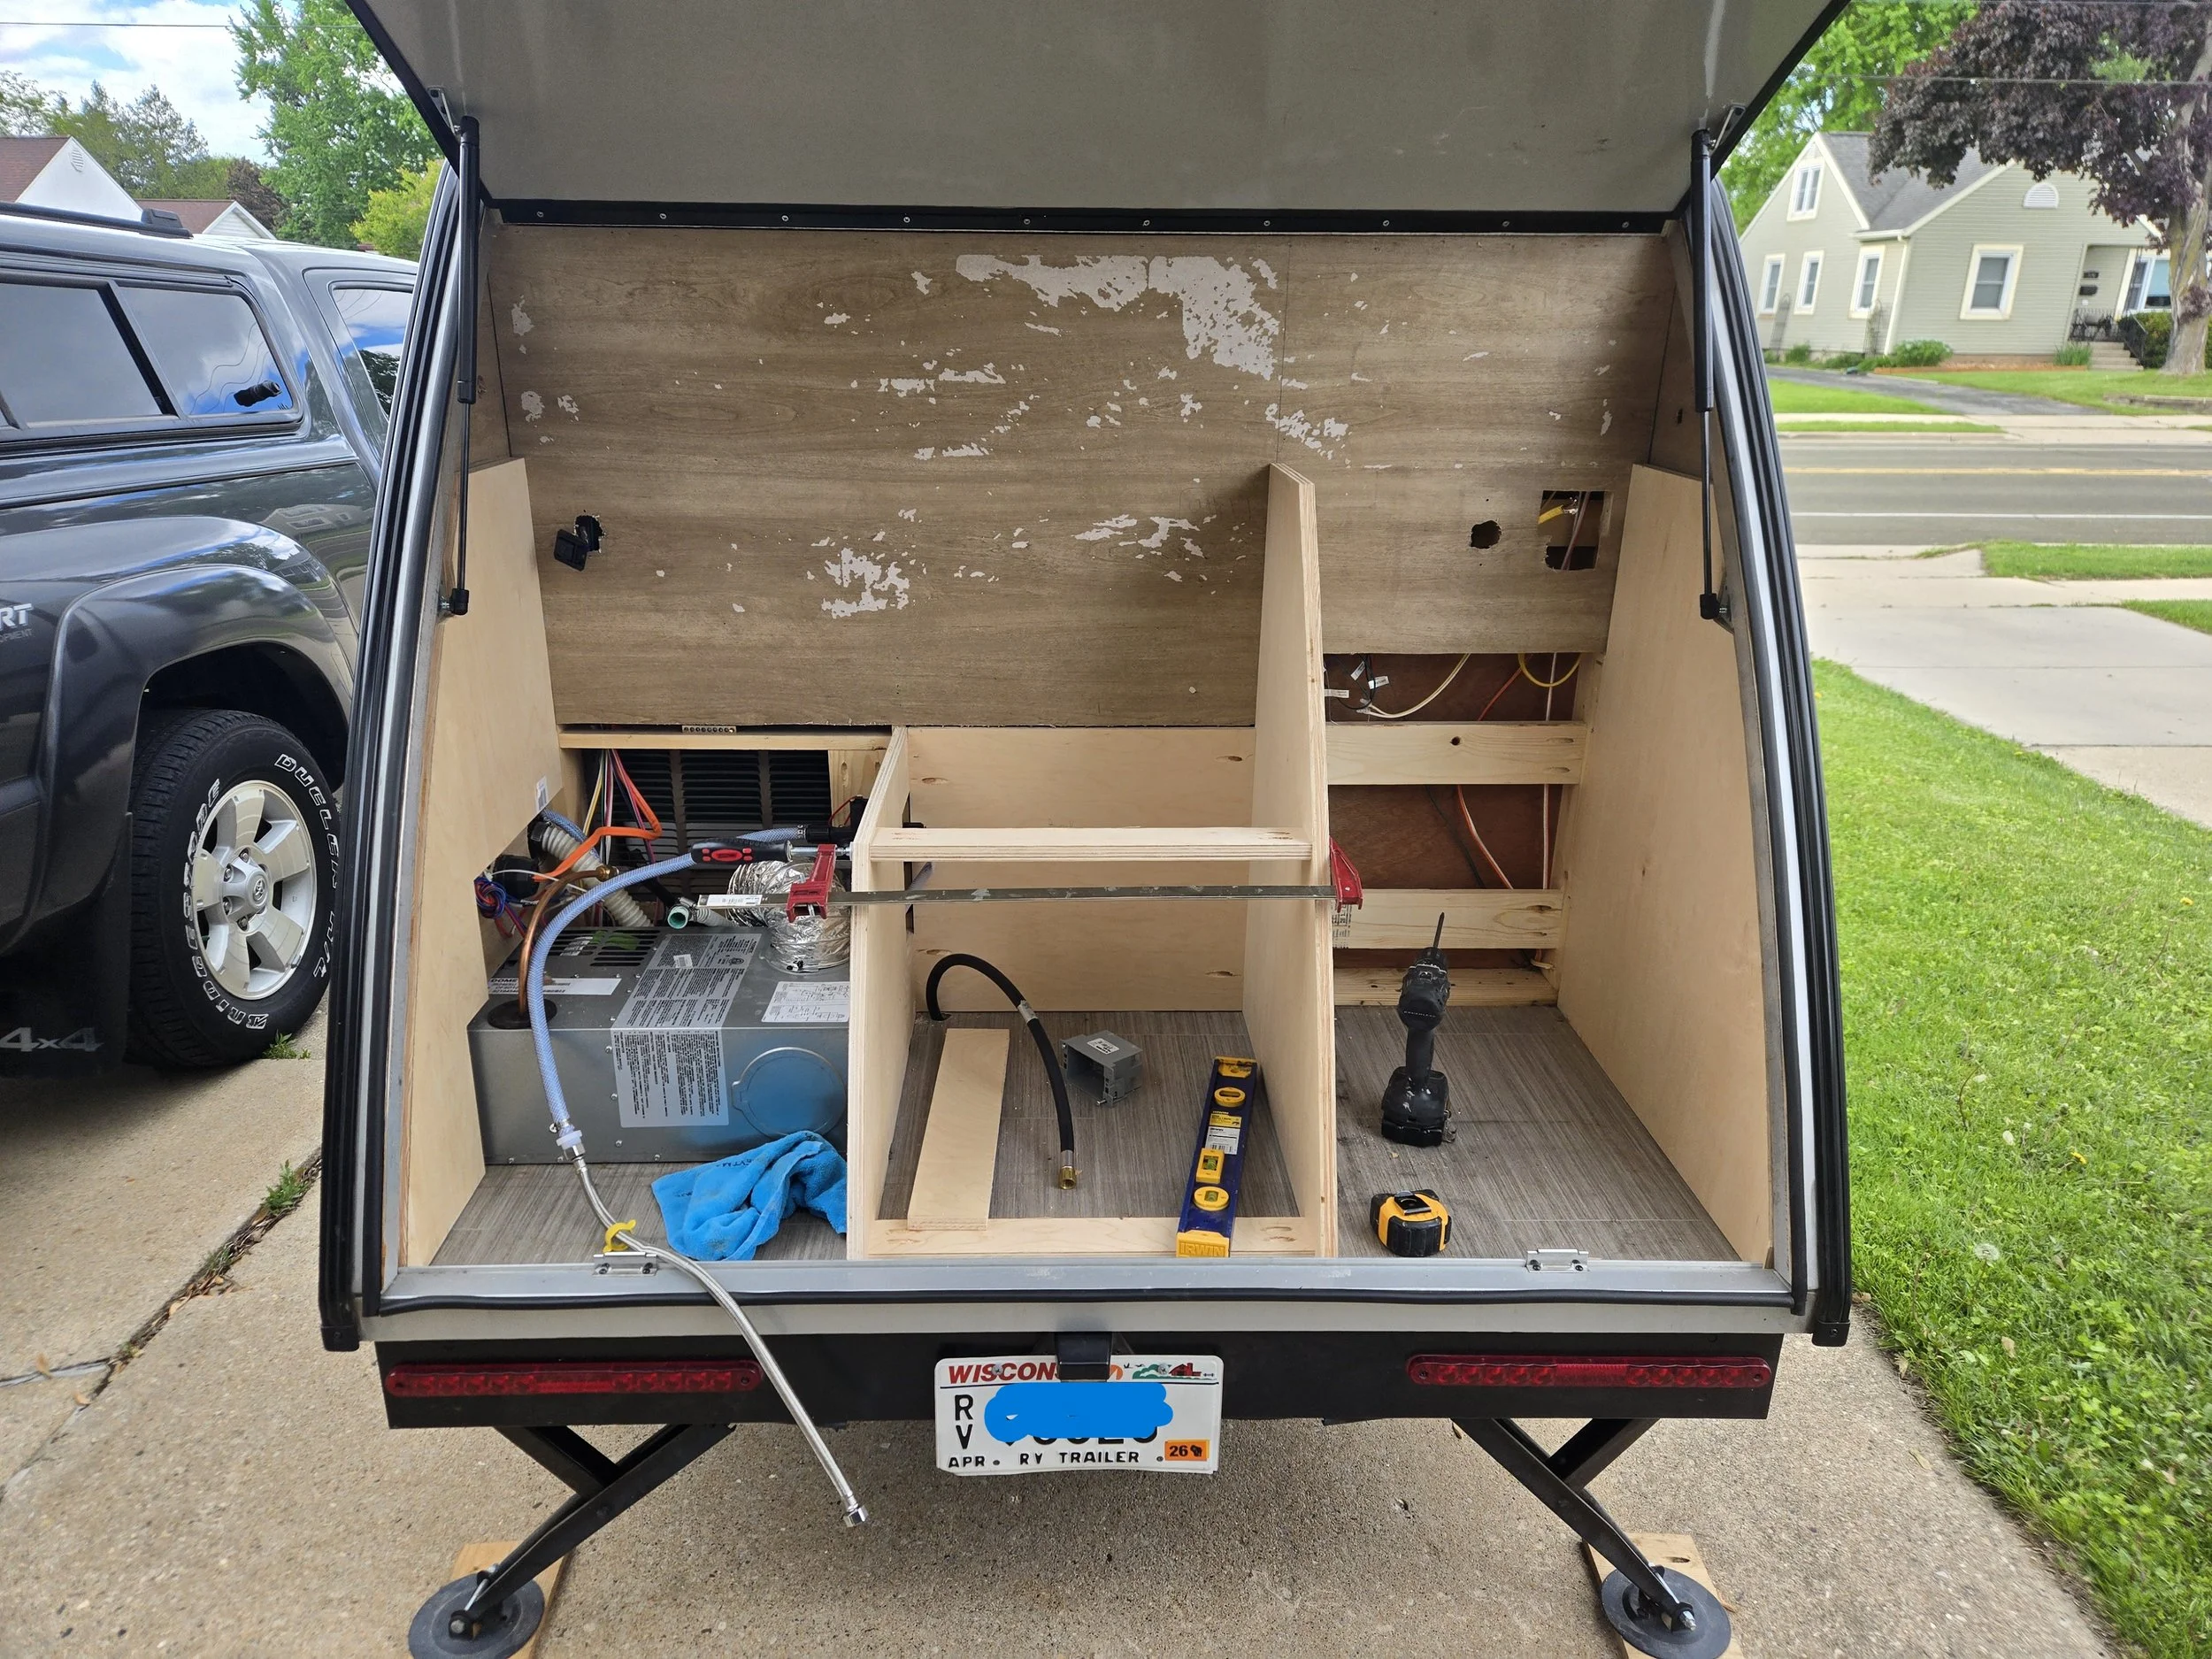
The first thing I did was make more usable space by moving the water pump that was once on the floor to the wall above the heater. Then I put some blocking in the wall bay so that I could slide the fridge into the wall to make it fit, but not so that it was going to crash through the thin wall during a hard stop when that suicidal deer walks in front of traffic.
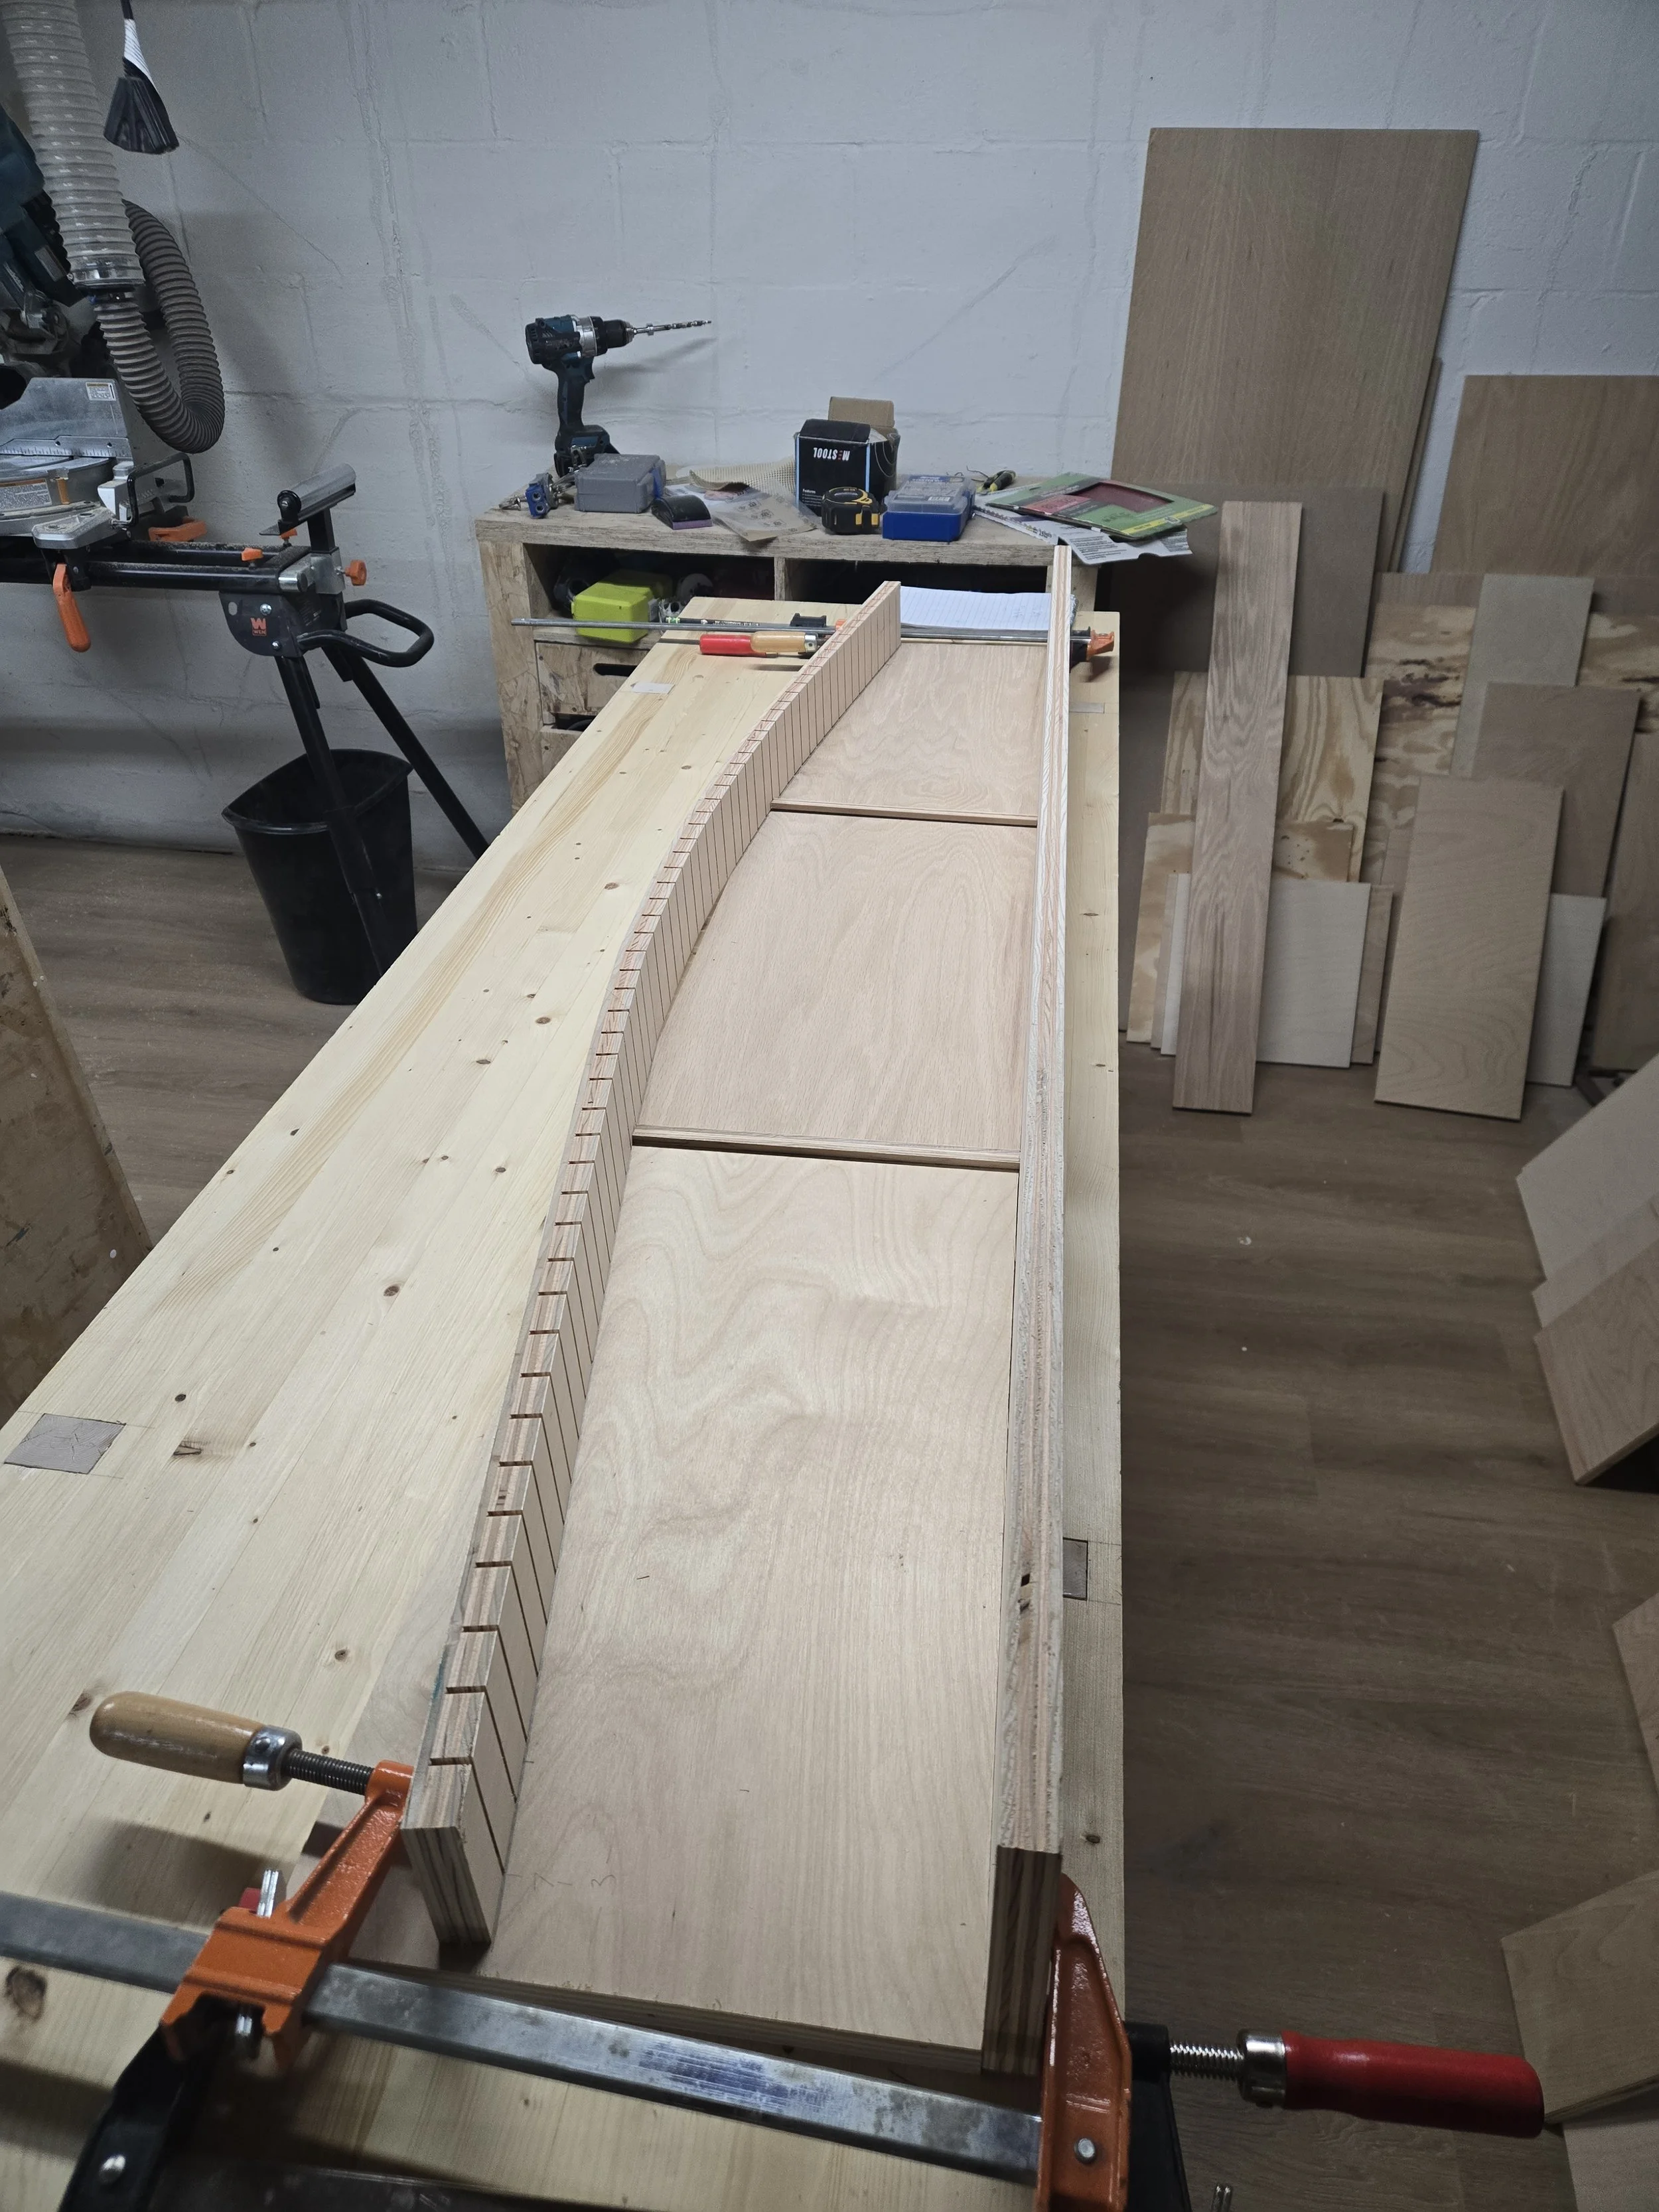
In order to make the cabinet sides I traced the curvature of the sides onto a piece of cardboard and then traced that onto 3/4” plywood. I used pocket screws to attach them to the framing in the trailer and also to attach stretchers to connect the sides together.
To make the cabinet and drawer fronts, shelf, and door I used a process called kerf cutting. This involves making a bunch of sawblade cuts into the plywood so that it will bend. I made my cuts every 1” and they went deep enough so that I left about 1/8” material on the face. These cuts were deep enough to get the job done, but not deep enough to do any permanent damage. Once everything is nailed and glued, the wood will hold the bend.


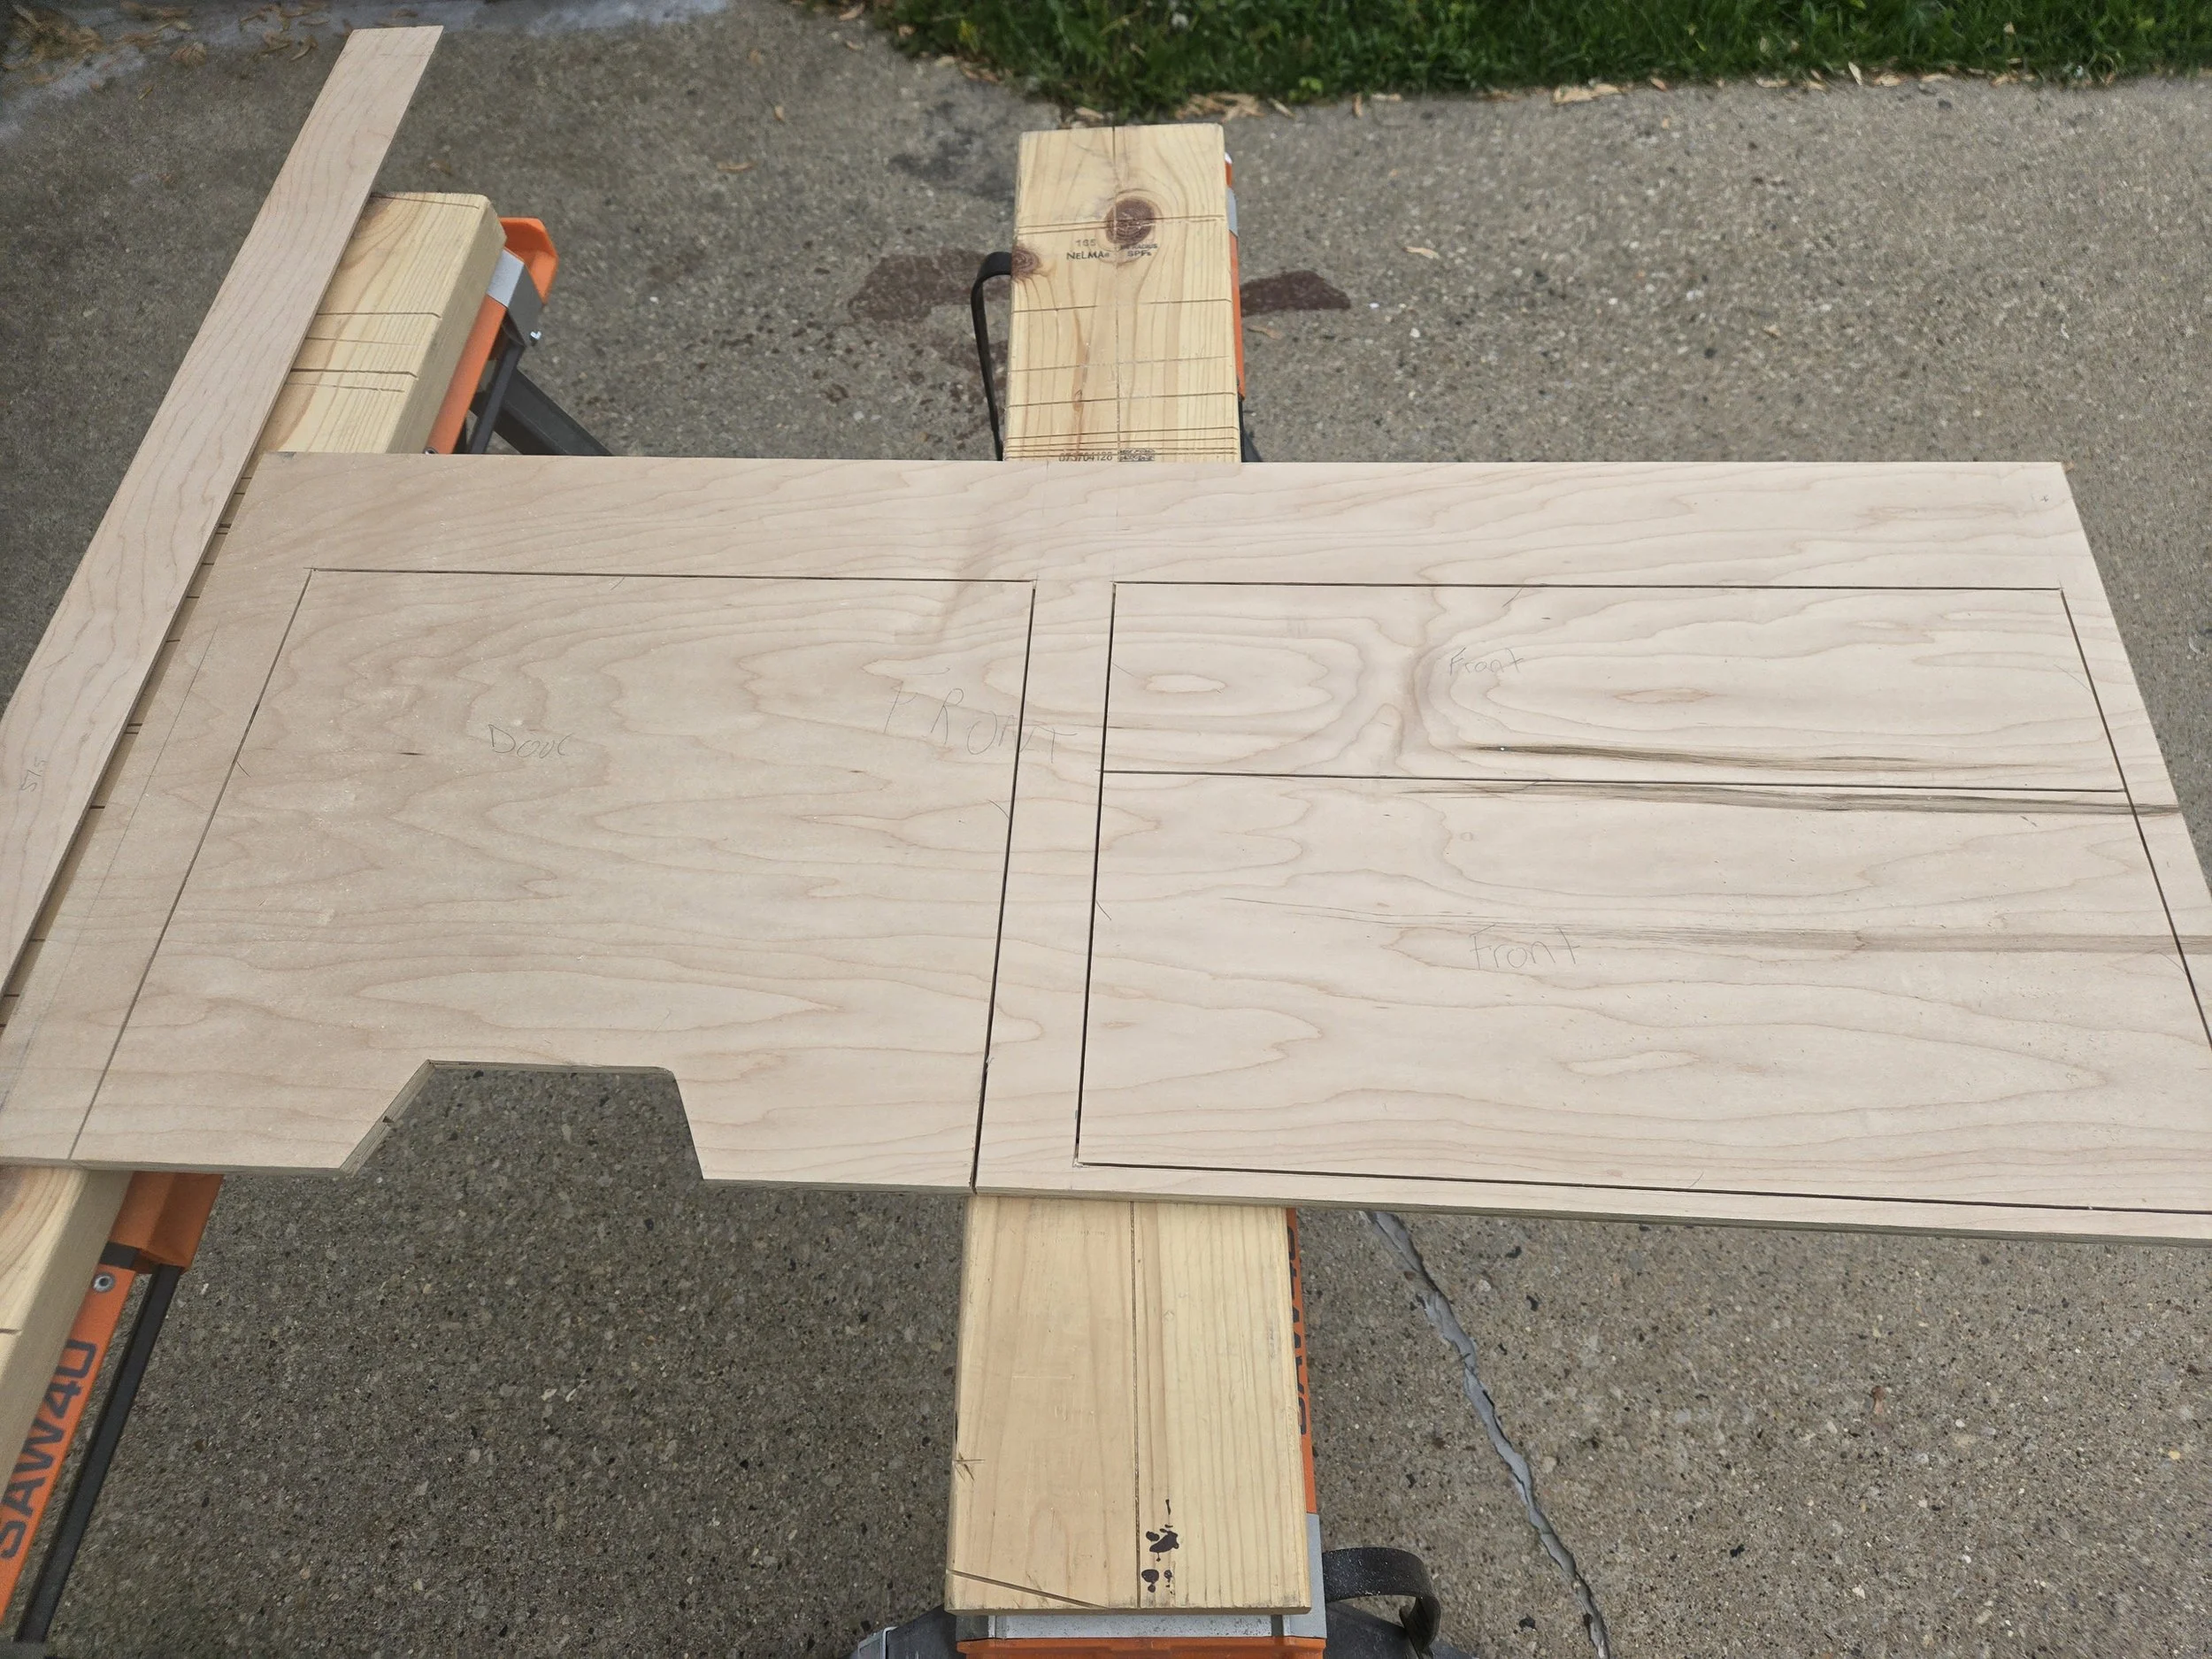
To make the cabinet front facing parts I cut one panel that would cover the entirety of the cabinets. I then kerf cut that piece before using a track saw to cut out all my door and drawer fronts.

As everything was going to be painted I glued and nailed my pieces and then filled in the nail holes.
Pro Tip: If you royally fuck up a previous project and then have a ton of expensive cabinet paint left over try, to convince your client that same color just so happens to be the perfect match.
Pulling Out

When someone gives you creative authority it is important to not waste the opportunity to get weird with things and experiment. The goal was to create more countertop area for a very limited space. In order to accomplish this, I stole a concept from some truck bed drawers that I built a few years ago. I made drawer lids out of countertops to give this camper a strong pull out game.
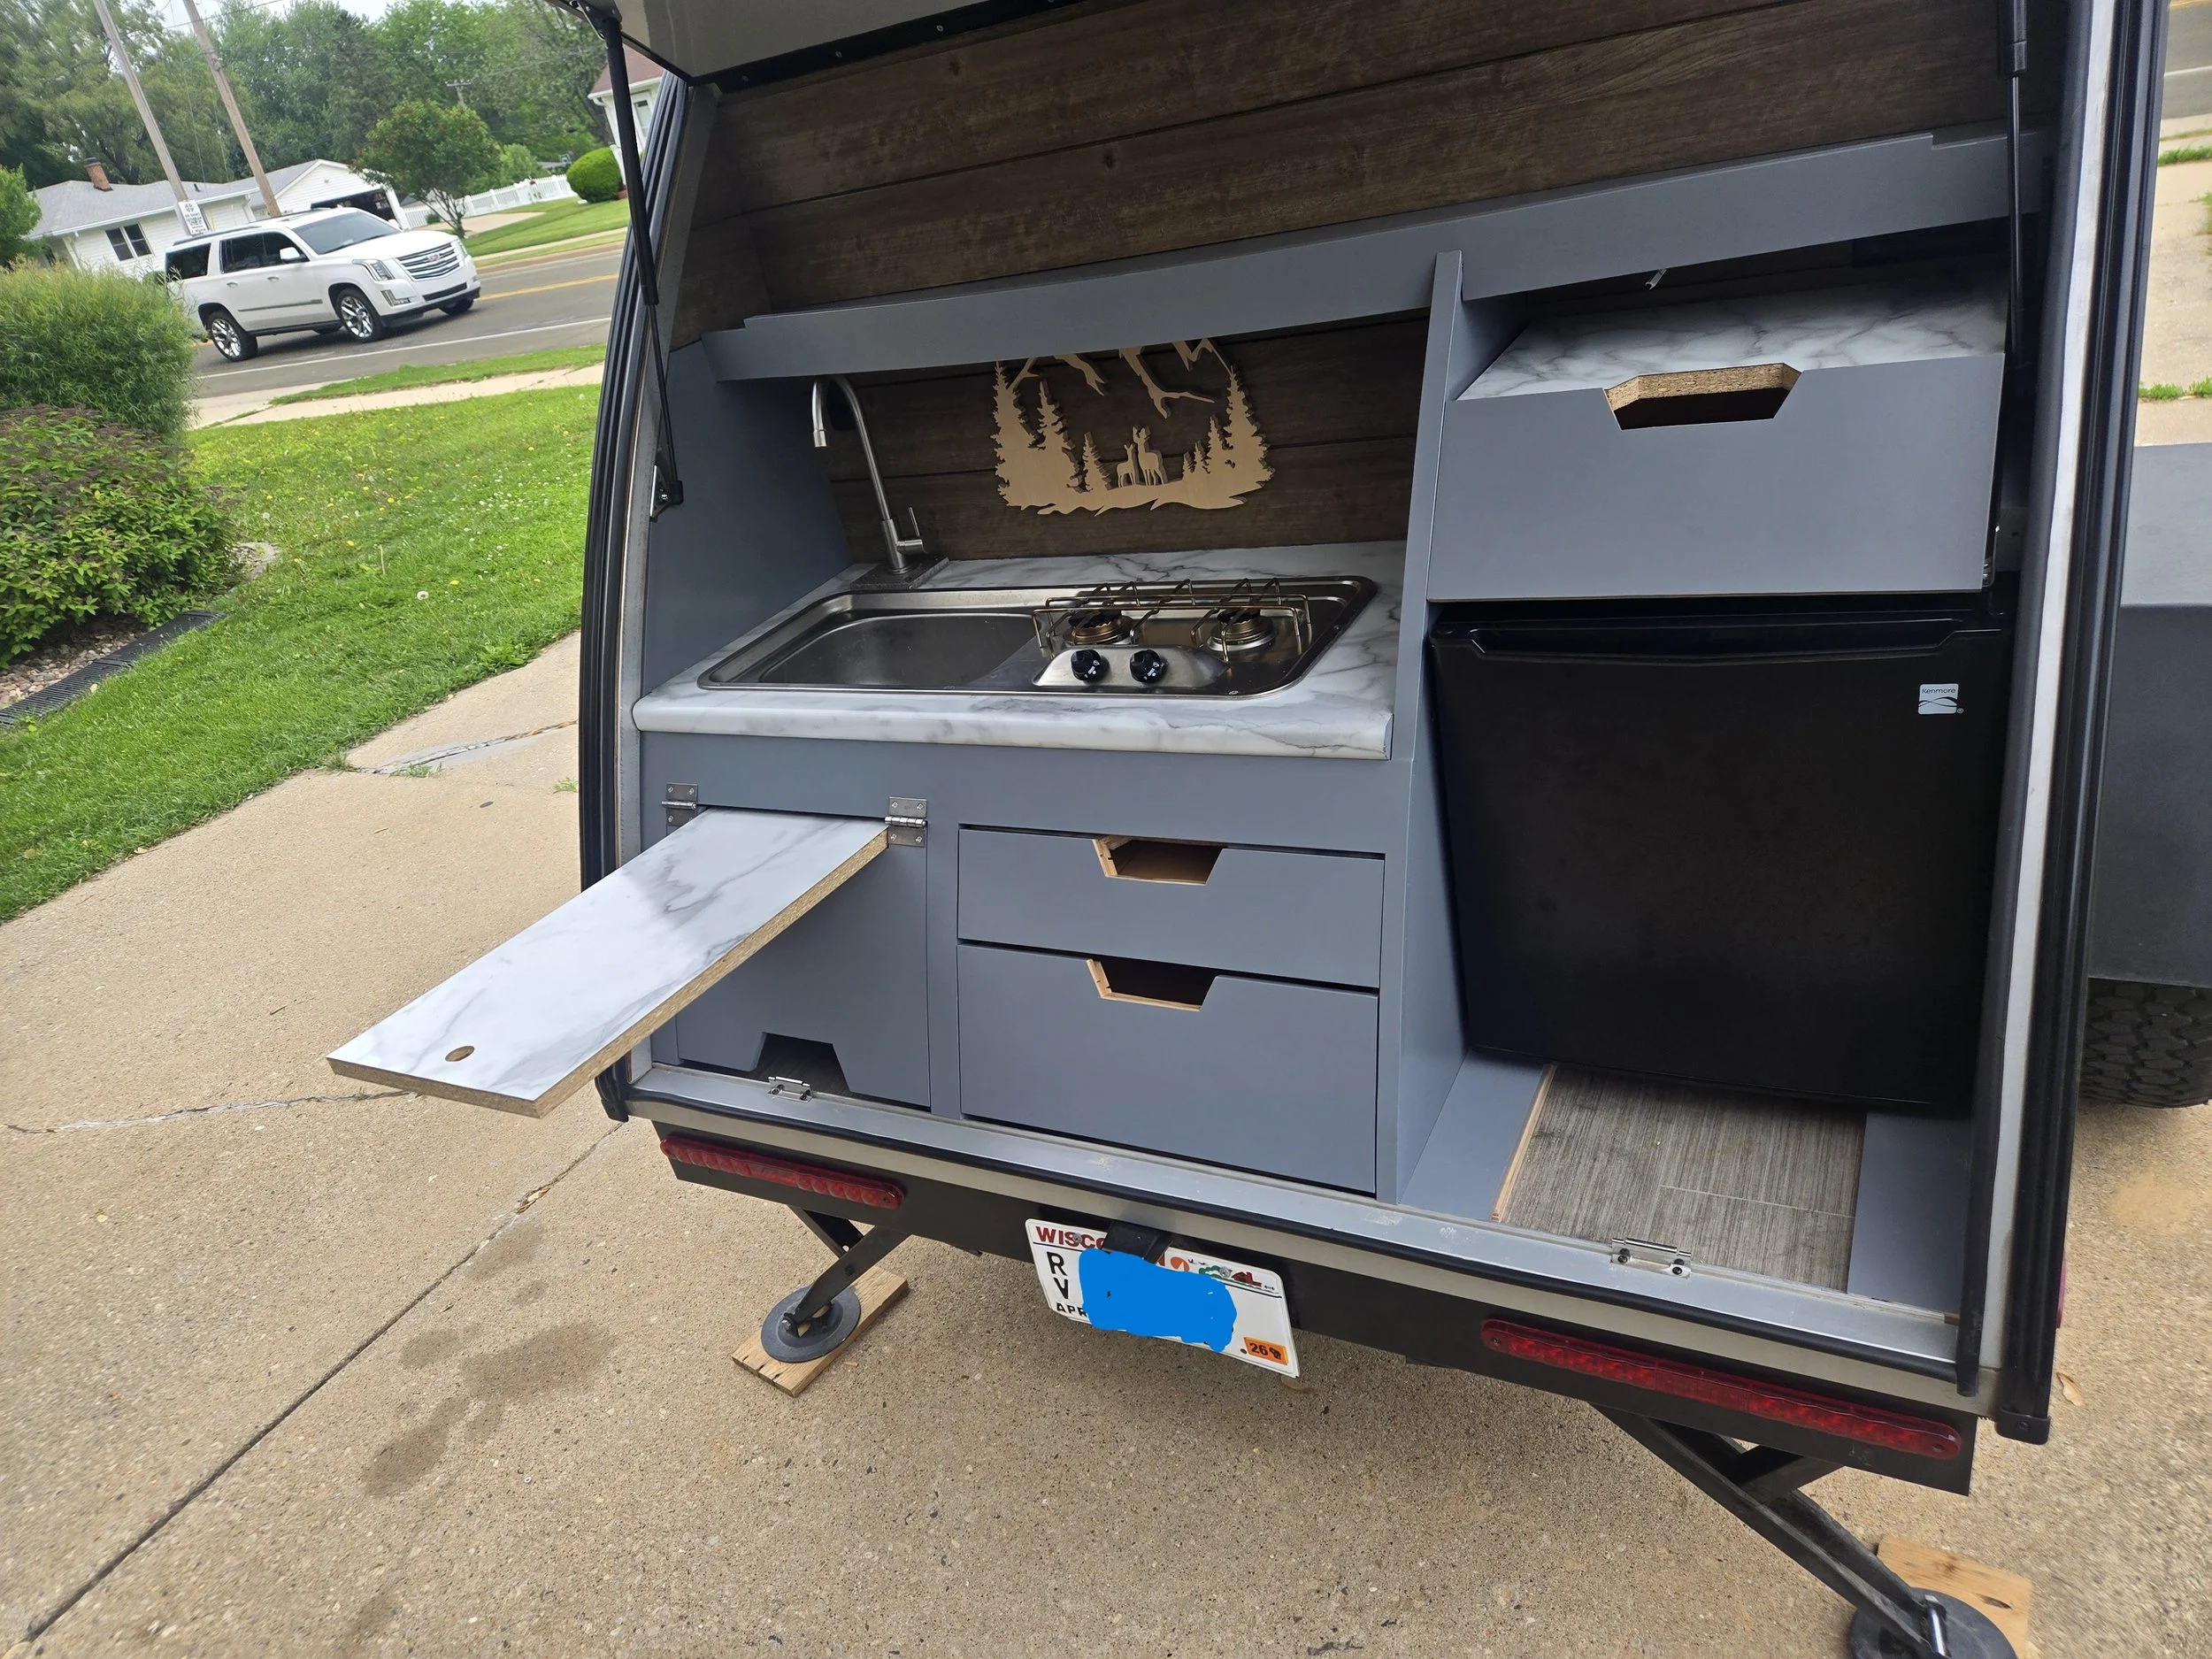
Even so I was still left unsatisfied. That was until I cut an opening in the countertop for the sink and stove combo. As I stared at the cut out piece sitting on top of my trash pile I had the realization that maybe this piece, like myself, is not trash after all. Maybe it can serve a purpose.
So I rigged up a cleat system underneath the countertop that I could slide this cutout into and it would serve as another countertop. I also had to cut a decorative notch in the door to make this happen. This piece slides underneath the fridge when not in use. The cleat and the door both help support the countertop and it was surprisingly sturdy.
cabinets with benefits
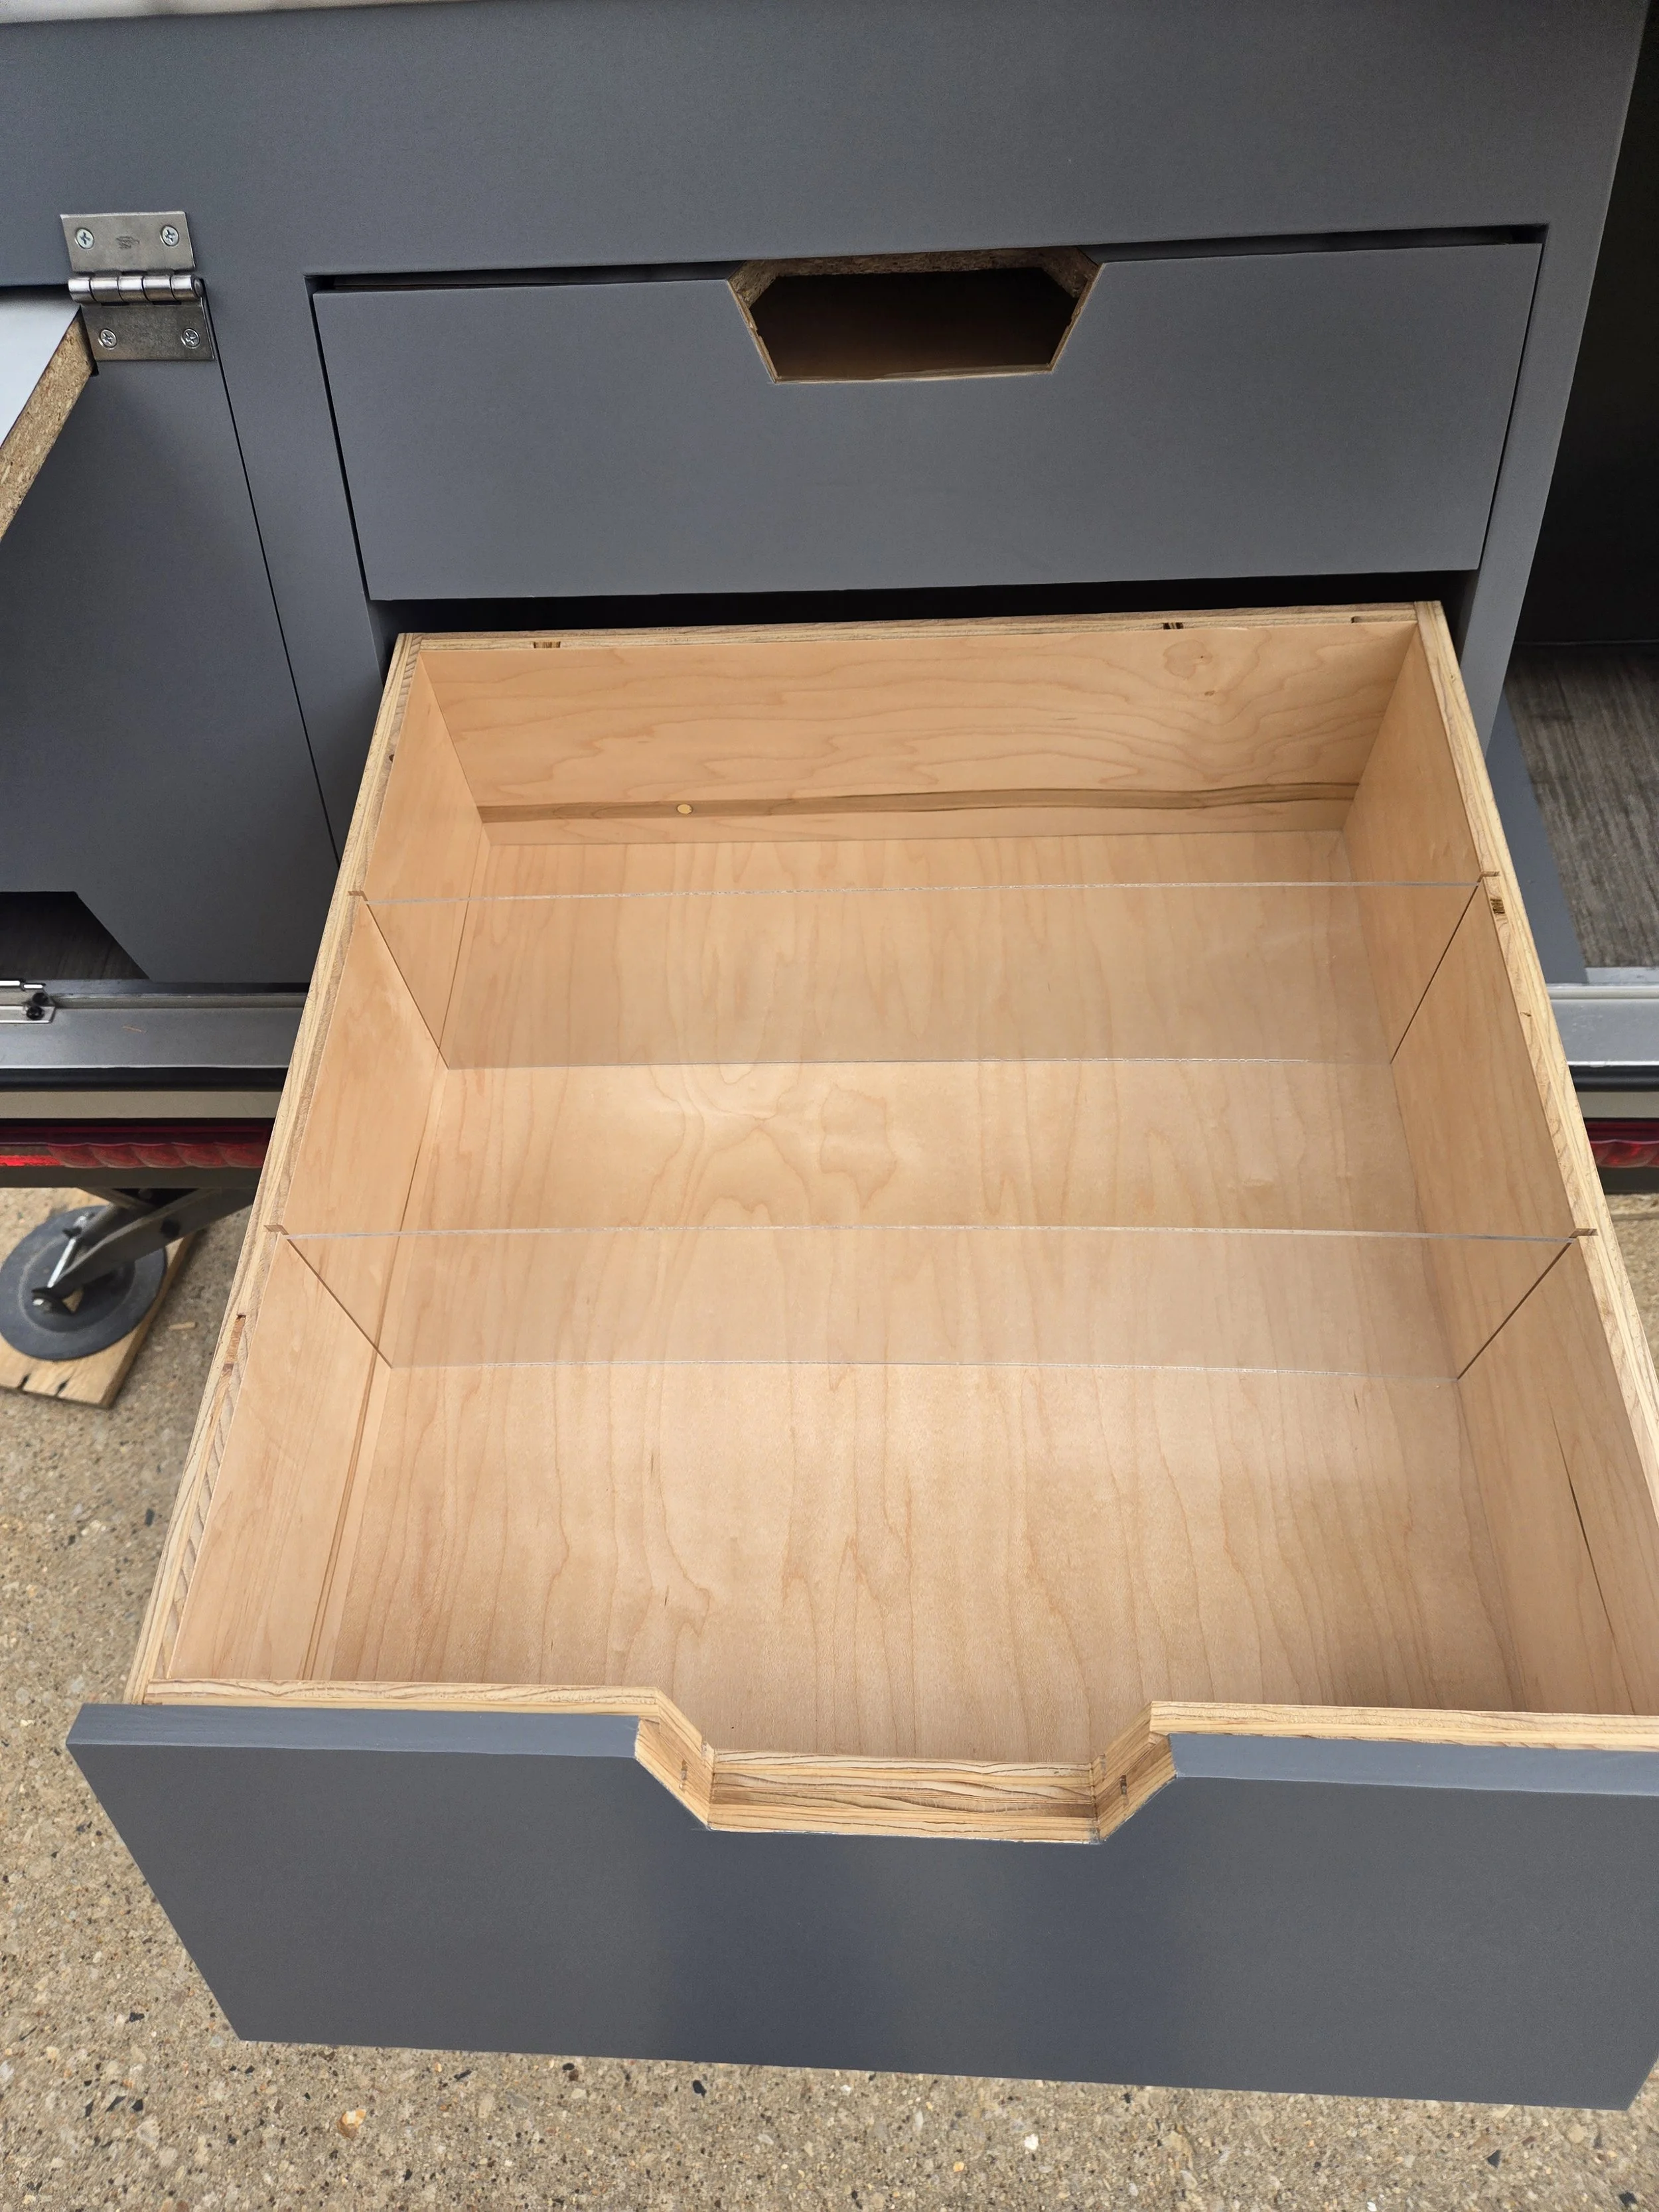
In case the main event wasn’t enough, which it rarely is in my case, I decided to throw in some bonus features. Again stealing from my truck bed drawers, I decided to add some removable plexiglass dividers to the drawers. This was easy to do and can really help organize the small things.

Above the fridge I replaced the old outlet with one that has USB charging ports. I also added LED lights under the shelf as well as a power strip mounted out of sight. The LED lights change colors and flash and do fancy stuff that I figured the owner would appreciate.
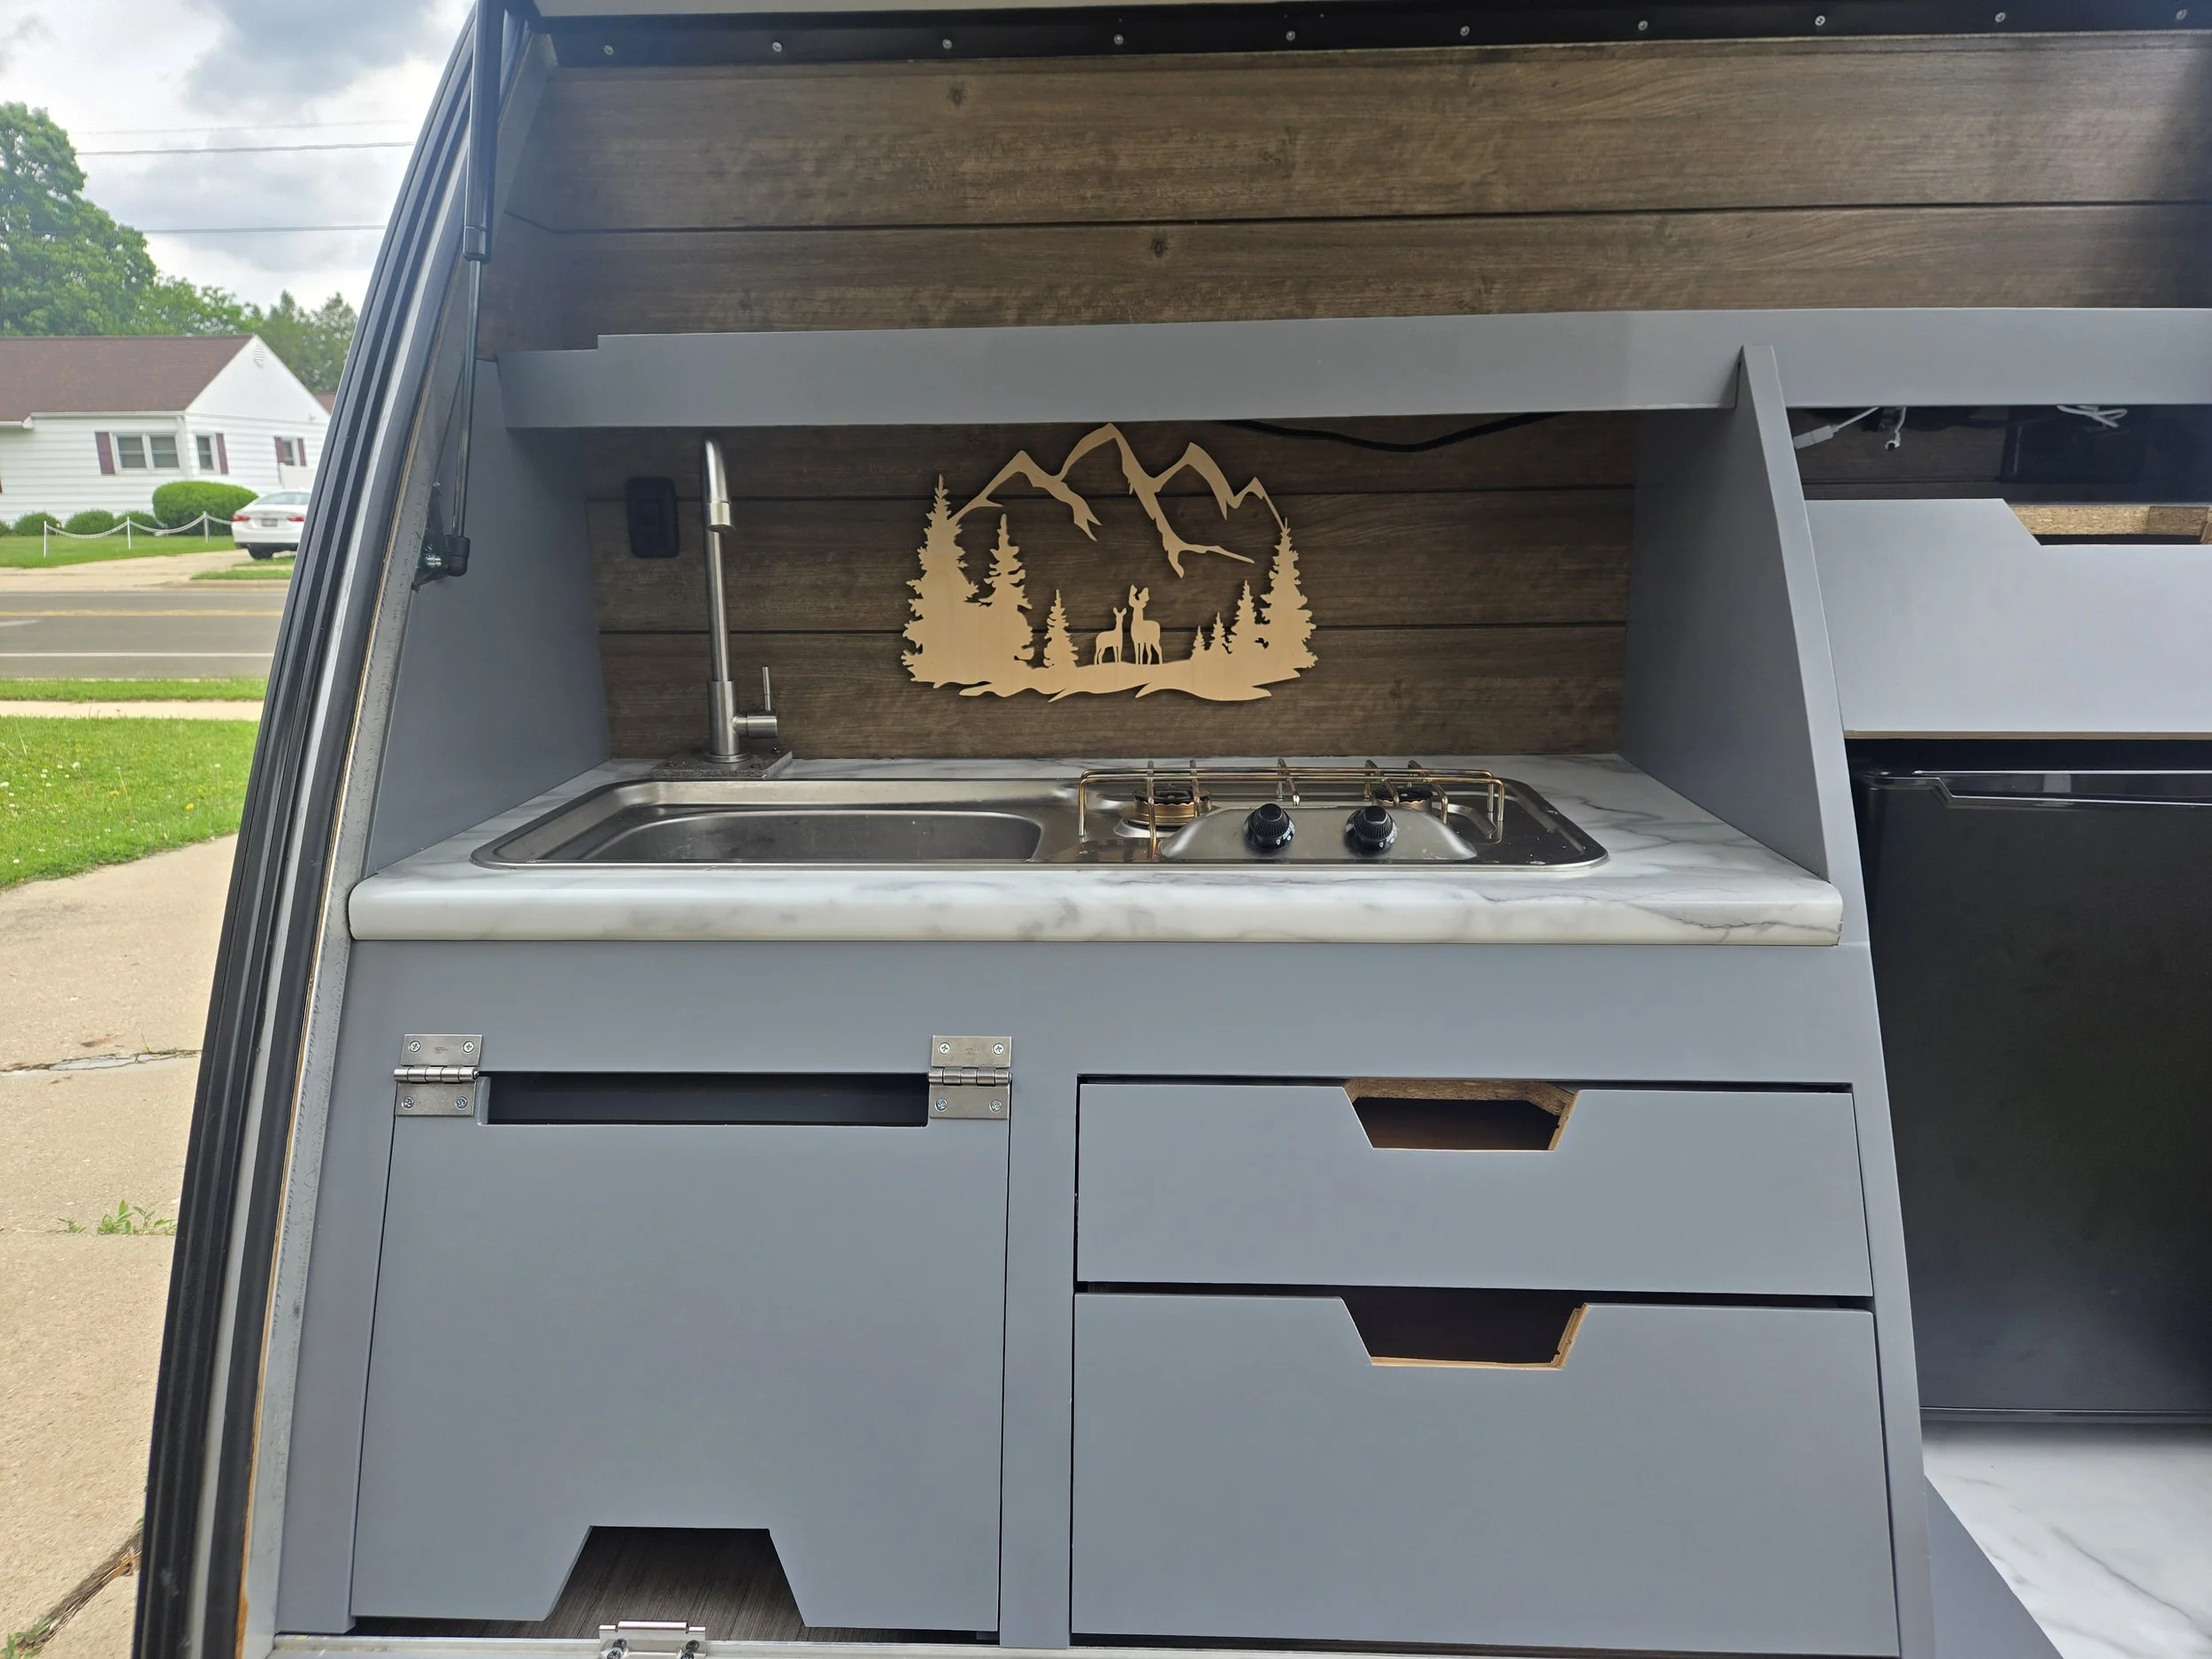
I installed shiplap on the walls and thought I was finished. But it was the evening before the owner was coming to pick this up and I just had the feeling that something was missing. I couldn’t tell if I was reflecting on my life or this camper but then it hit me: it needed some artwork. So I spent the next several hours making a scroll saw piece for above the sink. I worked on it until about 1AM fueled by large amounts of caffeine and angst. And it was totally worth it.
All said and done it was fun project for me. From what I hear the owner is also enjoying it maybe as much. But I never can really tell if the other person is enjoying it as much as me or they are faking it. Either way, I finished and I’m proud of myself.