
Cherry-Face: Not Canceled Yet
turn boring into full blown alcoholism for zero dollars. let’s talk about kitchen cart remodels, relationships, and how to make maple look like cherry.

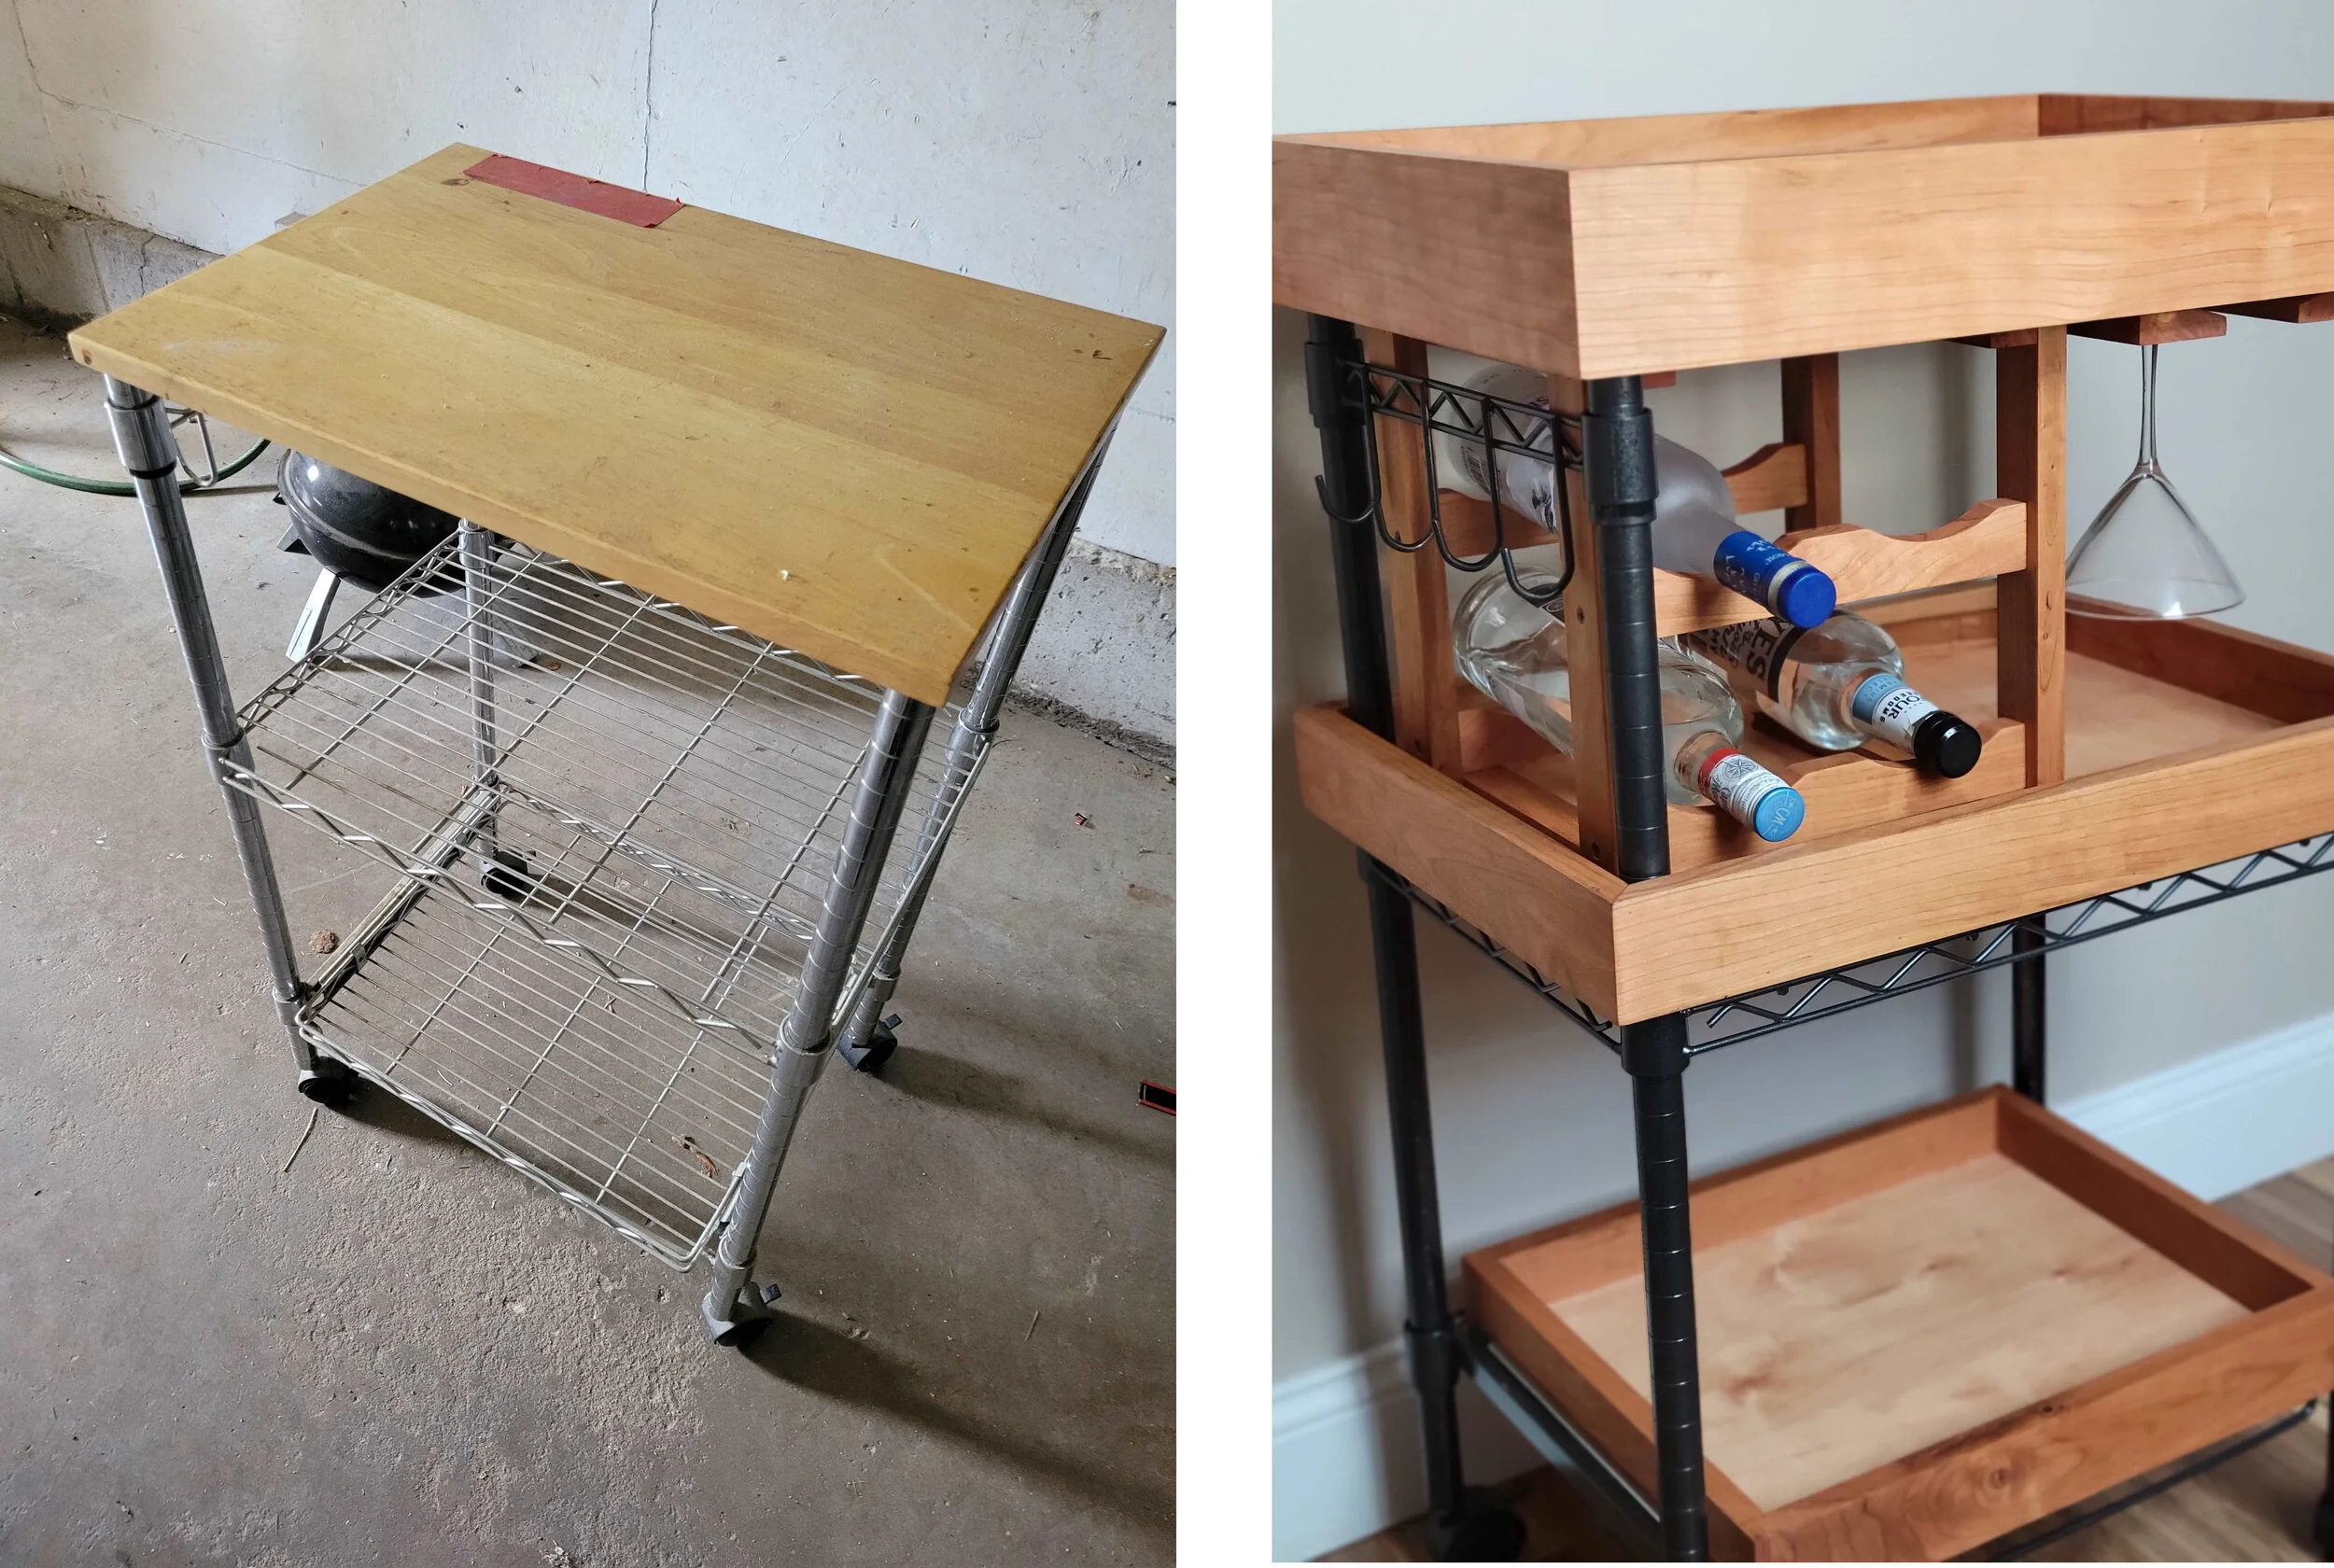
I’ve had this kitchen cart with me for years. Like myself, it’s pretty unimpressive which is why we get along so well. However, I had been planning to move and I felt I our time was coming to an end. So I was going to end our relationship like all my other ones and kick it to the curb.
Then came one of my many existential crises and plans changed. I decided that instead of trying to figure out my life plan, I’d distract myself and make this cart into a bar cart. And then use it to avoid making life decisions forever.

A bar on wheels means you can bring the bar to you.
Break It Down

The first step in anything I do is to make things worse. I started by taking the top shelf off as well as the bottom drawer. I kept all the hardware to use later. I then used my angle grinder to cut out the middle shelf while I only slightly hoped the sparks didn’t ignite the piles of sawdust around me.
Once all this was done I gave the cart a romantic sponge bath. Per usual it wasn’t reciprocated.
having fun with the scraps
I didn’t want to put any money into this project. I also had bins full of scrap wood that I needed to get rid of. It just so happens I was flush with some nice cherry and maple plywood. I used the plywood for the the shelves and drawer bottom. The cherry became the sides, wine rack, and glass holder. I was able to make the two different woods match pretty closely which I’ll get to later.


I cut notches in the middle shelf for the cart posts. I planned to make the sides wrap around the posts. Because of the joinery I was using, the shelf had to extend past the posts so that it would fit into groves that I would cut into the sides.
Screwing is for sinners

If you couldn’t tell by now, I am a very traditional-thinking person. And as such, I believe that quality woodworking should be abstinent from screwing of any kind. It’s just not classy. Almost all of my joinery involves glue and finish nails if needed.
I cut grooves into the bottom inside corners of all the side pieces. The official term for these grooves are called rabbets. They were the same depth as my shelf thickness.
I then cut miters on on each side piece so that they would make nice sharp corners. Unlike those butt joints. Butts are sloppy.
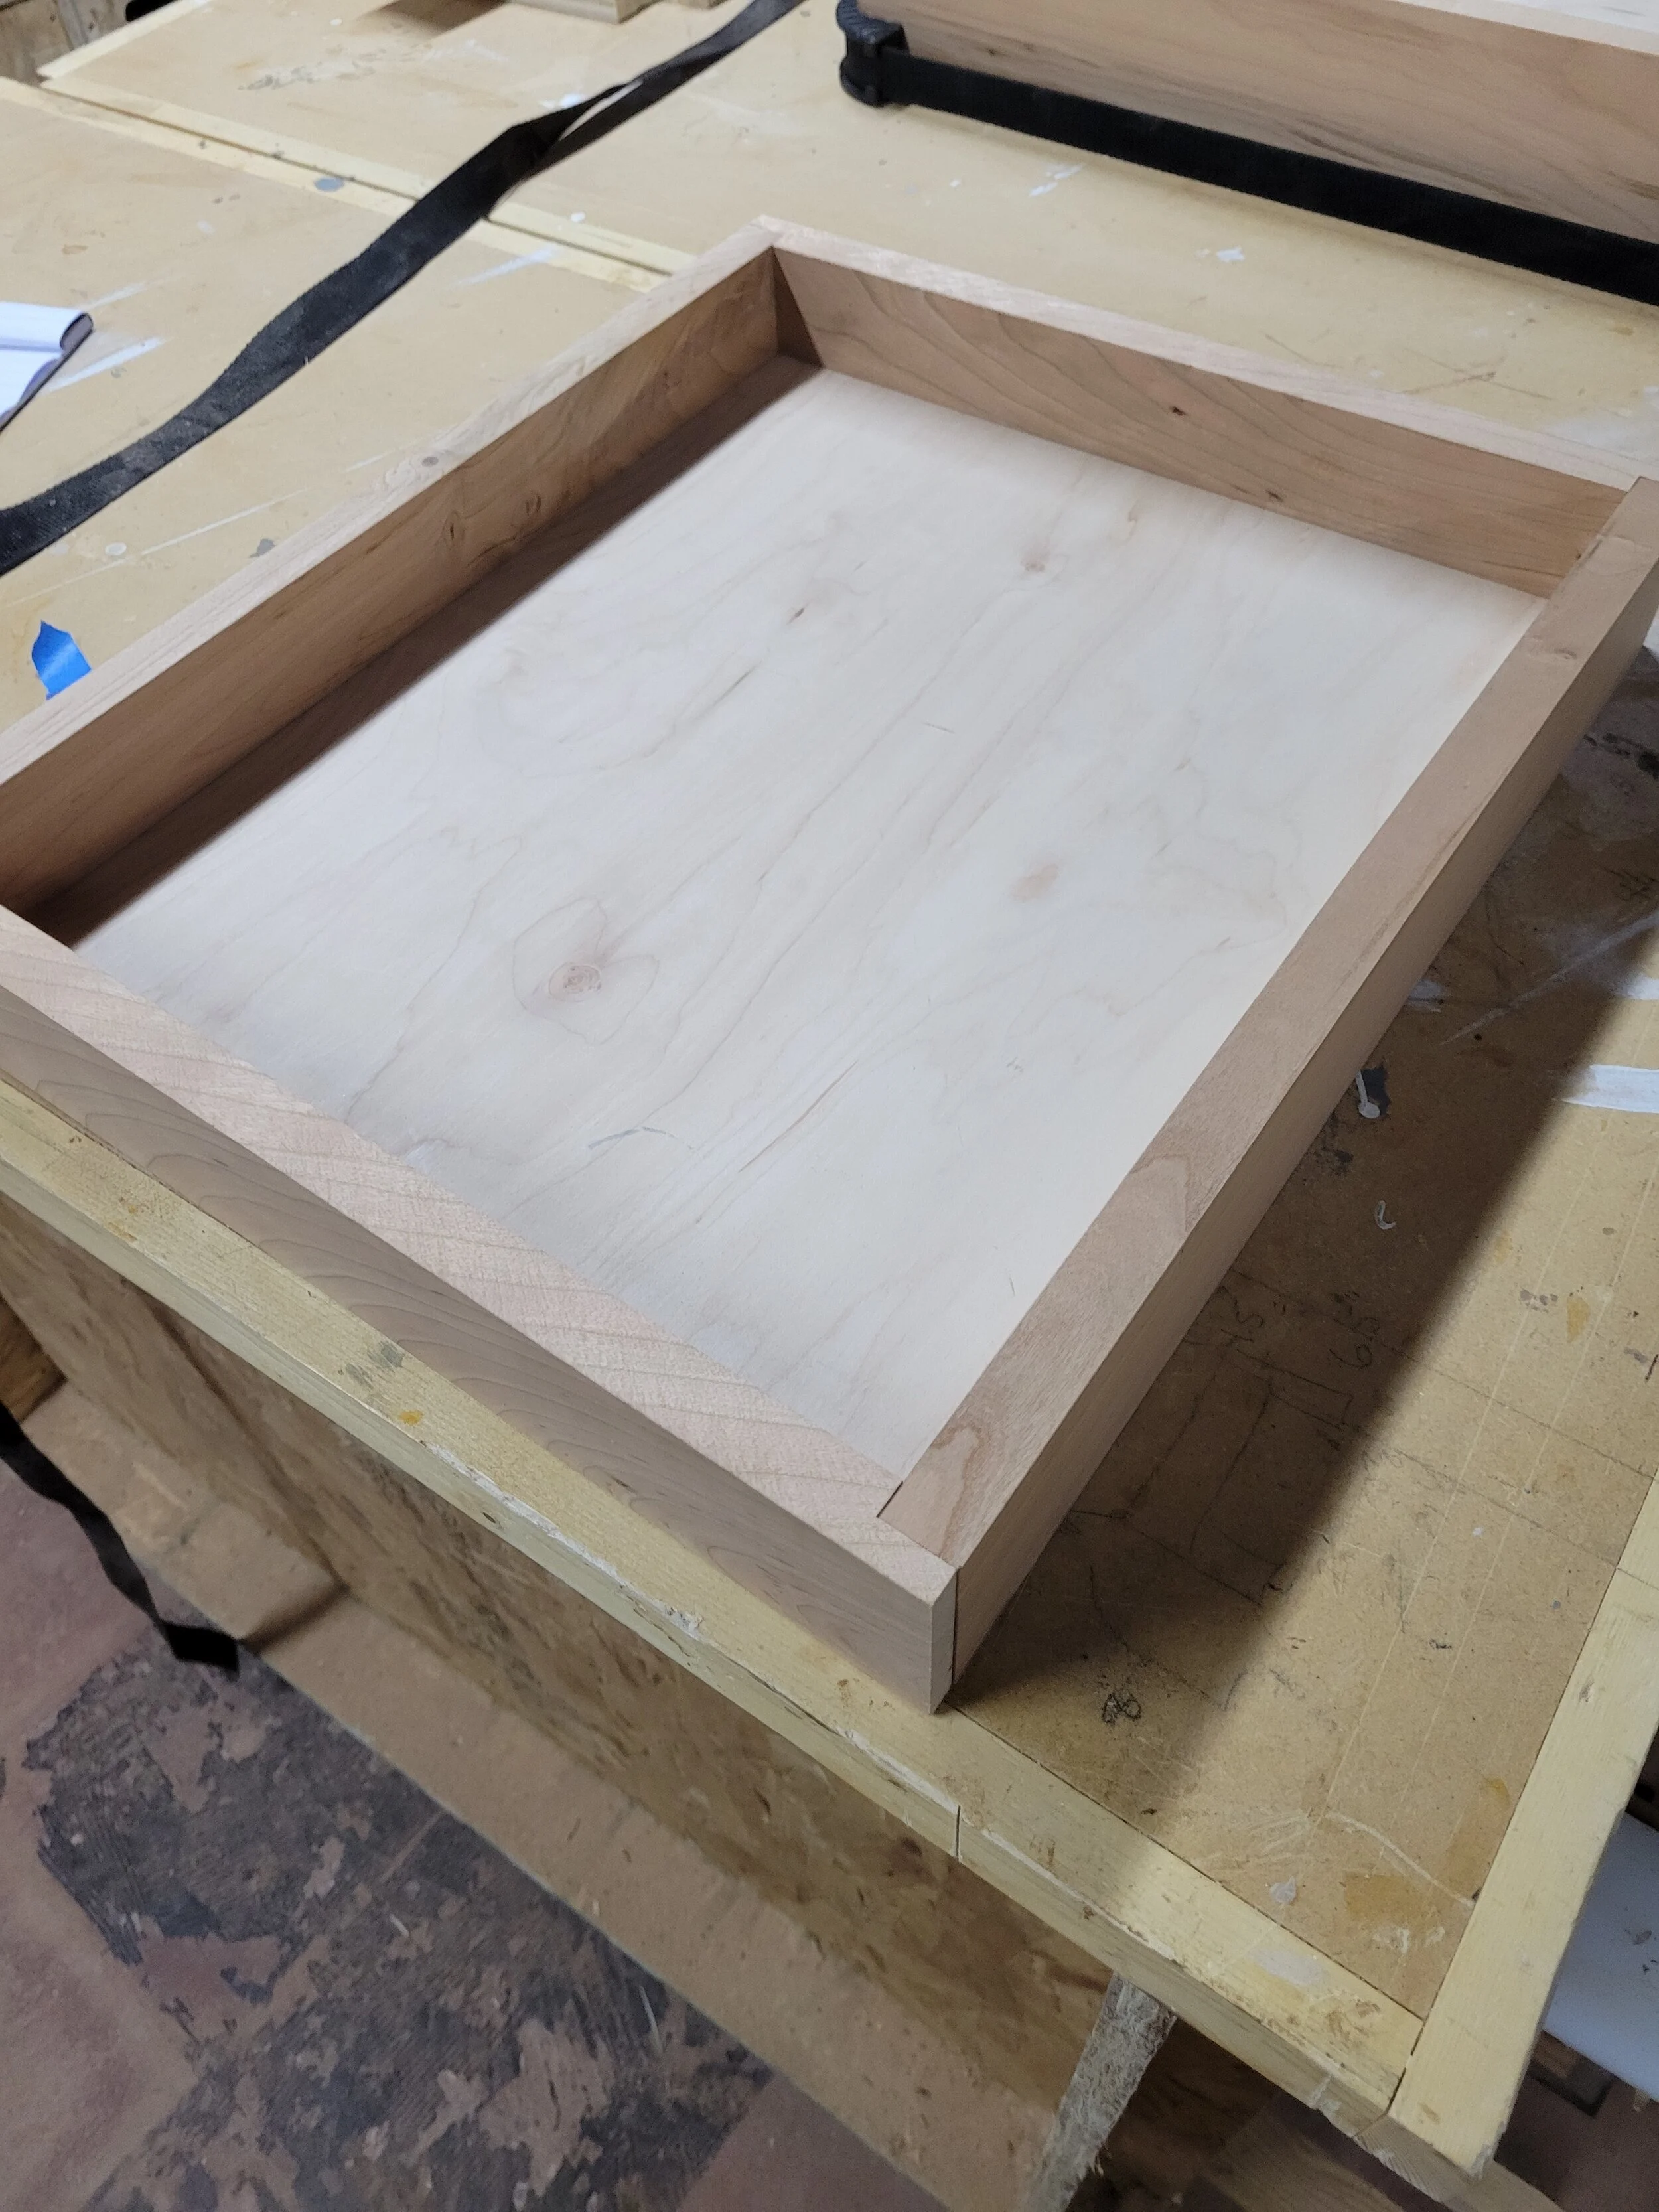
This picture is the drawer. The plywood sits into grooves I cut on the side pieces. Instead of miters this time, I cut rabbets into 2 of the side pieces. I did this because there is more surface area for the glue, making it a stronger joint. The drawer needs to be stronger since it’ll be pulled on. I also shot a couple nails into the joints for stability during the glue up.
Finishing doesn’t have to be the end
One of the most debated topics in woodworking revolves around glue ups. When you use wood glue correctly, you should get seepage (squeeze out) from the joint. This extra glue becomes a very annoying mess. When glue dries on bare wood, it creates a barrier to any stains or finishes which in turns create discolorations called glue marks. You can avoid this by sanding after you glue.
Some people like to immediately wipe the glue off with a wet rag. I find that this often just smears the glue around. Some people like to let the glue dry completely and chisel the dry glue off. I have a hard time doing most stuff, and that includes chiseling dry glue without accidentally gouging the wood.
My preference is waiting for the glue to get tacky so that it doesn’t spread around, and then using a dull chisel to get most of the glue off. I then sand and call it a day. This works well except when you have inside corners such as the inside of a drawer. It’s nearly impossible to sand all the way to a corner.
My method is to sand the insides and apply finish to all of my pieces before gluing up. I do this because glue doesn’t adhere to finish. Once I have the pieces clamped and the glue has squeezed out, I then remove it with a dull chisel and a wet rag to clean up. A bonus of this method is that if I miss some it won’t show up as a noticeable glue mark unless you really look closely. But I’ve been wrong about most things in my life, so I might be giving bad advice here.
Cherry-Facing
On the topic of bad advice.. Because I didn’t have cherry plywood I used maple scraps that I had. I also had on hand some Watco Danish Oil with a cherry tint to it. I am a big fan of Danish oil because it’s incredibly easy to apply. You just cut up your old Nickelback t-shirts into rags and wipe the finish on. This cherry tint has a red hue to it. After applying this to the maple, I thought the boards to be passable as cherry. It is a new technique I created called Cherry-Facing.
On a side note: you’ll see that the stained pieces do not have stain in the miters. This is because I will be putting wood glue there. Wood glue will not adhere to areas that have stain.


When it came time to glue up, I used band clamps. I don’t love many things, but I do love my band clamps for gluing frames or boxes. I also used 23 guage pin nails to help keep the pieces aligned as they dried. The nails are very tiny, so they don’t provide strength. But the holes they leave behind are pretty unnoticeable.
You can also see the squeeze out I was talking about in one of the miter joints. That came right off since the wood was finished before gluing.
Once the glue dried I then sanded and stained the outside surfaces.

While the glue was drying, I used Rustoleum black metallic spray paint that I had left over from another project to paint the metal parts of the cart. I taped off the wheels and drawer slides to prevent paint from messing with any moving parts.
but that rack though


A cart is just a cart without a rack. So I’ve been told. I wanted to add a wine rack and glass holder to the middle section of the cart, and I had the scrap pieces to do it.

How single am I?
I needed the rack to hold four wine bottles, because any more is a bit excessive. I also needed to make sure a wine glass would fit into my holder. But I was quickly reminded of the lack of a female presence in my life, as I had no wine bottles. I also could only find one martini glass in the back of my cabinet. So these are what I used for measuring. Not drinking in the woodshop of course.

I traced the edge of a bucket to get to the curves that I needed to cut for the wine rack pieces. I then cut these out on my bandsaw. I cut one piece and traced it on the other pieces so that they were identical.

Since the band saw leaves cut marks, I then brought each piece to my drill press. I have a drum sander kit that is made for drill presses. I used this to sand the curves rather than do it by hand.
A lot of people don’t have these last couple of machines. If that is you and you’re jealous, just remember that instead of spending money on kids or dates or socializing, I spent my money on a cylinder that spins around really fast. So we’re even.
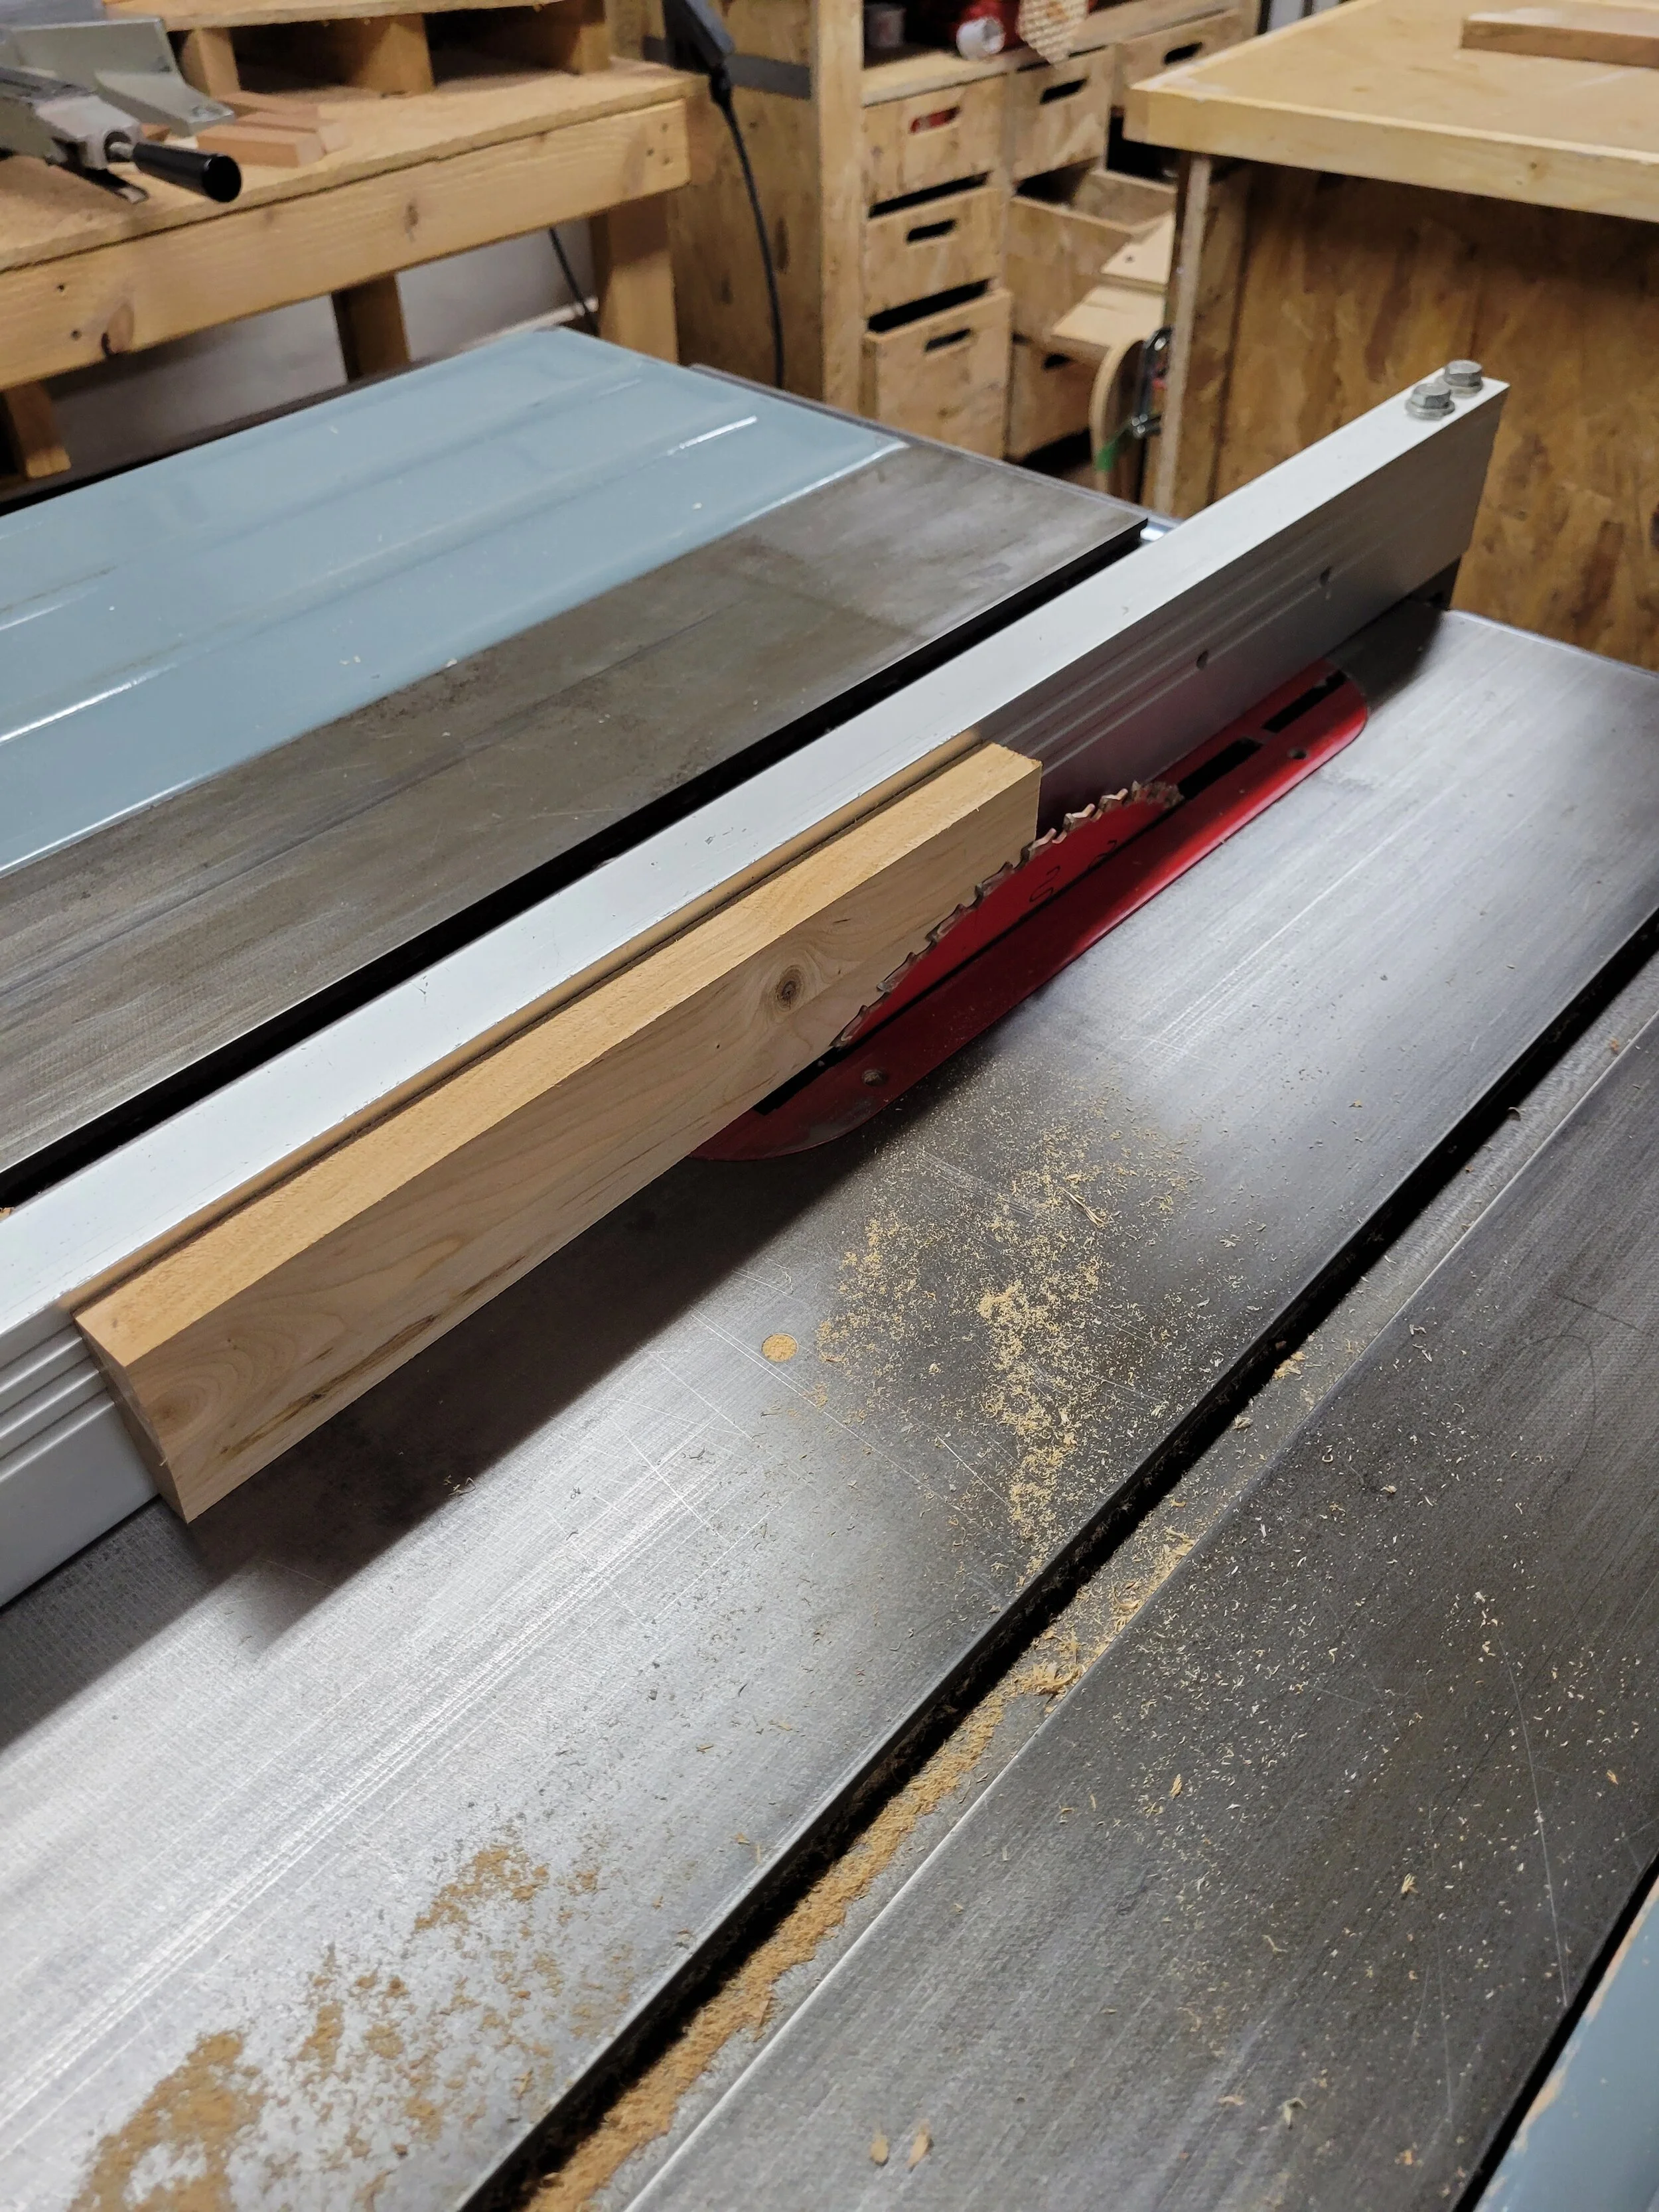
As for the glass holder: I had to experiment to get a good fit for a wine glass. I found the simplest way was to take two strips and cut bevels (angled edges) so that the base of the glass would slide behind them. I cut these 15 degree bevels on the table saw.
Once all my pieces were cut I sanded and cherry-faced them. While waiting for them to dry, I put the old drawer hardware back on the new drawer. I cleaned the slides and greased them before installing.

I then assembled and installed the wine rack and glass holder.
I know I said screwing is bad. But when it comes to alcohol we all get carried away, so yes I did use screws to assemble the wine rack and attach the glass holder.

And then everything was put on and she was done!
But What Did I Learn About Myself
I learned a lot about relationship during this project. I learned that instead of just giving up on something you can invest a little time and love and create something beautiful. And then get rid of it. As in this cart is for sale. Use the contact button if you’re interested.