
Damaged Goods

if it looks good enough on the outside, then it doesn’t really matter What’s on the Inside. get an accent wall for under $200
The saying goes something likes this: beauty is only skin deep. What people don’t know is that it goes on to say that if something is beautiful enough on the surface, then it doesn’t really matter what’s going on underneath. This way of thinking saved me hundreds of dollars on an awesome DIY wood accent wall. So next time someone tries to tell you things about people's insides, you tell them that they’re wasting their time and money.

I had just laid flooring and painted the walls in my living room. But I couldn’t shake the all-too-familiar feeling that something in my life was missing. I came to the same solution as every other life crisis I’ve had and decided a cheap and superficial makeover will fill this void.
I figured an accent wall would make this space seem respectable for the first time in its existence. I choose the wall where my couch sits because it had no windows and a lot of space. So I did what I know best and filled that space with wood.
Reclaim Your Dignity
I wanted to do a reclaimed wood accent wall. But I couldn’t bring myself to pay three times as much money for someone’s garbage wood that was “reclaimed.” I don’t pay more for used clothing and I refuse to pay more for used wood.
I had recently installed 1/4” tongue and groove pine boards on my kitchen ceiling to cover up the worst drywall work I had ever seen. These boards were super cheap and they were only finished on one side. The backs were left with mill marks, which was perfect for imitating a reclaimed look. These boards also had a plethora of knots and defects that really made them look ugly. But like I tell myself every morning: ugly things can serve a purpose too.
For once, Menards’ low quality lumber came in handy, and this is where I got these boards from. Beware though, that if you got a place that actually sells decent lumber, you may not get the reclaimed look you may be going for.
Experiment Like You Did In College

So I had the wood, but the natural look was too new looking, even with the defects. I needed to stain them, but I also knew I didn’t want the stain to look too uniform. When you have real aged wood pieces they aren’t all the same color. I decided to use multiple different stains, but I had no idea which stains to use.
On an unrelated trip to the hardware store, I saw that some stains were on clearance for $4.00 a can and conveniently they were supposed to add a weathered effect. So I tested these out on some sample wood pieces, along with every stain I had in my collection. I even experimented with bleach, whitewash, and a homemade stain made from vinegar and steel wool.

Because I’m never content, I also tried putting stains over stains. During this experiment I found that whitewashing the wood first and then applying stain over the wash produced some pretty cool finishes.
I’m not sure if there’s a formula for whitewash, but I just mixed roughly 2 parts paint to 1 part water. And what I mean by that is I put some paint in a cup and then put in half as much water. If you’re going to be the pampered chef in stain mixing then go find that recipe somewhere else.
Another stain I liked was the vinegar and steel wool. You buy a jar of pickles, throw out the pickles, and then put vinegar in the jar along with a pad of fine steel wool. You let that sit overnight and then apply it to the wood. The vinegar oxidizes the steel wool which in turn reacts with the wood. I’m not a scientist so I don’t know exactly how it all works.

Once I came down from the high I received from playing with all these stains, I couldn’t decide what to use. So I said let’s use them all. I then spent a full 8 hours staining all of the boards in my basement and forgot my name. In all seriousness you should do this in a ventilated area if you can.

Once everything was stained. I cut the boards into 6’, 4’, 3’, and 2’ lengths. I then sorted all boards by color and length in the living room. This only works when you live alone and never expect company, as it takes up the entire room. Those of you don’t have that luxury, that’s your own fault that you needed that family so damn bad.
Sorting the boards makes it easier when you’re laying them. You can see how much you have left of the different colors and sizes.
How to Lie about your size
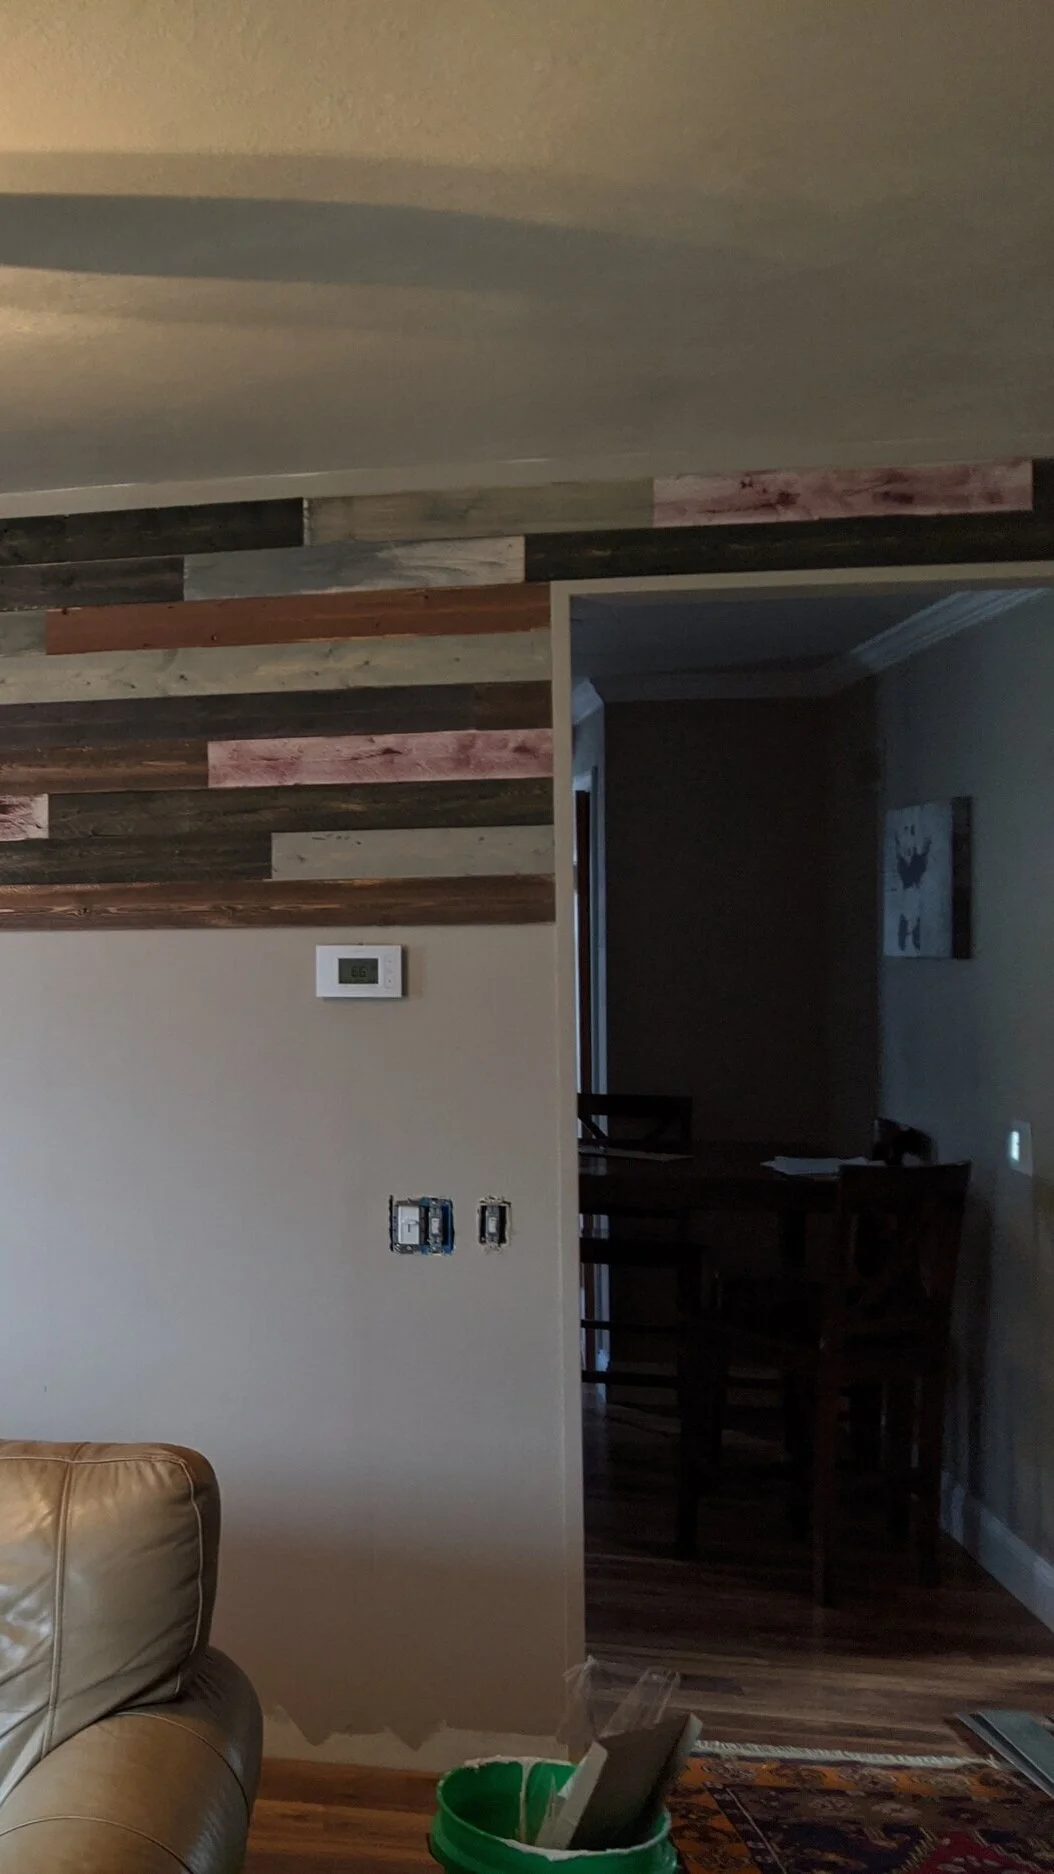
The major issue I had with this project was that the boards were only 1/4” thick. Real reclaimed wood will more likely be around 3/4” thick. The thickness is a dead giveaway that I cheated. This won’t really be an issue if the wall you’re doing is bordered by two other walls. As long as nobody can see the edges of the boards, they won’t notice how thin they are. But I had this walkway in the middle of the wall so I needed a way to hide my lack of girth.
To do this, I ripped two of my boards into 1” wide strips. I then nailed them to the edge of the wall around the opening. I then used drywall compound, but you can use spackle or putty if you wish, in the seams between the board and the wall. After a coat of paint that matched the wall, the strips looked like they were part of the wall. This trick gives the appearance that the boards were set into the wall rather than on top. And nobody would be able to see the edges of the boards for what they really were.
Cheat on your girlfriend, but not on electrical
On a side note, understand that you will have to do work around your outlets and switches. I had to take off my thermostat and remount it to the surface of the boards. I also had to extend my outlet and switch boxes 1/4” so that they were flush with the boards. You can buy outlet extenders at any hardware store and they’re cheap. If you don’t want to do it correctly, you could just unscrew your outlets, lay the boards, and then secure the outlets so they rest on top of the boards. But this is technically not up to code. Outlet boxes should be flush with the surface of any flammable material, which includes wood. I may cheat on a lot of things but I don’t cheat on electrical code.
Where to Begin
It’s almost time to get to shit done. But first, if you want to actually want to succeed with this project, you should lay out everything properly on the wall. The first thing I did was find the studs with a stud finder. I drew vertical lines all down the wall along the studs so I knew where to place my 1” finish nails. If you don’t hit the studs you’re boards are going to loosen up and start to sag. And nobody likes sag.
I started laying my boards from the top down. It’s important to know that unless Jesus really loves you, you’re probably not going to end with perfect full width boards in your last row. Because I was going to put baseboard over the bottom row, this didn’t matter. The bottom row is also less likely to be noticed than the top row, so I always suggest the foreplay method and work your way from the top down.
If you’re ceiling is a disaster like mine, as in it is wavy and not level, I would also not recommend starting with a row against the ceiling. My boards were 3.5” wide. So I could’ve found the highest point in the ceiling, and measure 3.5” down. I’d then use a level to draw a horizontal line at that height along the wall. I’d then lay my first row along that line and work my way down from that.

In my case, I was planning on putting crown molding over the top row so that row didn’t matter either. I actually started my first row along the top of the walkway opening. I then ran a row up and finished all the way down. For my top row, I scribed each board. Scribing is when you match the board width to the contour of the ceiling. For more details on scribing a board, check this link out.
My method for choosing boards like this was the following: I had no method. My only goal was to not have seams line up with each other. I just picked colors based on how I felt in the moment, which was always sadness. I also kept tabs on how much of each color I had so that I wouldn’t end up with just one or two colors left for the bottom of the wall.
As you complete rows make sure to check that they’re level. The nice thing about tongue and groove is that you as you lay them you have a little bit of play to pull them further and closer apart to adjust for level.
Put on protection

Once everything was up, I put on two coats of a water-based polycrylic. If you’ve decided to curse yourself with kids, you may want to put on four coats before they draw all over your walls. Because that’s what kids do. They mess up your shit. I put the clear coat on after everything was up because it was a lot quicker to do it all on the wall rather than individual boards, it’s less time of having a hundred boards laying around your house while they dry, and if the polycrylic builds up along the tongues and grooves, the boards may not fit inside each other. And many a good time has been ruined by things not fitting.
I want to end with one regret. If I was to do this all over again, I would’ve either laid roofing felt on the wall before I laid the wood, or painted the wall black. Both are cheap options. When using wood with defects there will be small holes from knots that fell off, or cracks, and you can see the wall behind the boards in those spots. It’s not a huge deal but I fucked up and I might cry about it.