
Attachment Issues
You can’t stop your life from falling apart, but at least you can save your furniture.
Coming apart at the seams
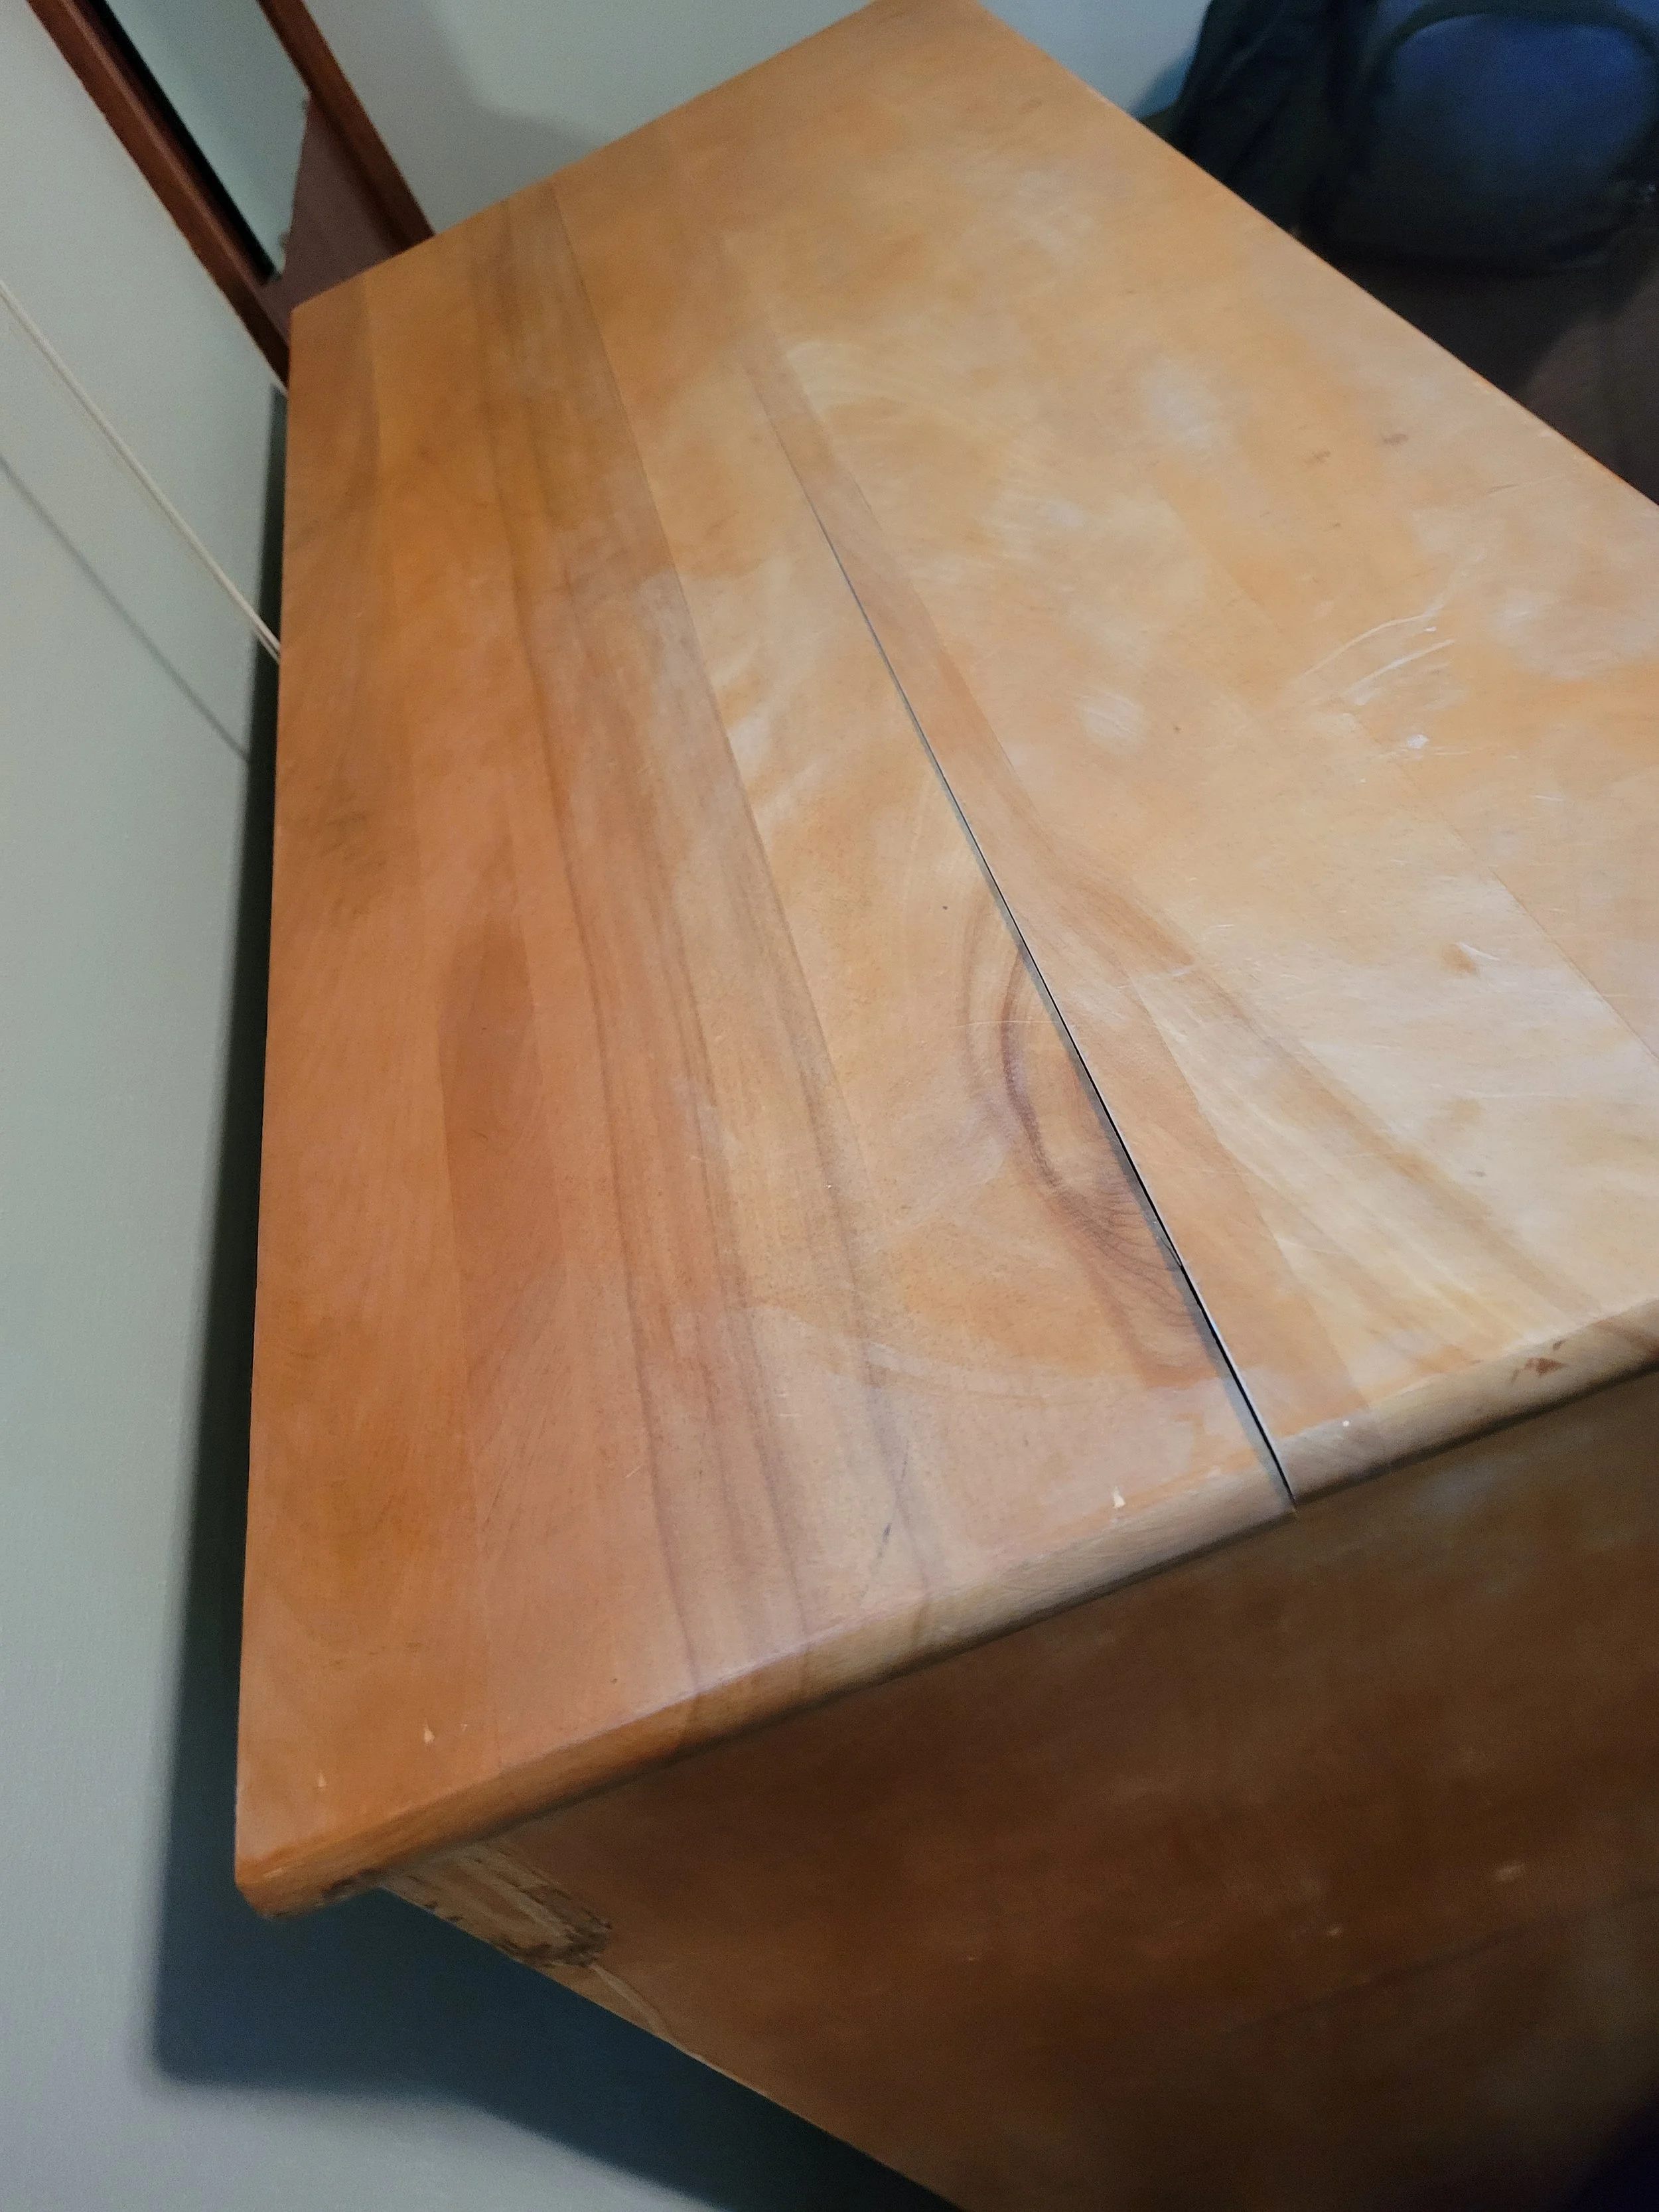
A friend of mine came to me with a problem. He had a dresser that he liked but the top was splitting in multiple places. He would rather fix it, or have me fix it, instead of throwing it away. Seeing as I can relate to being broken and borderline useless, I was inclined to help.
In order to properly fix this problem, it is important to understand how it came to be. It all comes down to something we all learn in our pre-teen years: wood grows and shrinks. As the seasons change, wood will expand and contract in response to humidity. In summer, wood will absorb some of the moisture in the air and swell; while in the winter wood will lose moisture and shrink. While annoying, this is not an issue as long as it is accounted for. But like a clingy ex: just because you ignore it, that doesn’t mean it’s going away.
In the case of this dresser, the builder screwed the top to the dresser frame around the perimeter. Because of this, the wood had no room to expand and contract. After many years of fighting against the screws, the wood finally gave up and split. I can relate to the feeling.
Let It Rip

My first step was to use my table saw and rip the top into strips at the split seams. The top was splitting in 3 different places so I ended up with 3 cuts.
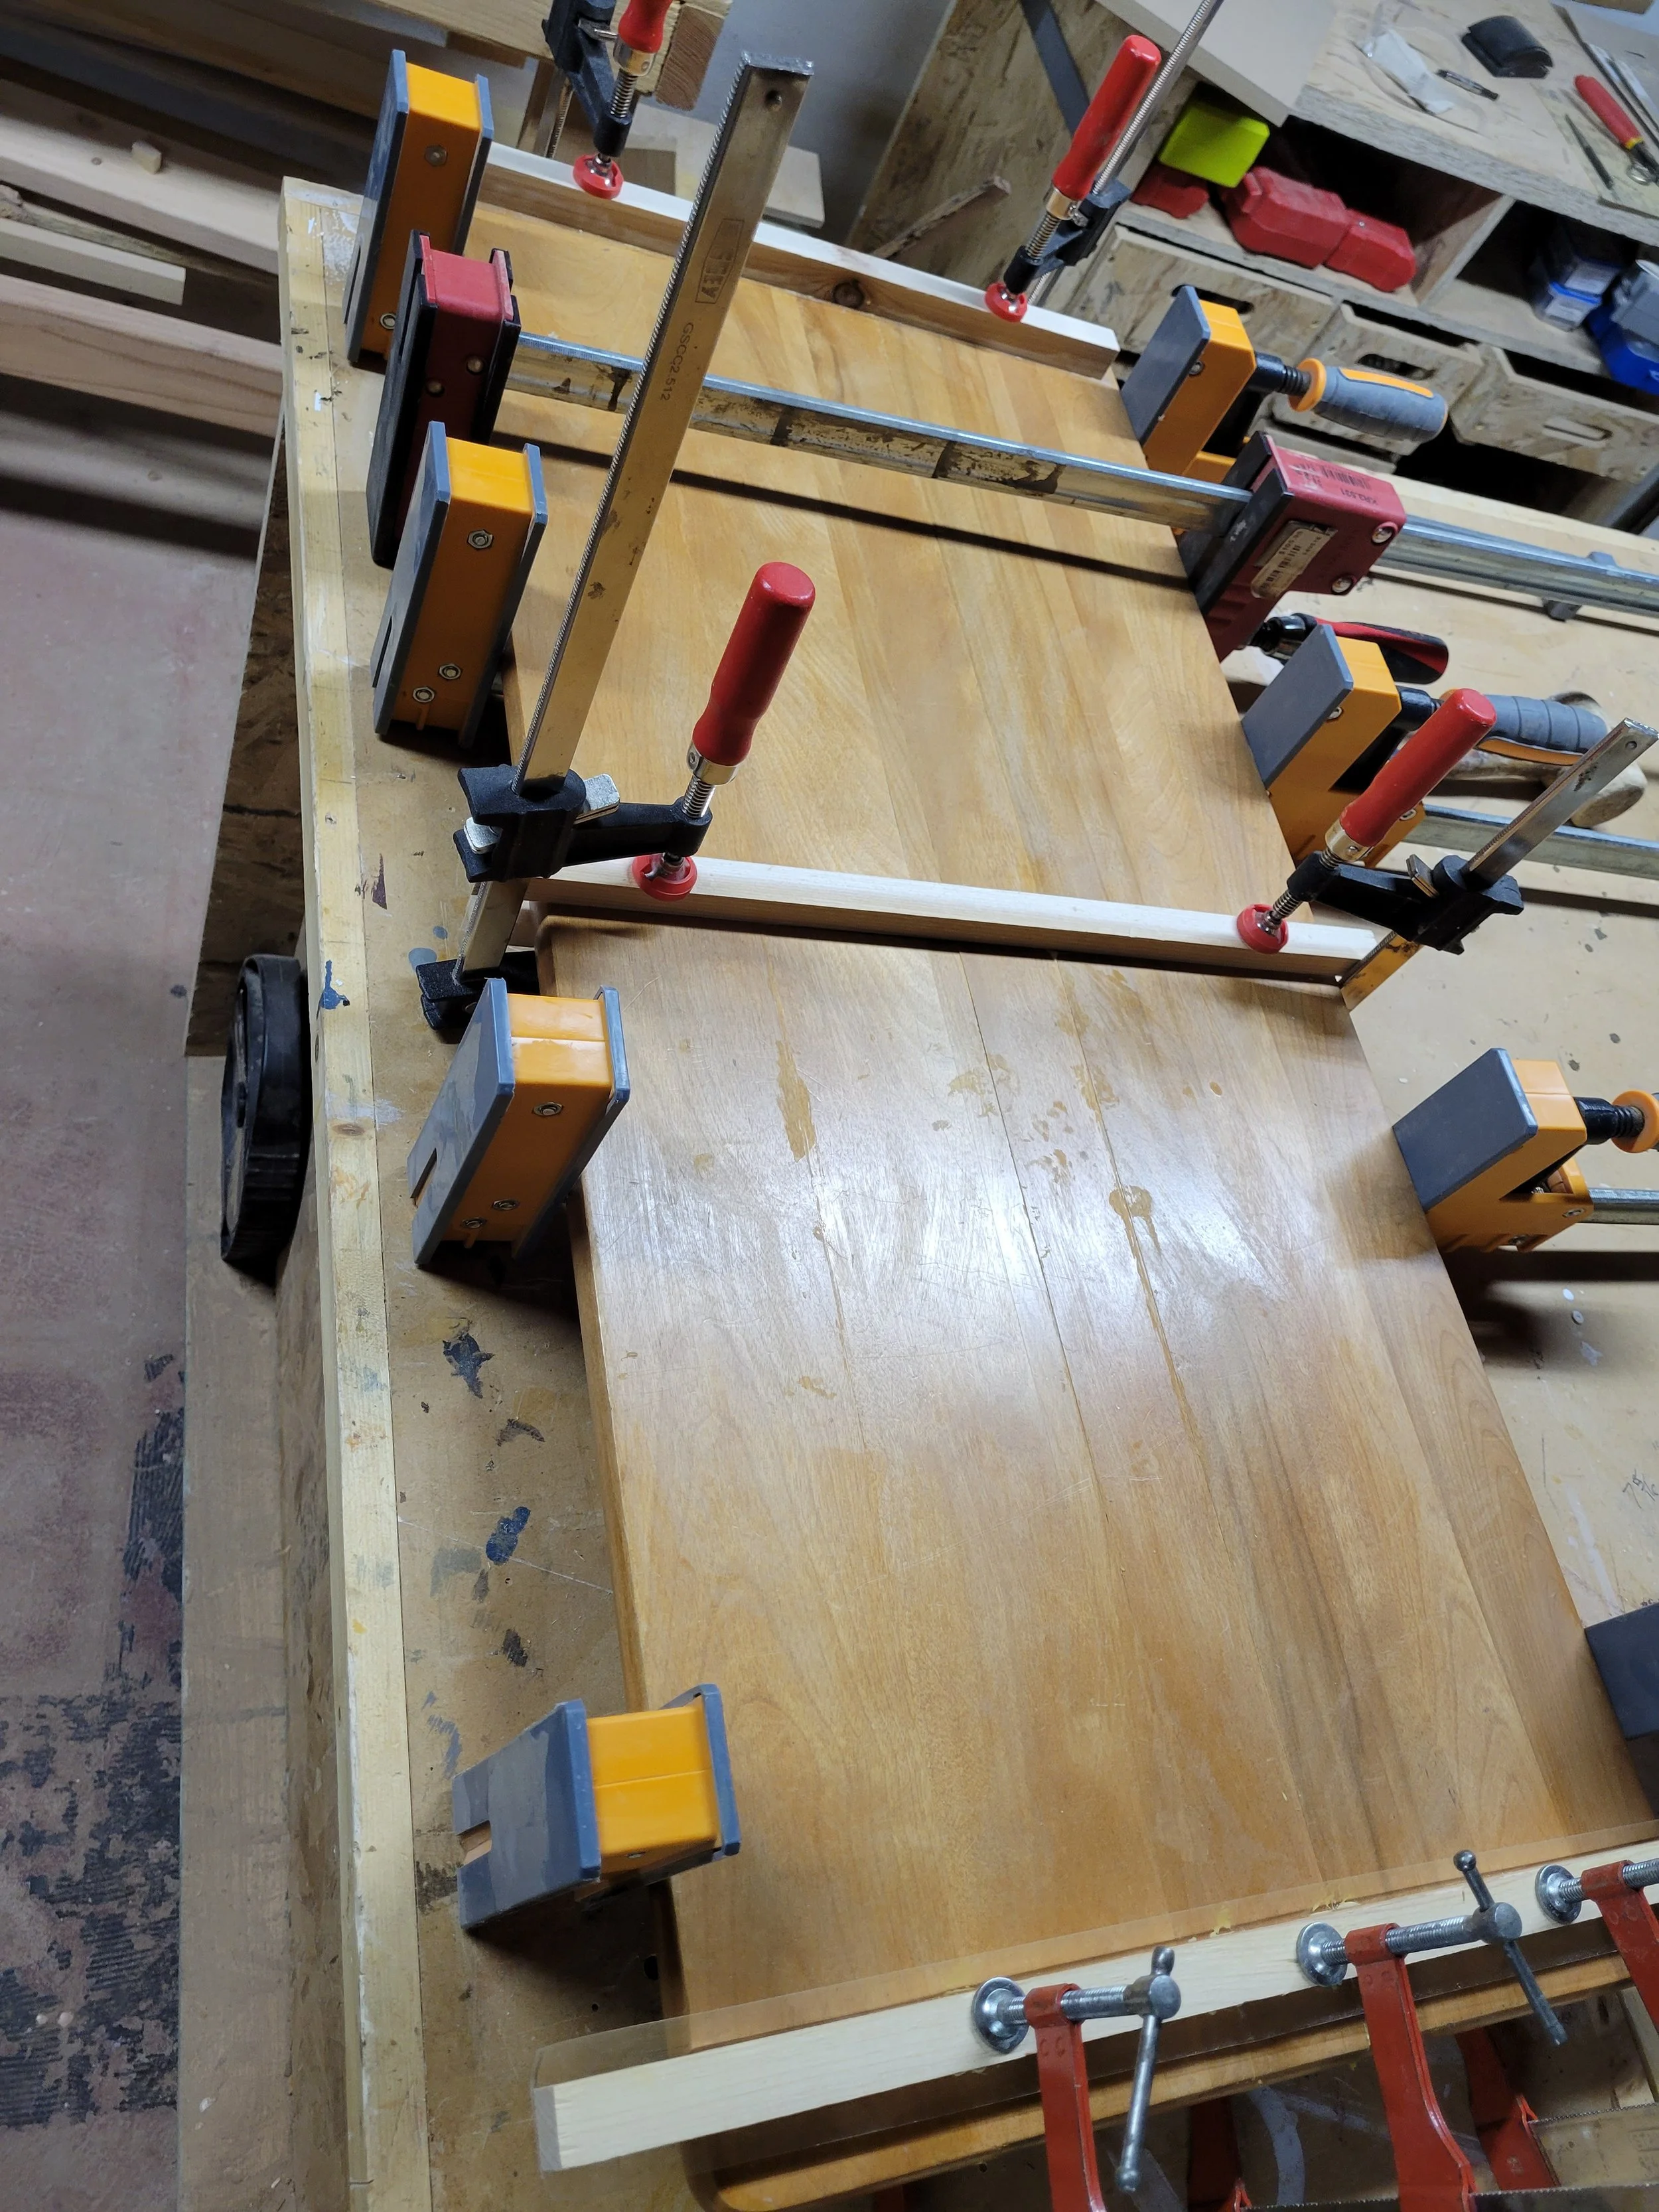
I then glued and clamped the boards. You’ll see in the photo that I used cauls. Cauls run perpendicular to the glue lines and run along the top and bottom. Clamps are used to sandwich the material between these strips to help ensure that everything stays even with each other. I wanted to make sure there were not going to be any lips as I wasn’t planning on resurfacing the top. But as always plans changed and I ended up sanding and refinishing it anyways.
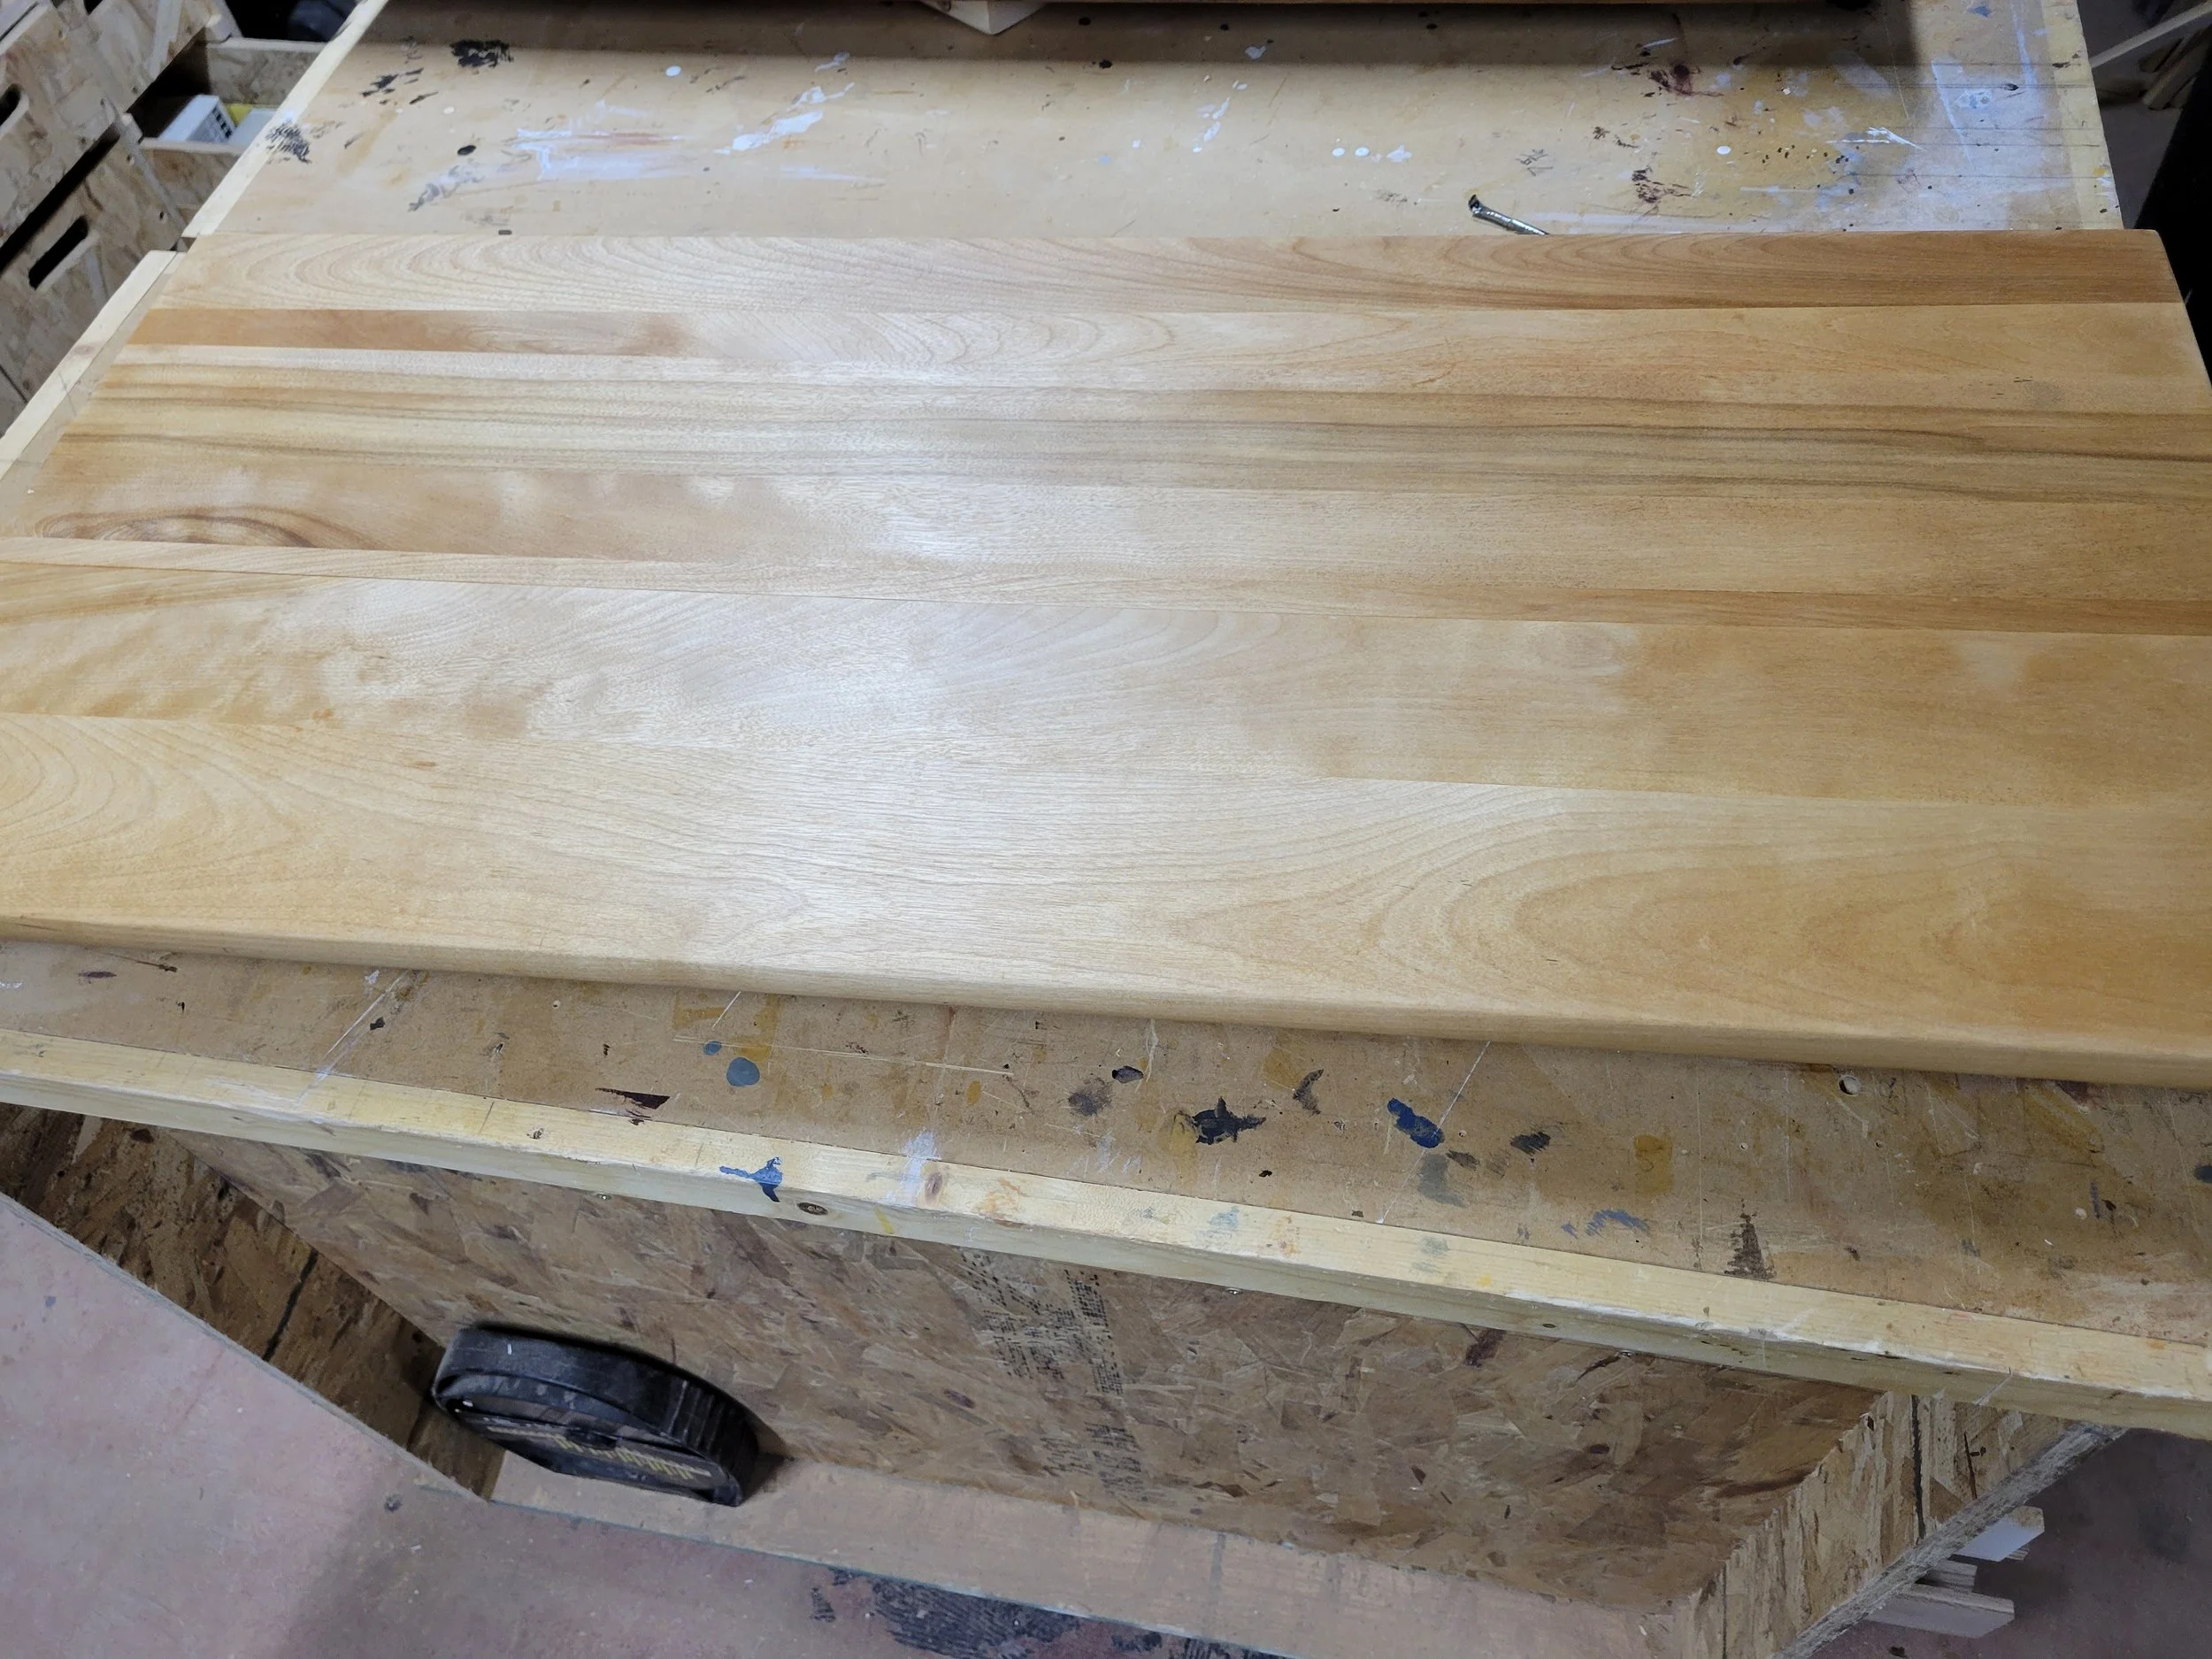
I used an oil based polyurethane in order to get an amber tint that would match the older finish.
It’s All About the Hardware

There are multiple ways to attach the top to the dresser frame and account for wood movement. One of the easiest ways is to use figure 8 fasteners. These are attached to the top of the frame and the bottom of the top using screws. As the wood moves these fasteners will rotate around the screws. These also work for table tops and other furniture pieces. The drawback is that there is a bit more of a process than simply screwing the top onto the frame. But I’m no savage so I do it right.

The fasteners are about 1/8” thick so in order to prevent a gap between the top and the frame, the fasteners have to be set into the frame to be flush. My fasteners were 5/8” diameter to I accomplished this by using a 5/8” Forstner drill bit to go 1/8” deep wherever I wanted to put a fastener.
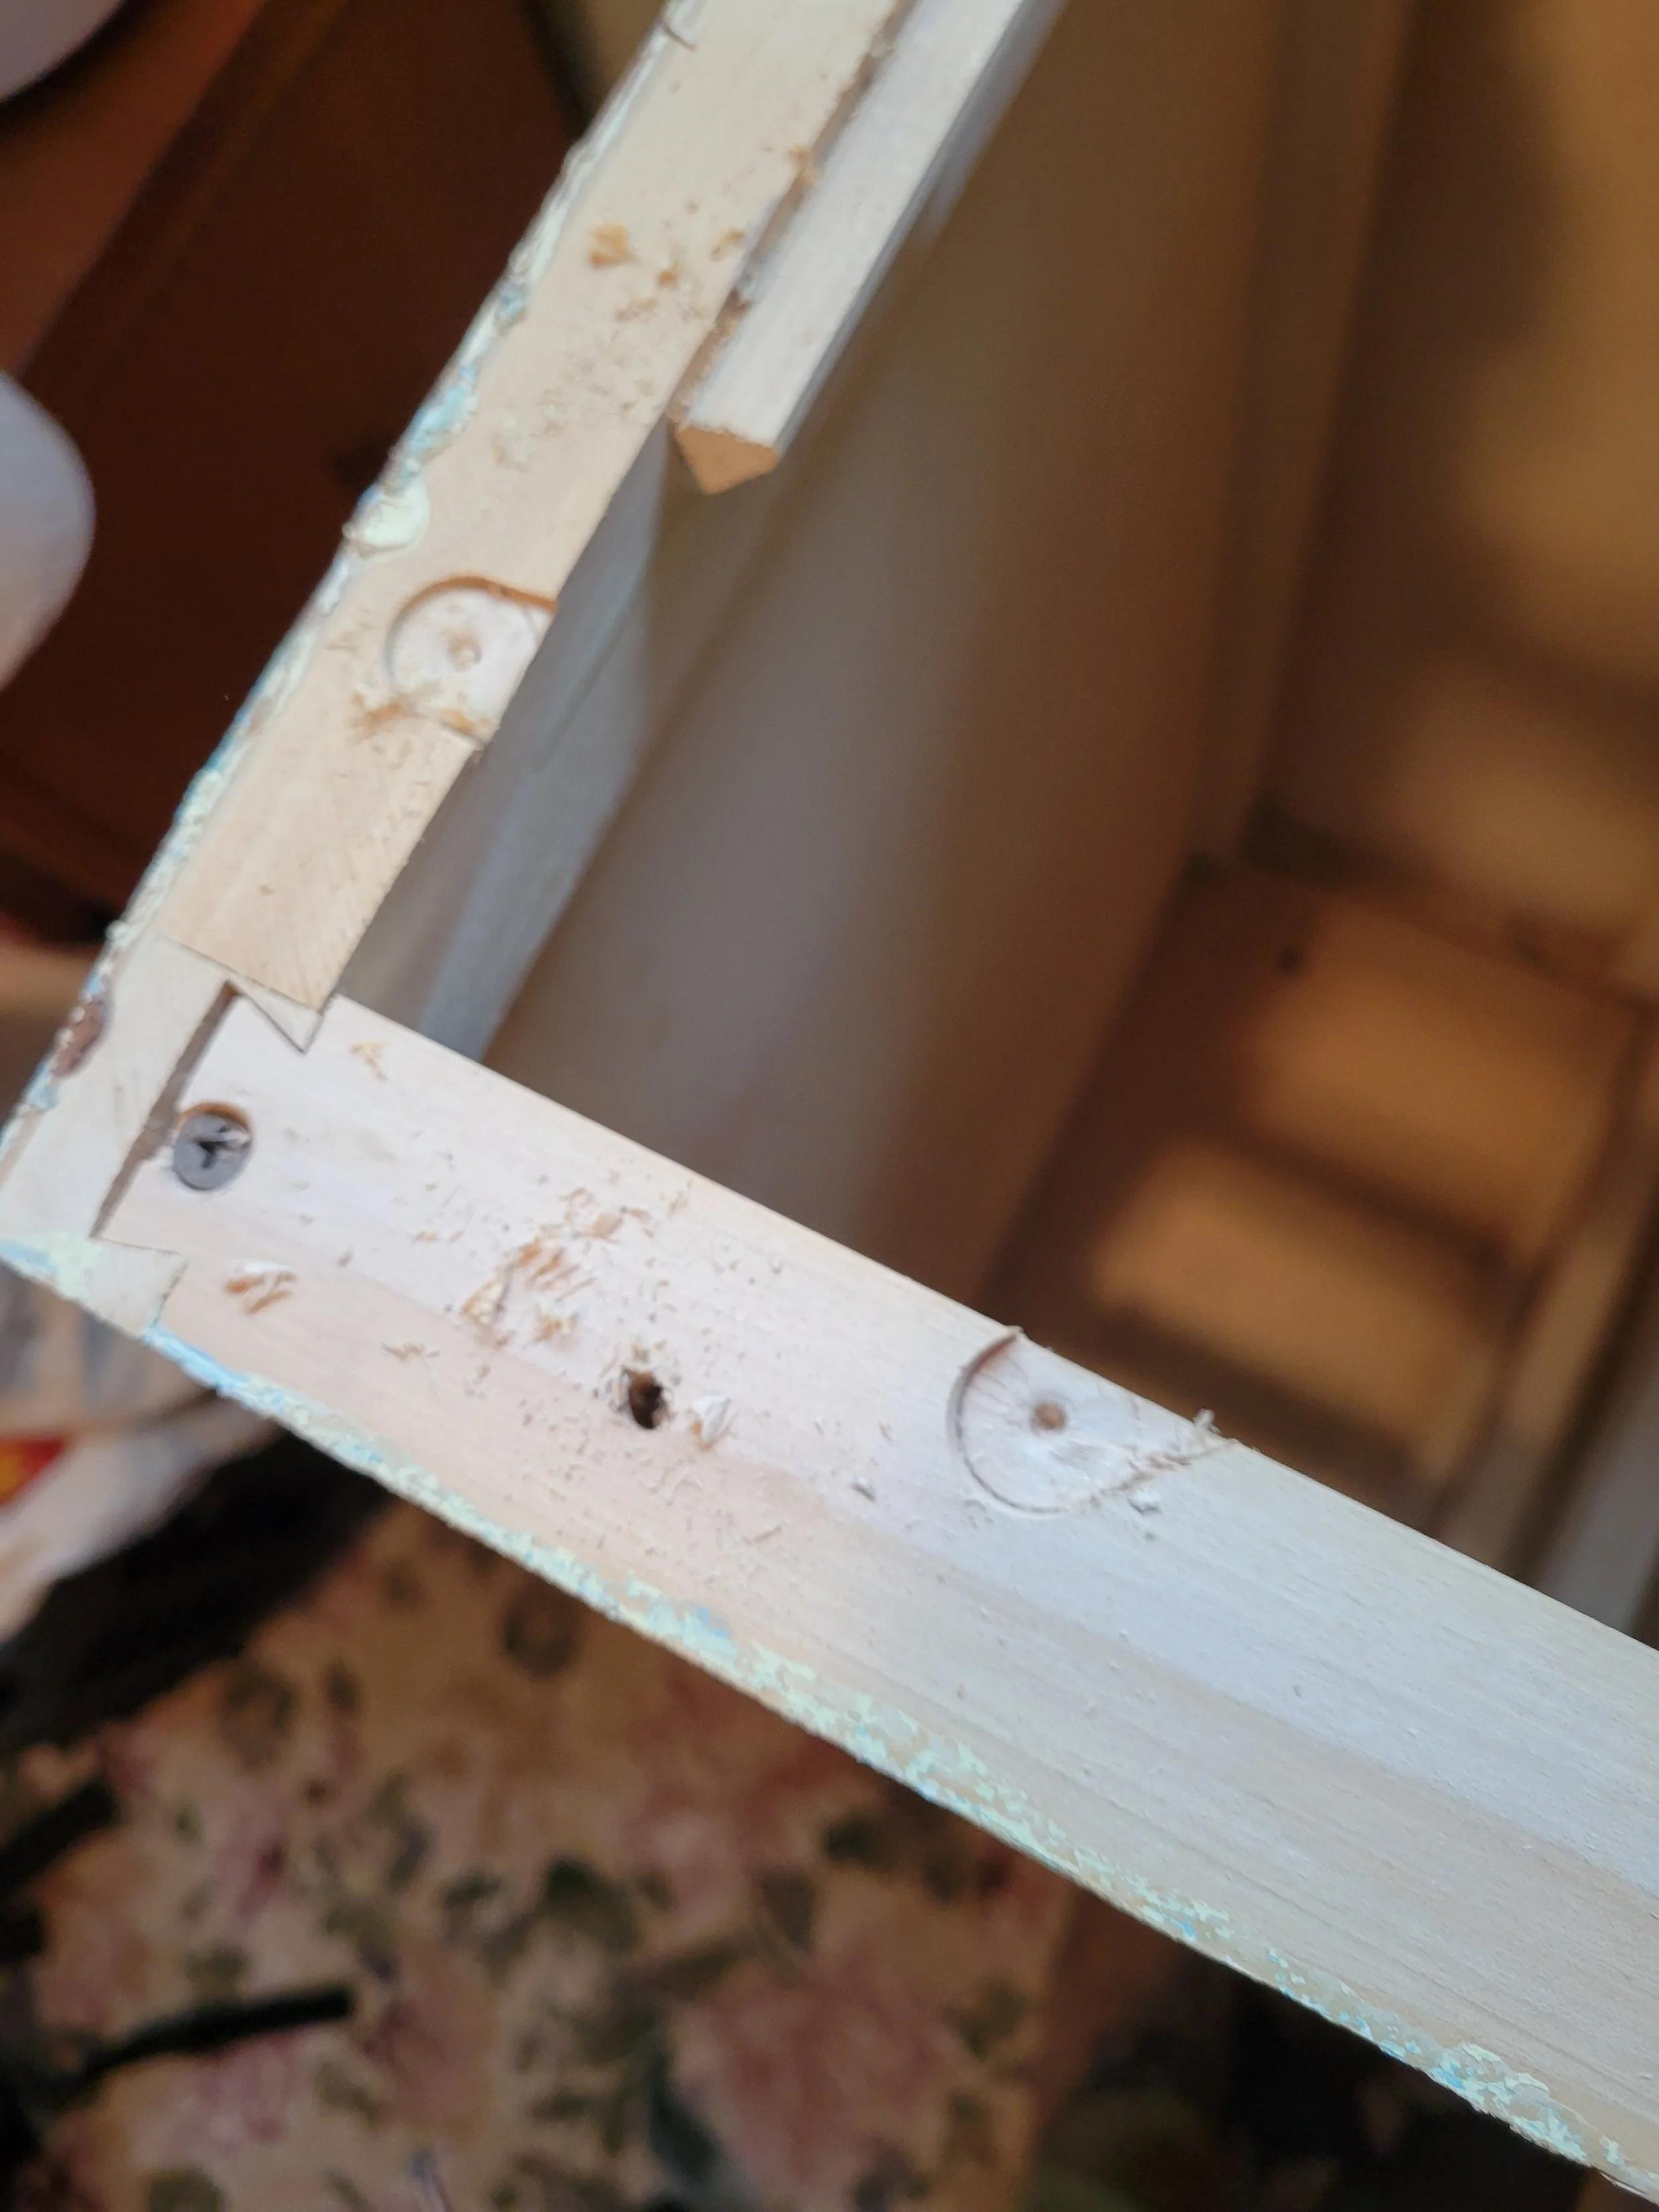
In order to allow the fasteners to pivot, I then used a chisel to remove material to allow this.

Then I secured the fasteners with screws. After this I could put the top on and secure the fasteners to the bottom of the top with screws.
And the final result…
I actually forgot to take a picture after I was done and my friend then took his dresser and moved to another state to get as far away from me as possible. So you’re just going to have to trust me that it turned out.