
DIY Cabinets. Do the right thing for once.

build your own cabinets and Prove to people that you’re good at something
Cabinets are a pretty big deal. They can make or break a kitchen. Statistically, a bad kitchen is the second leading cause of divorces, sitting just behind children. But cabinets can also be very expensive, especially if you go the custom route. So here we run into life’s biggest question… how do we have something nice but not pay a bunch of money for it? The answer is simple.. build your own. When I built a bar for a friend I also included custom cabinets. This blog post is a walkthrough of how I went about that.
if you don’t have a plan then you’re not trying
The biggest reason why I’ve royally messed up anything in the woodshop, or my personal life, is because I either didn’t have a plan or I didn’t follow the plan. When building cabinets, things have to be square, level, aesthetically pleasing, and ergonomic.

The first thing I did was to sketch up the carcass, or frame, of the cabinets. I started with outer dimensions and then sized the drawer, door openings, and shelf height based off these dimensions.
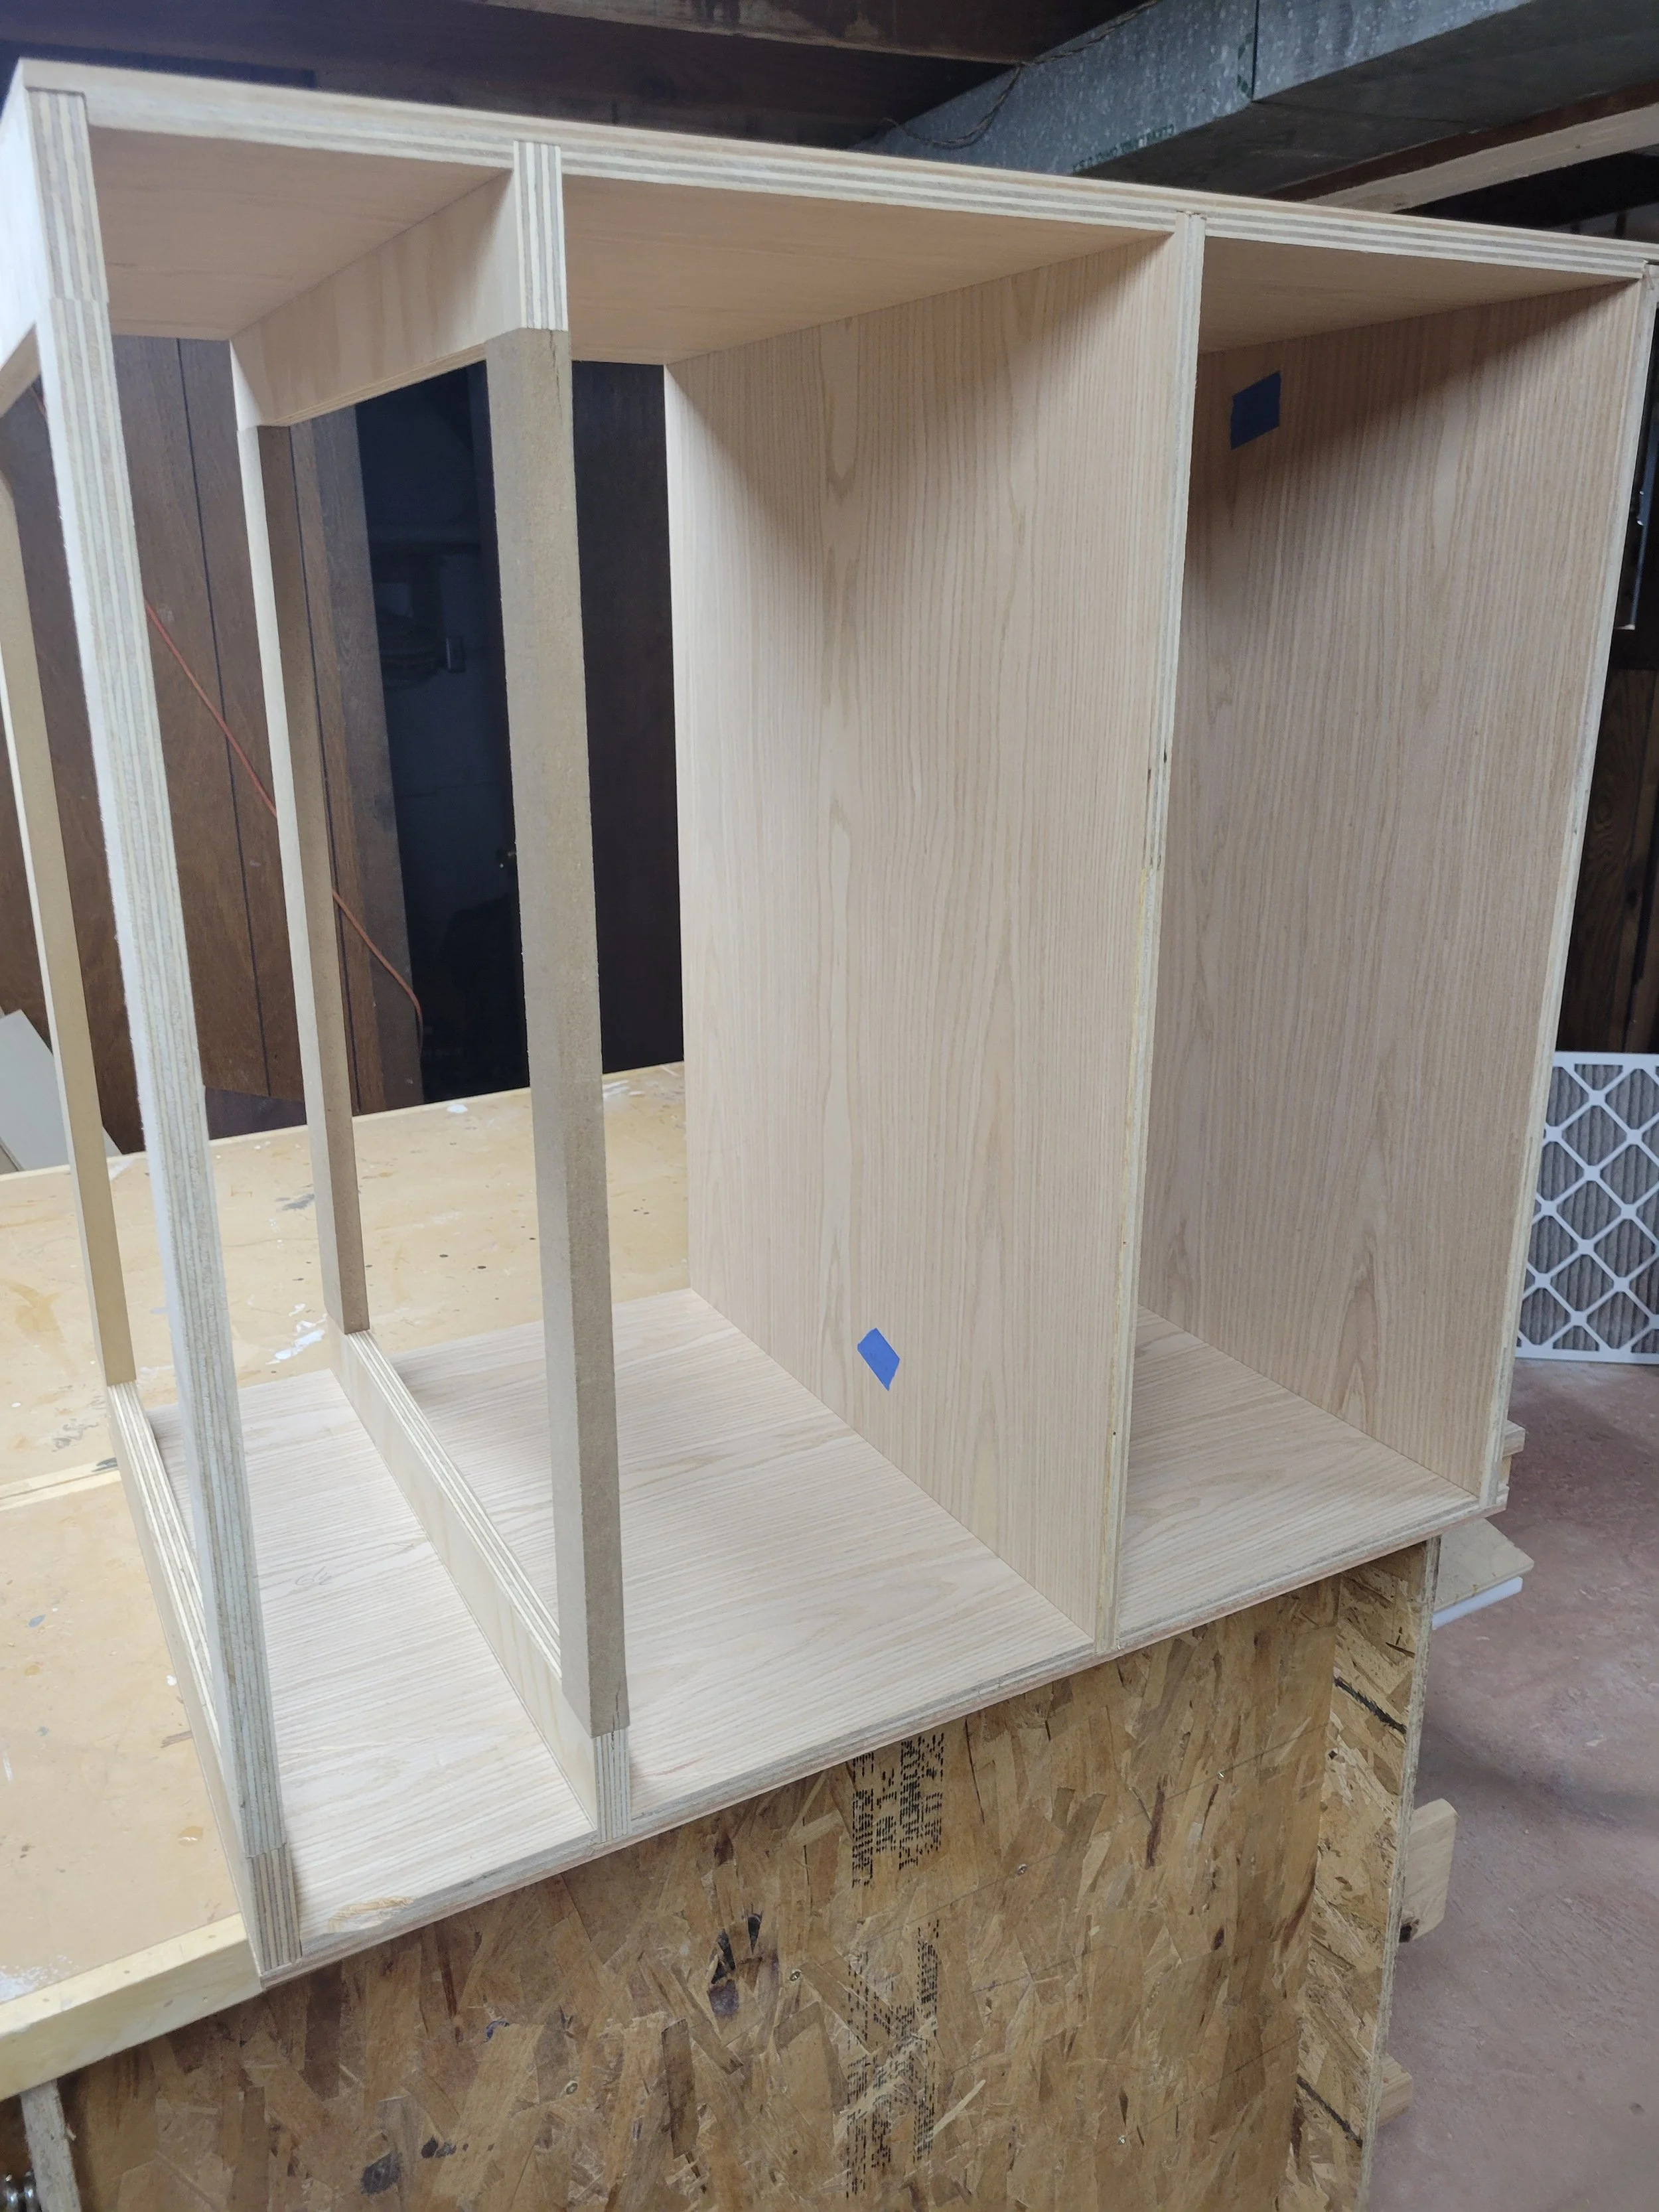
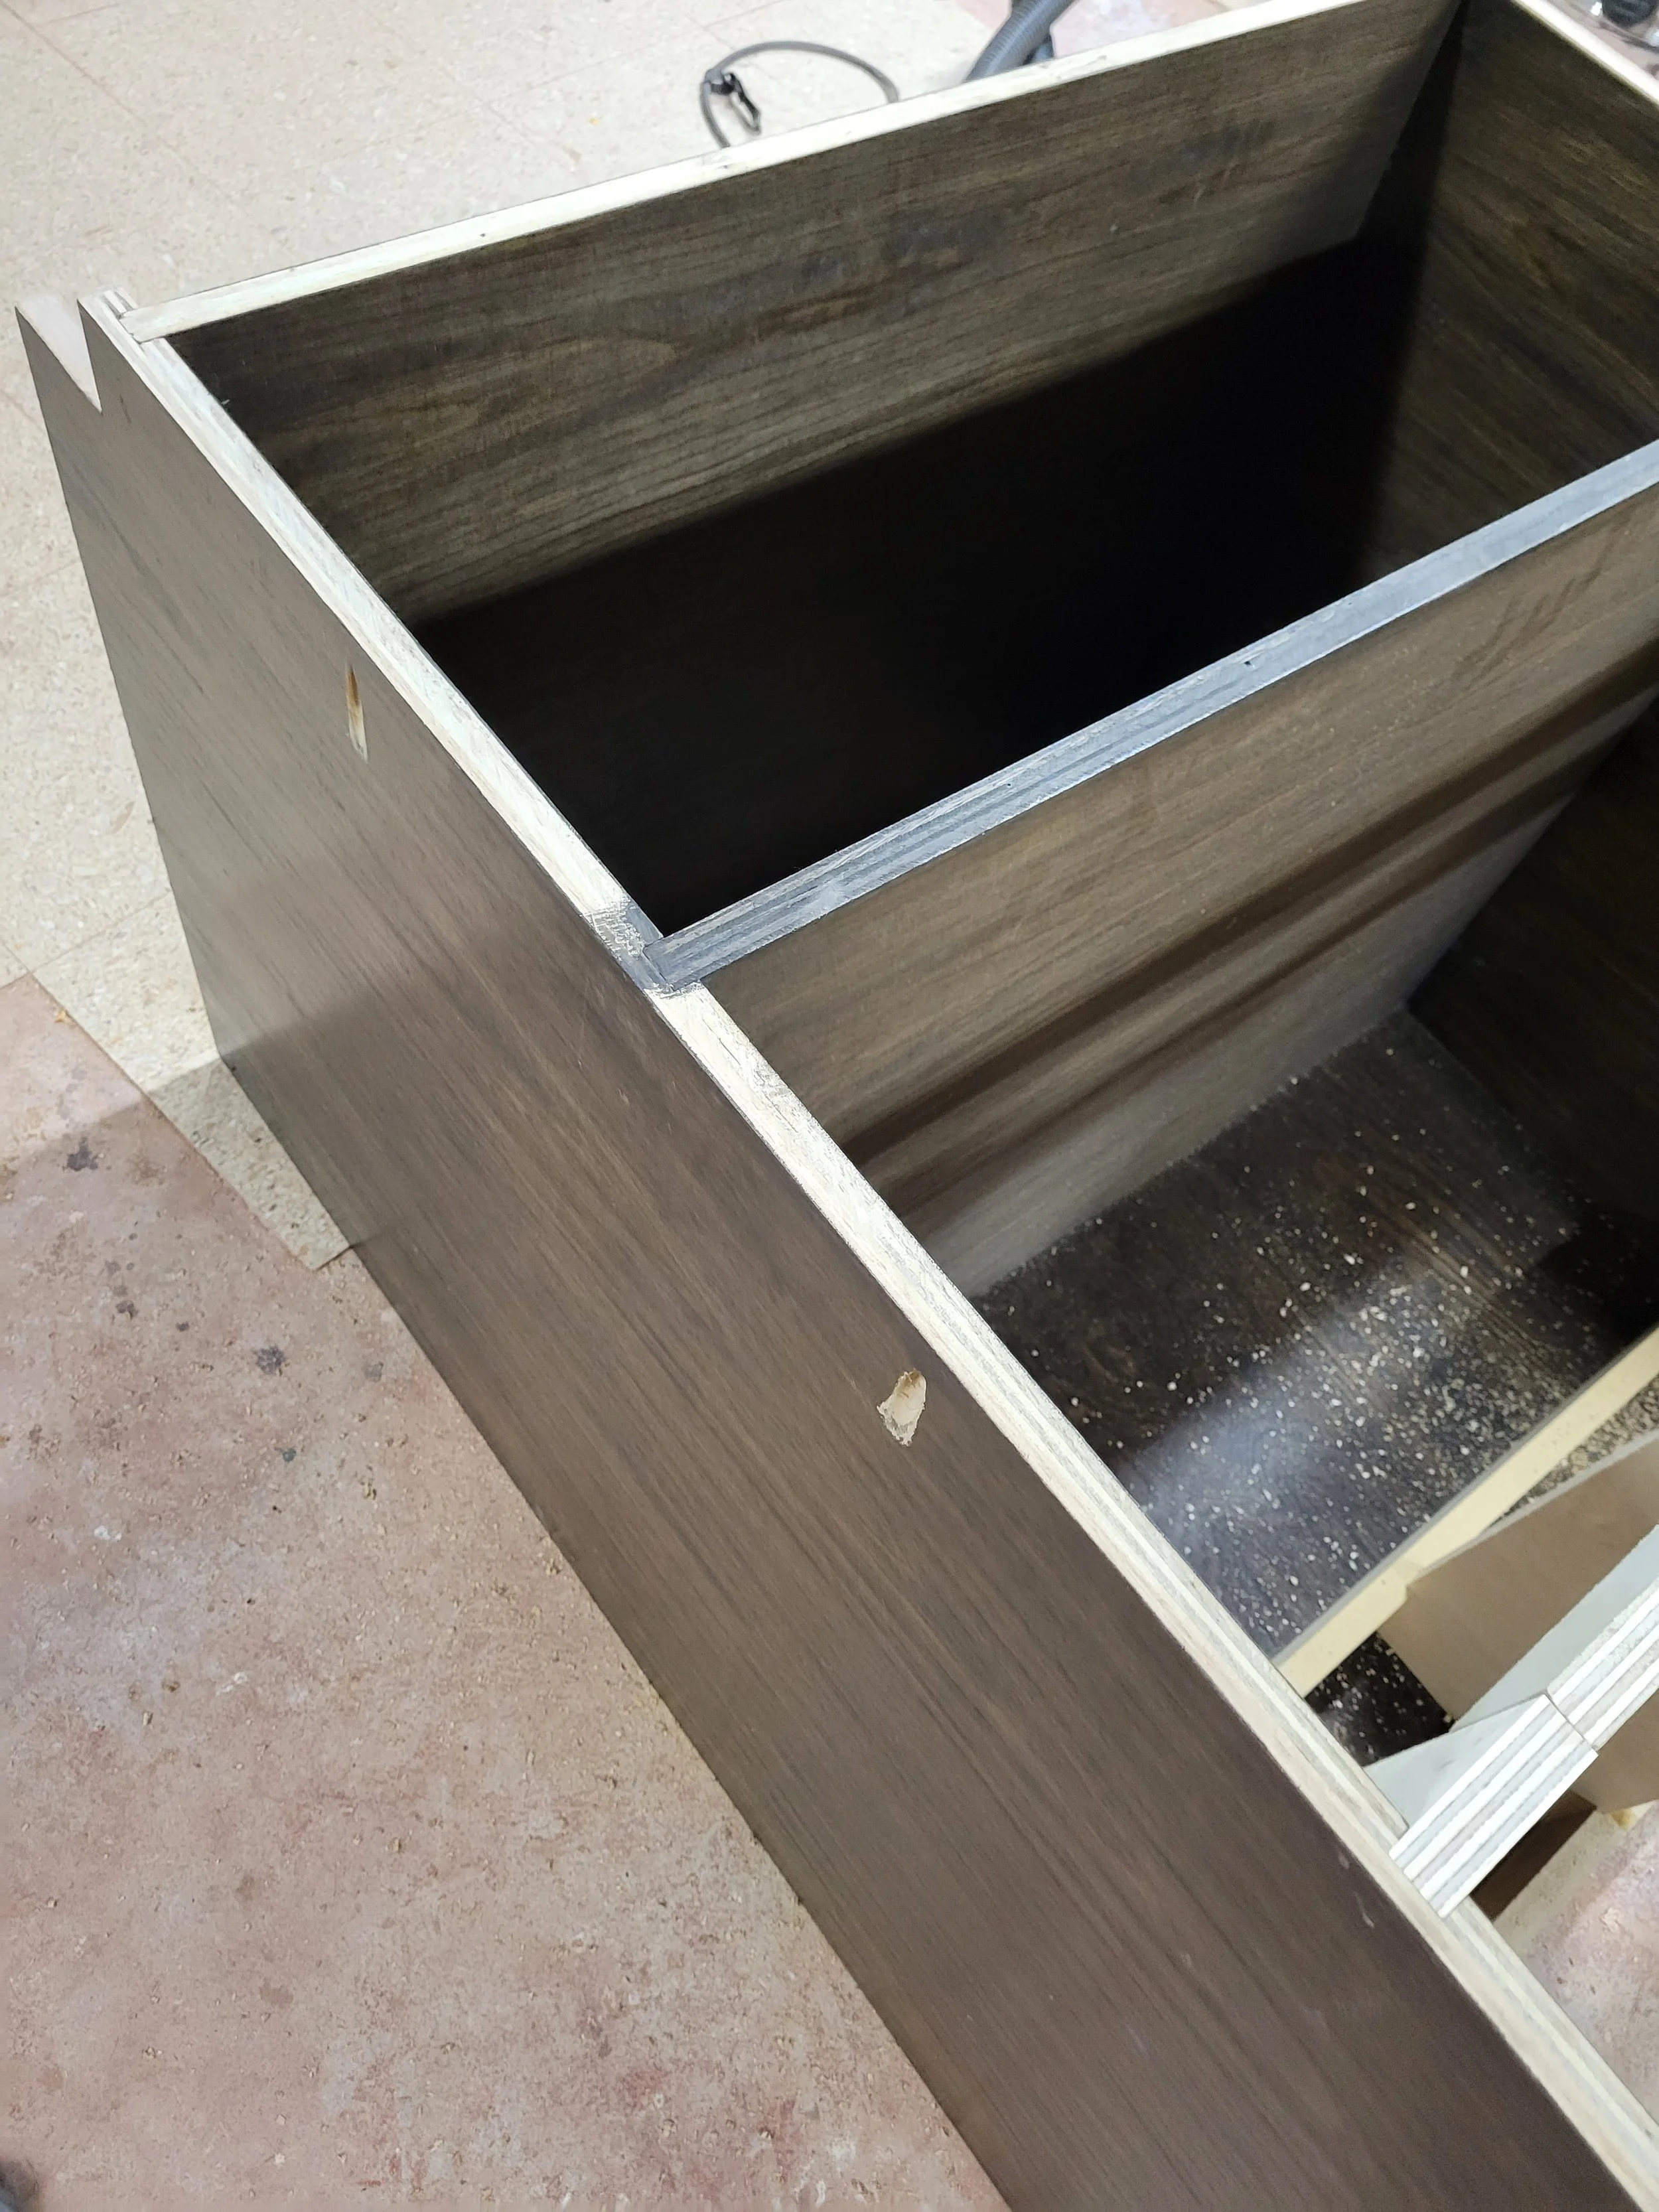
Once I had the sketches complete I made a list of the parts and sizes I would need to cut. The sides are the most important pieces to get exact because all the other pieces such as the shelves, bottoms, back, etc will be attaching to the sides. I planned to make grooves called dados for every piece to slide into. Using dados and wood glue would make sure these cabinets never come apart, no matter how much abuse they endured.
I used 3/4” thick oak plywood. To make sure both sides aligned perfectly together I laid them next to each other and then marked where each piece such as the shelves would attach to the side. Laying them next to each other ensured that I didn’t mess up any of my measurements, which I often do. I marked where I would be making the grooves and then labeled each groove and marked down the measurement I used. Similar to how I forget every person’s name that I meet the second that I hear it, I also forget my measurements so I have to write them down.


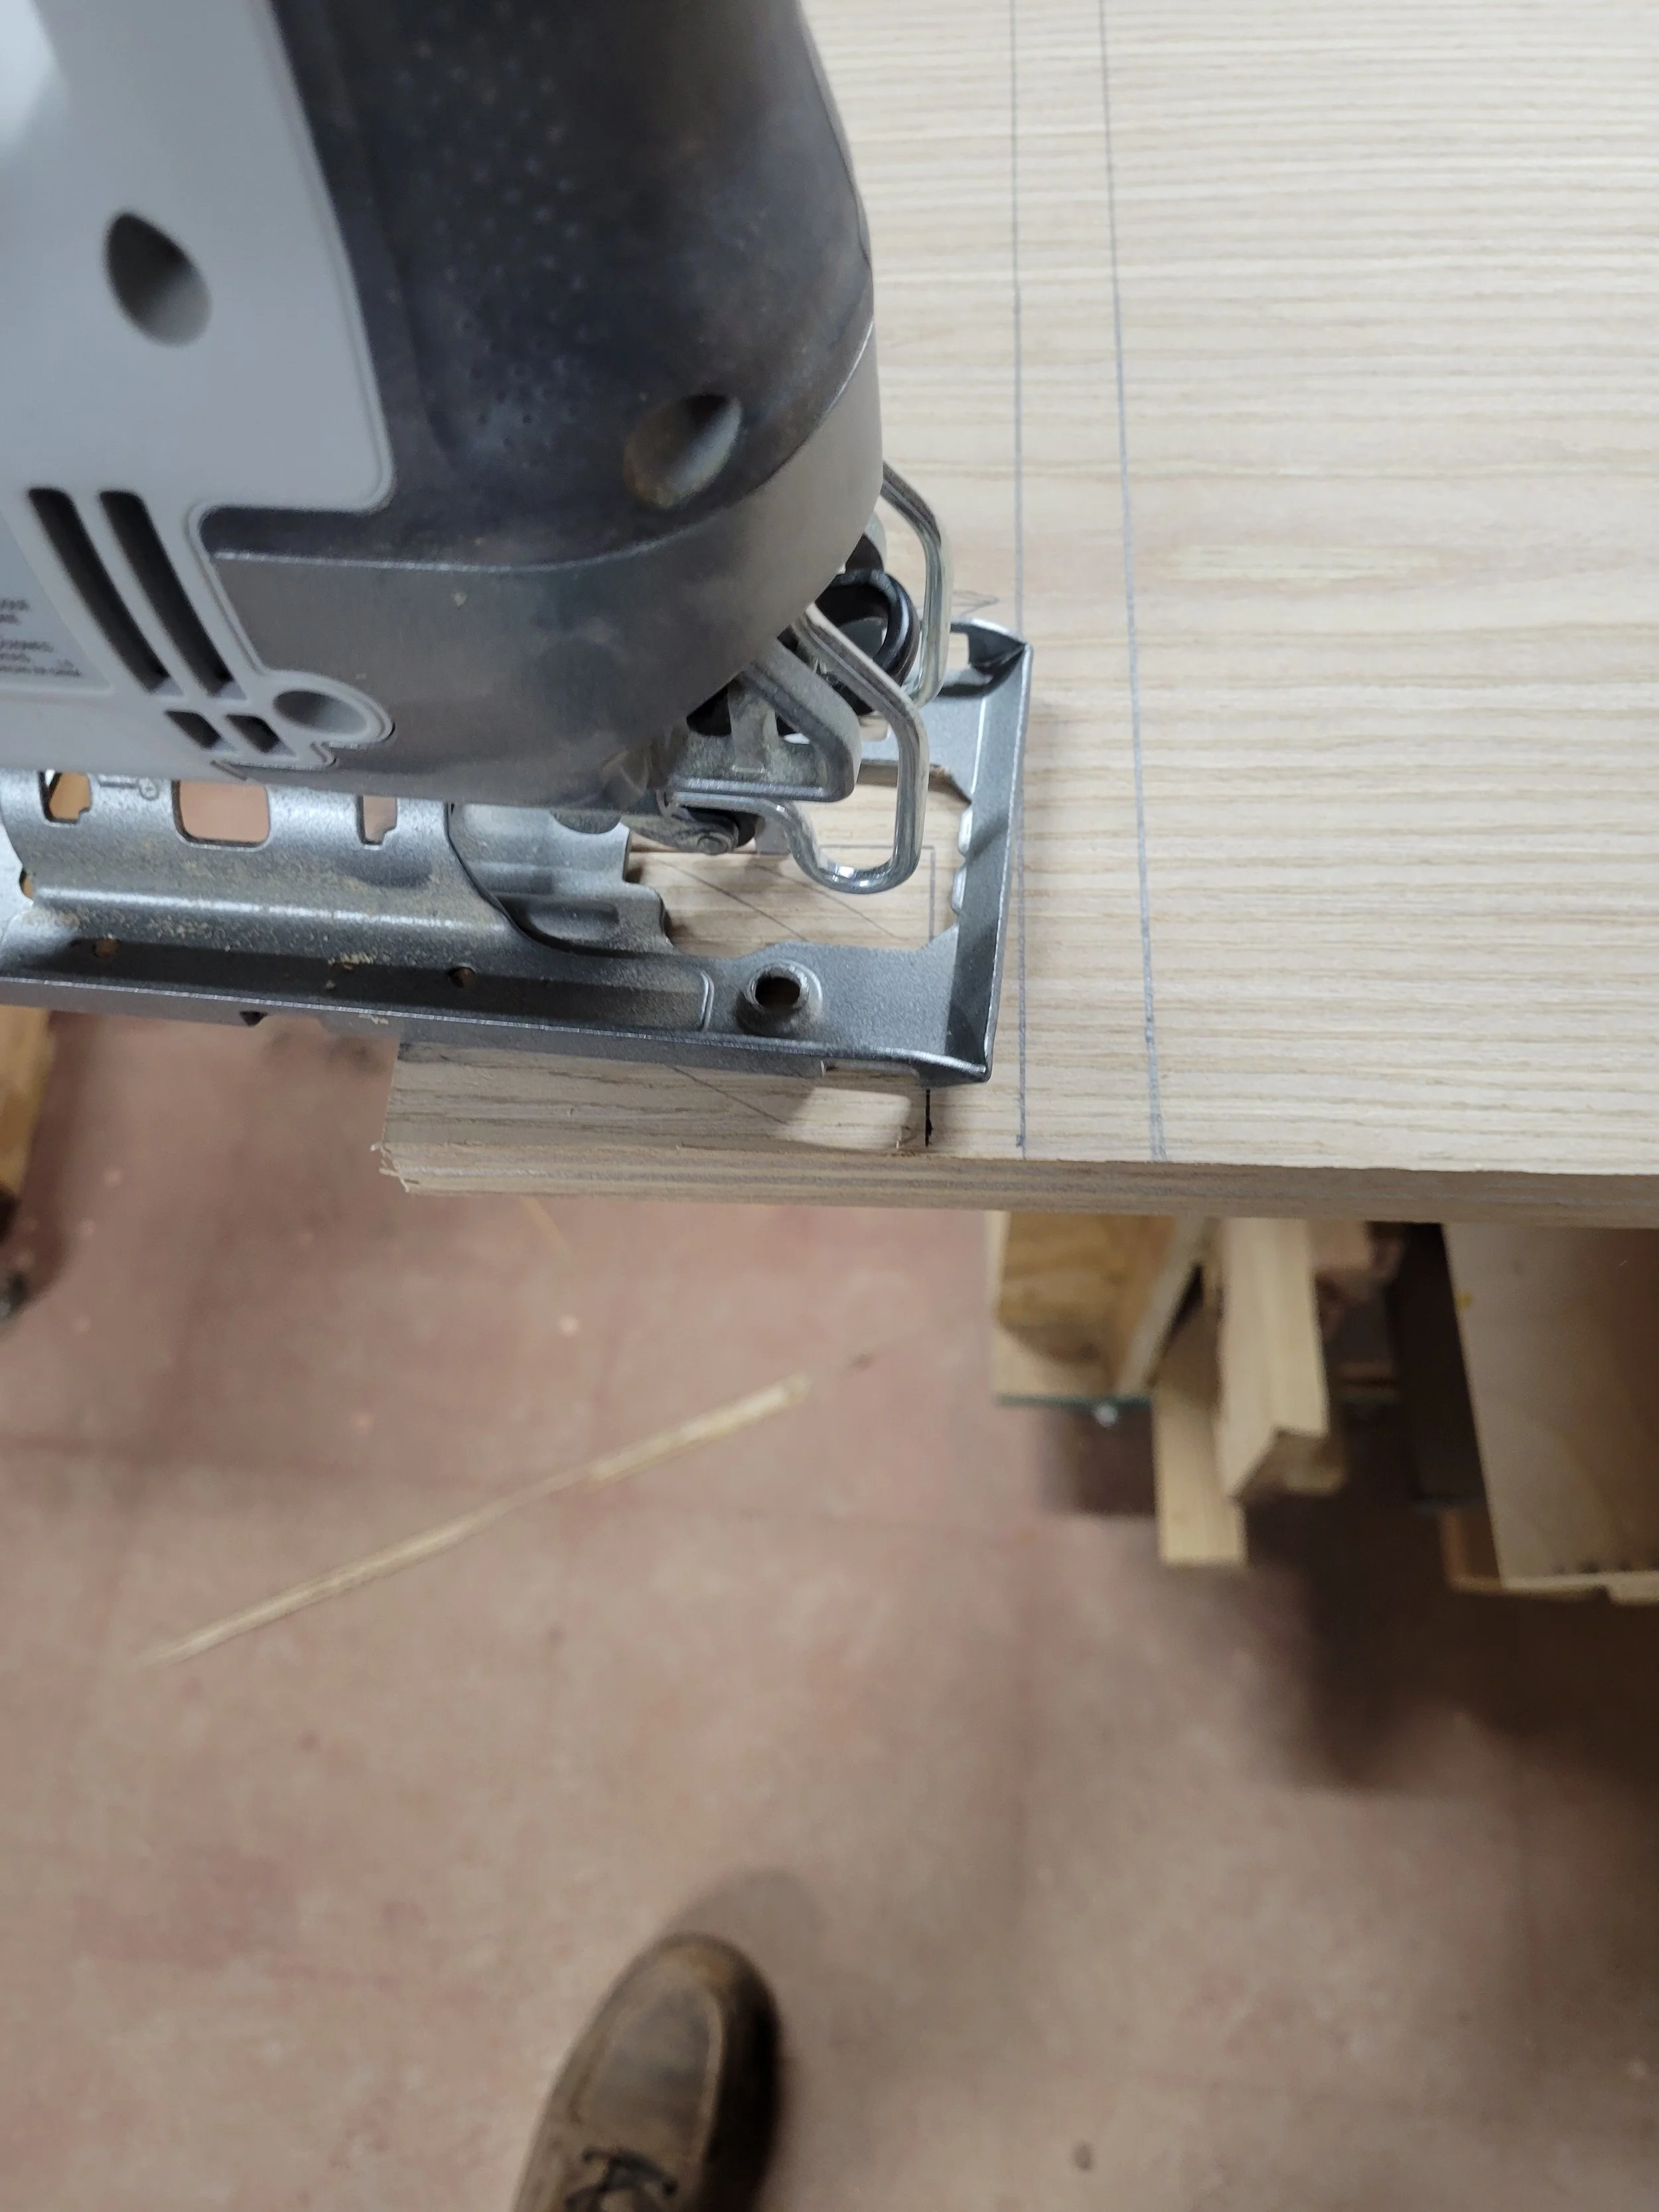
The first cut I made was for the toe kick. A toe kick is a cut out in the bottom of the cabinet so that you can stand close to the countertop without stubbing your toe or kicking the cabinet. I made mine 3” tall by 3” deep. I cut these out with a jig saw.
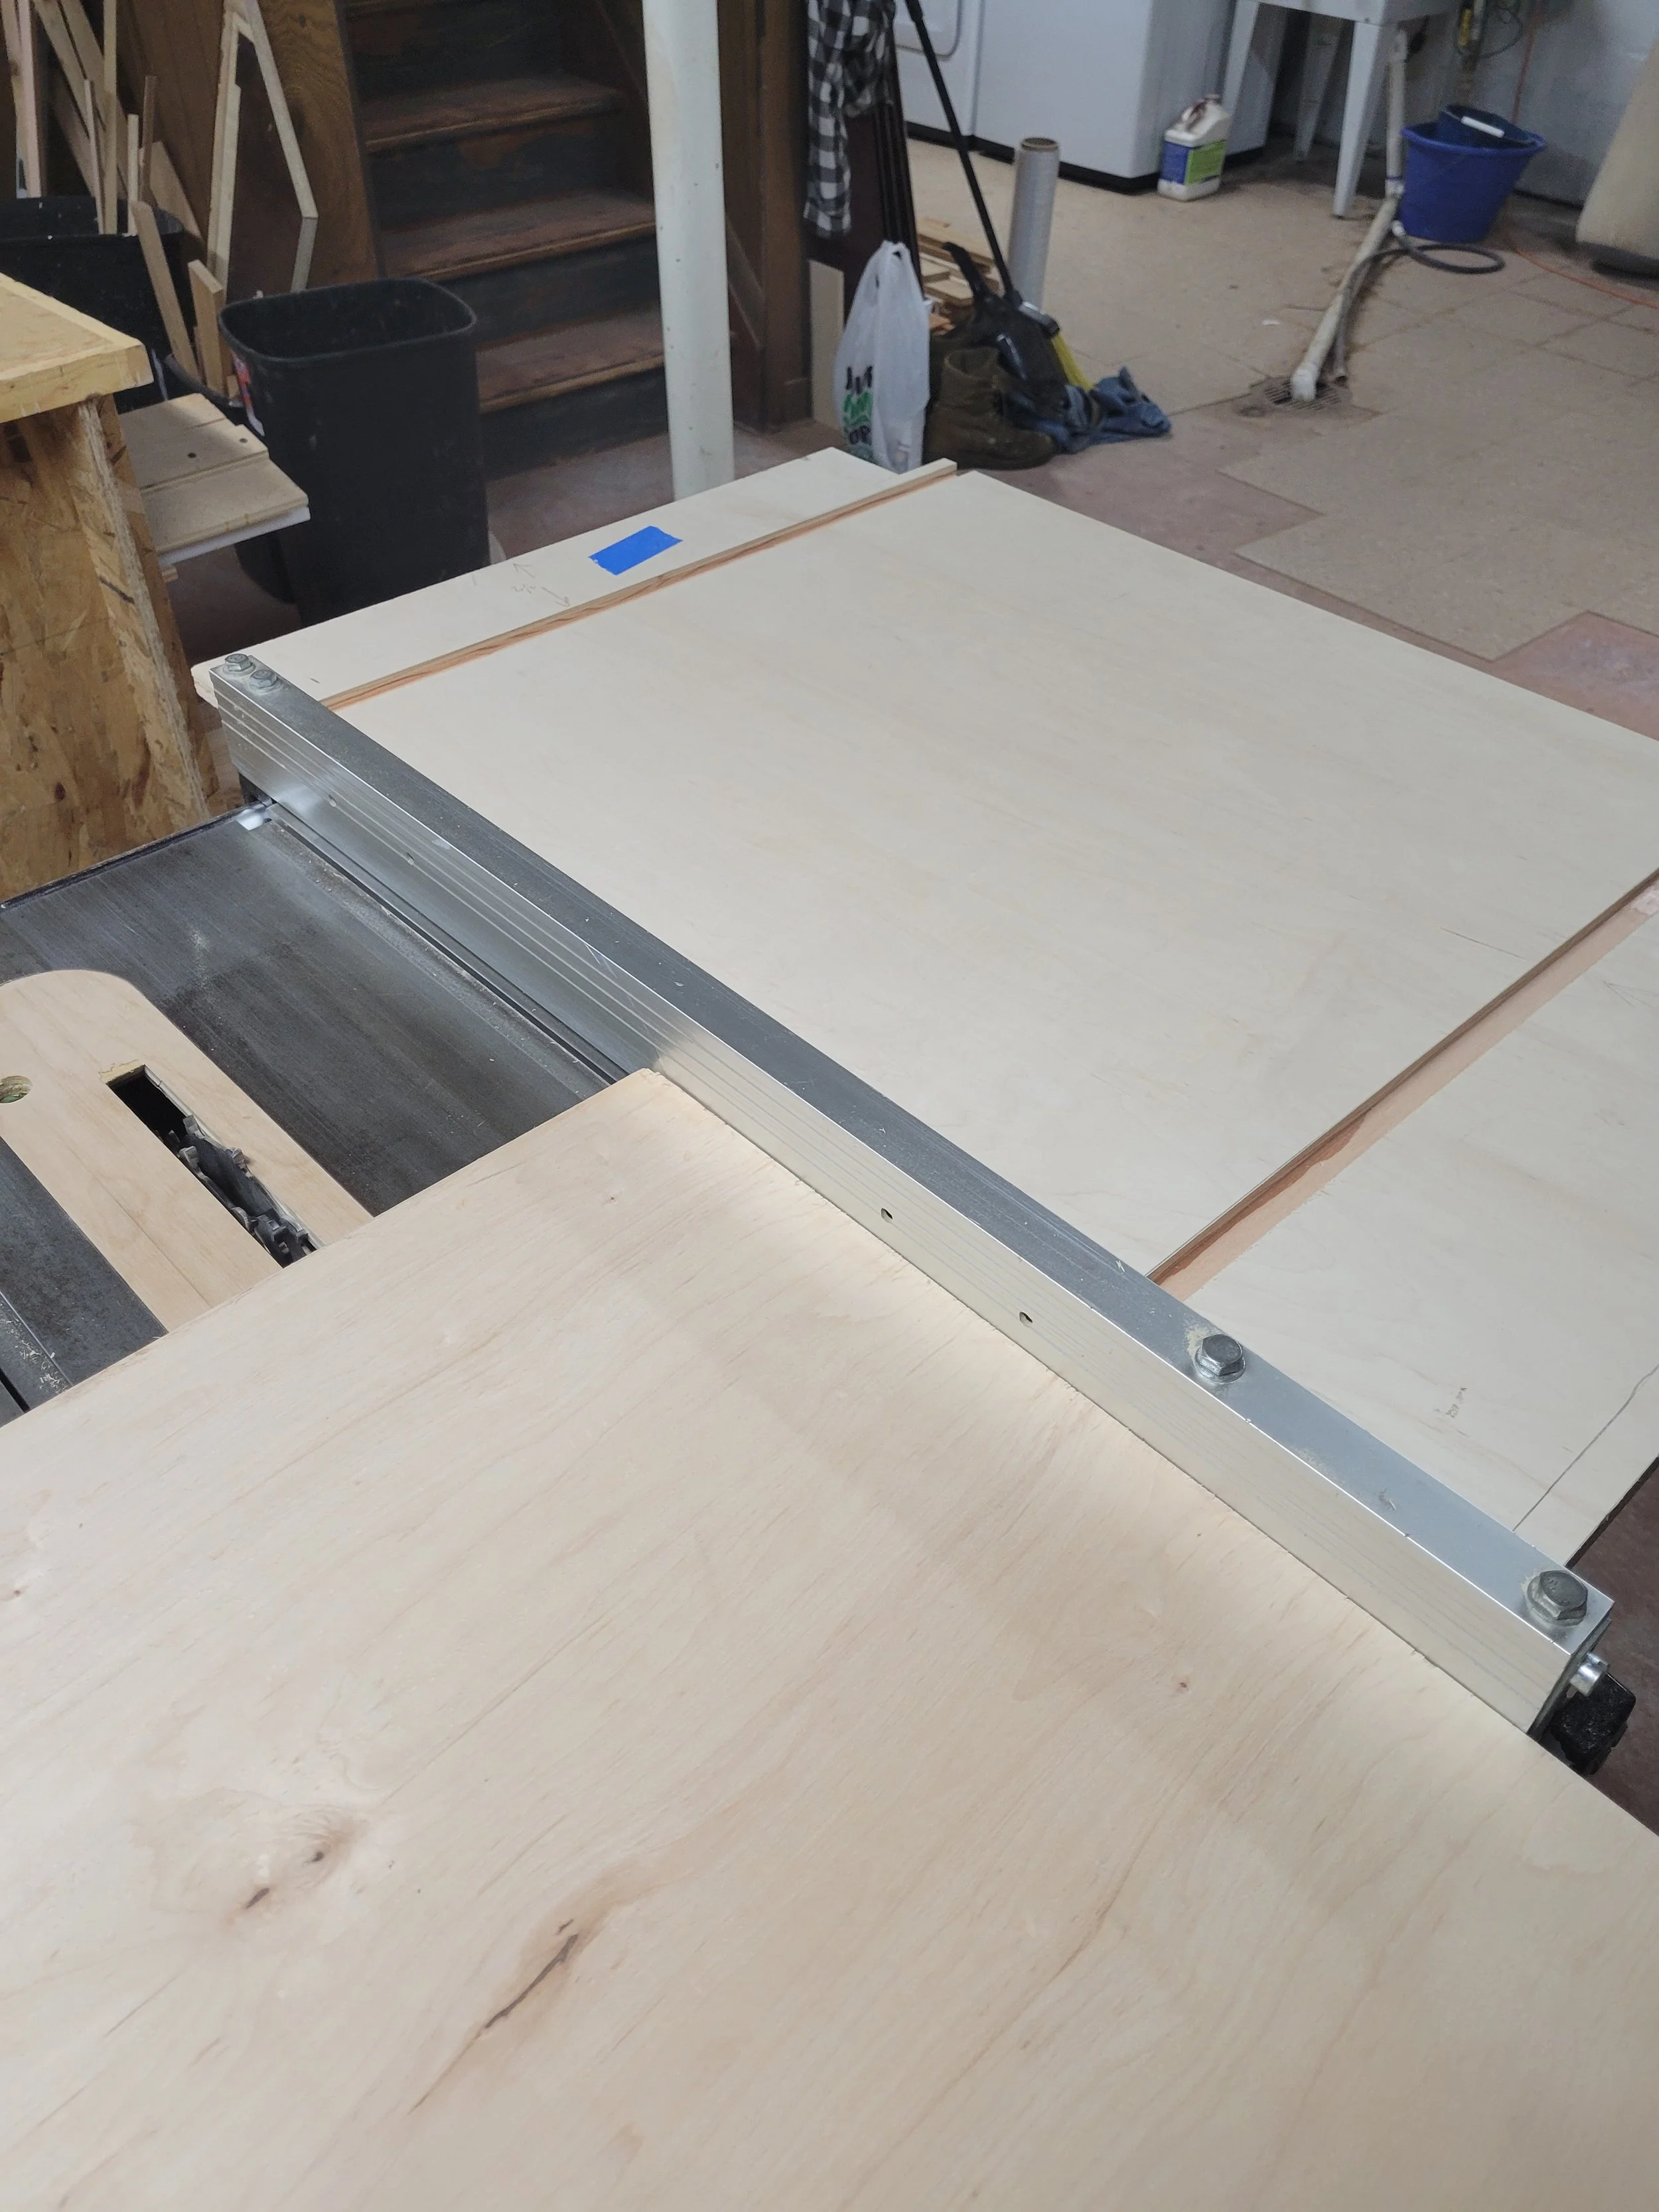
I then used a dado blade on my table saw. A dado blade is a set of special saw blades that you can stack together to make a very wide cut. I set the cut to be the thickness of my plywood so that the shelves would slide into the dados without any wiggle room. Tight bodied cabinets are sexy cabinets.
I used my markings to adjust my fence so that the cut was made where I planned it to be. For each dado I cut both sides and then moved onto the next cut. This was so the placement of each dado was identical on each side.
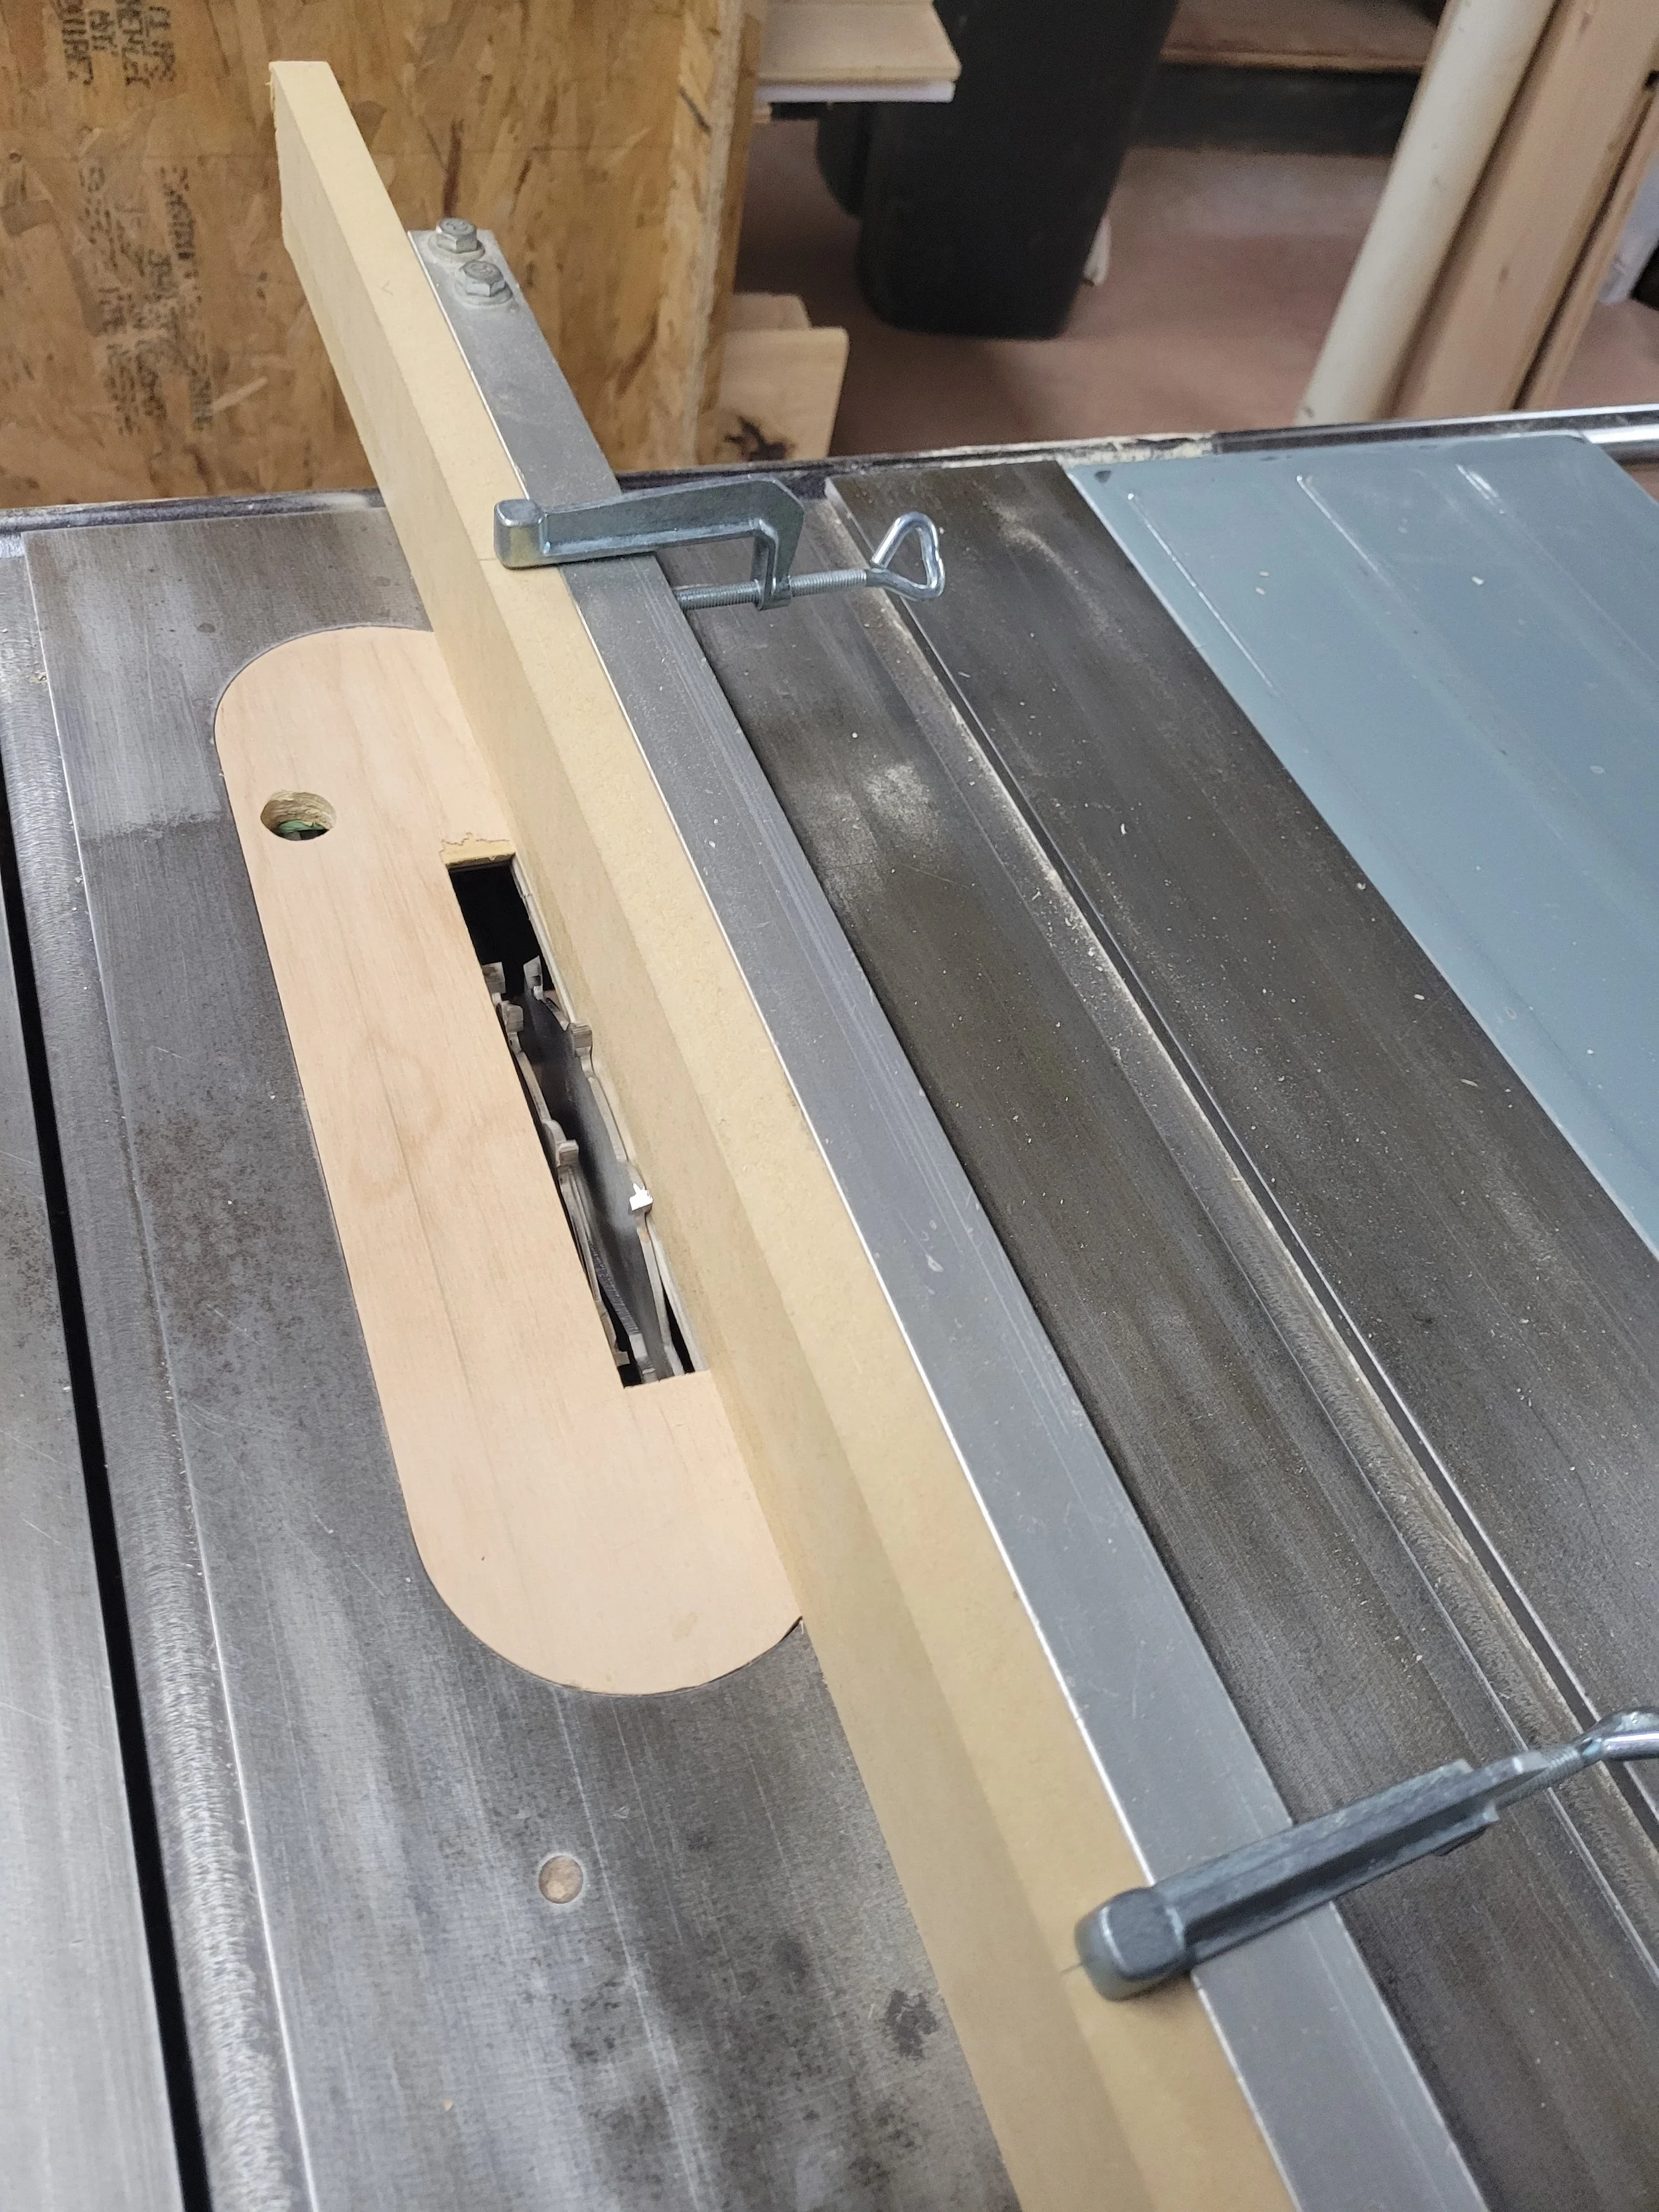
The grooves for the back and frame I would put in the top needed to be right along the edges of sides. These grooves along the edges are called rabbets. I cut these using the same technique as the dados. The only issue here is that you can’t put the fence directly next to the blade because the blade will cut into the fence. So I used something called a sacrificial fence. It’s essentially a straight piece of MDF that I clamp to the saw fence so that the blade would cut into the wood and not the metal. Like the name implies, you use this piece until it’s too chewed up to be used anymore and then you discard and replace it. Much like an abusive relationship.
WTF is a Web Frame?
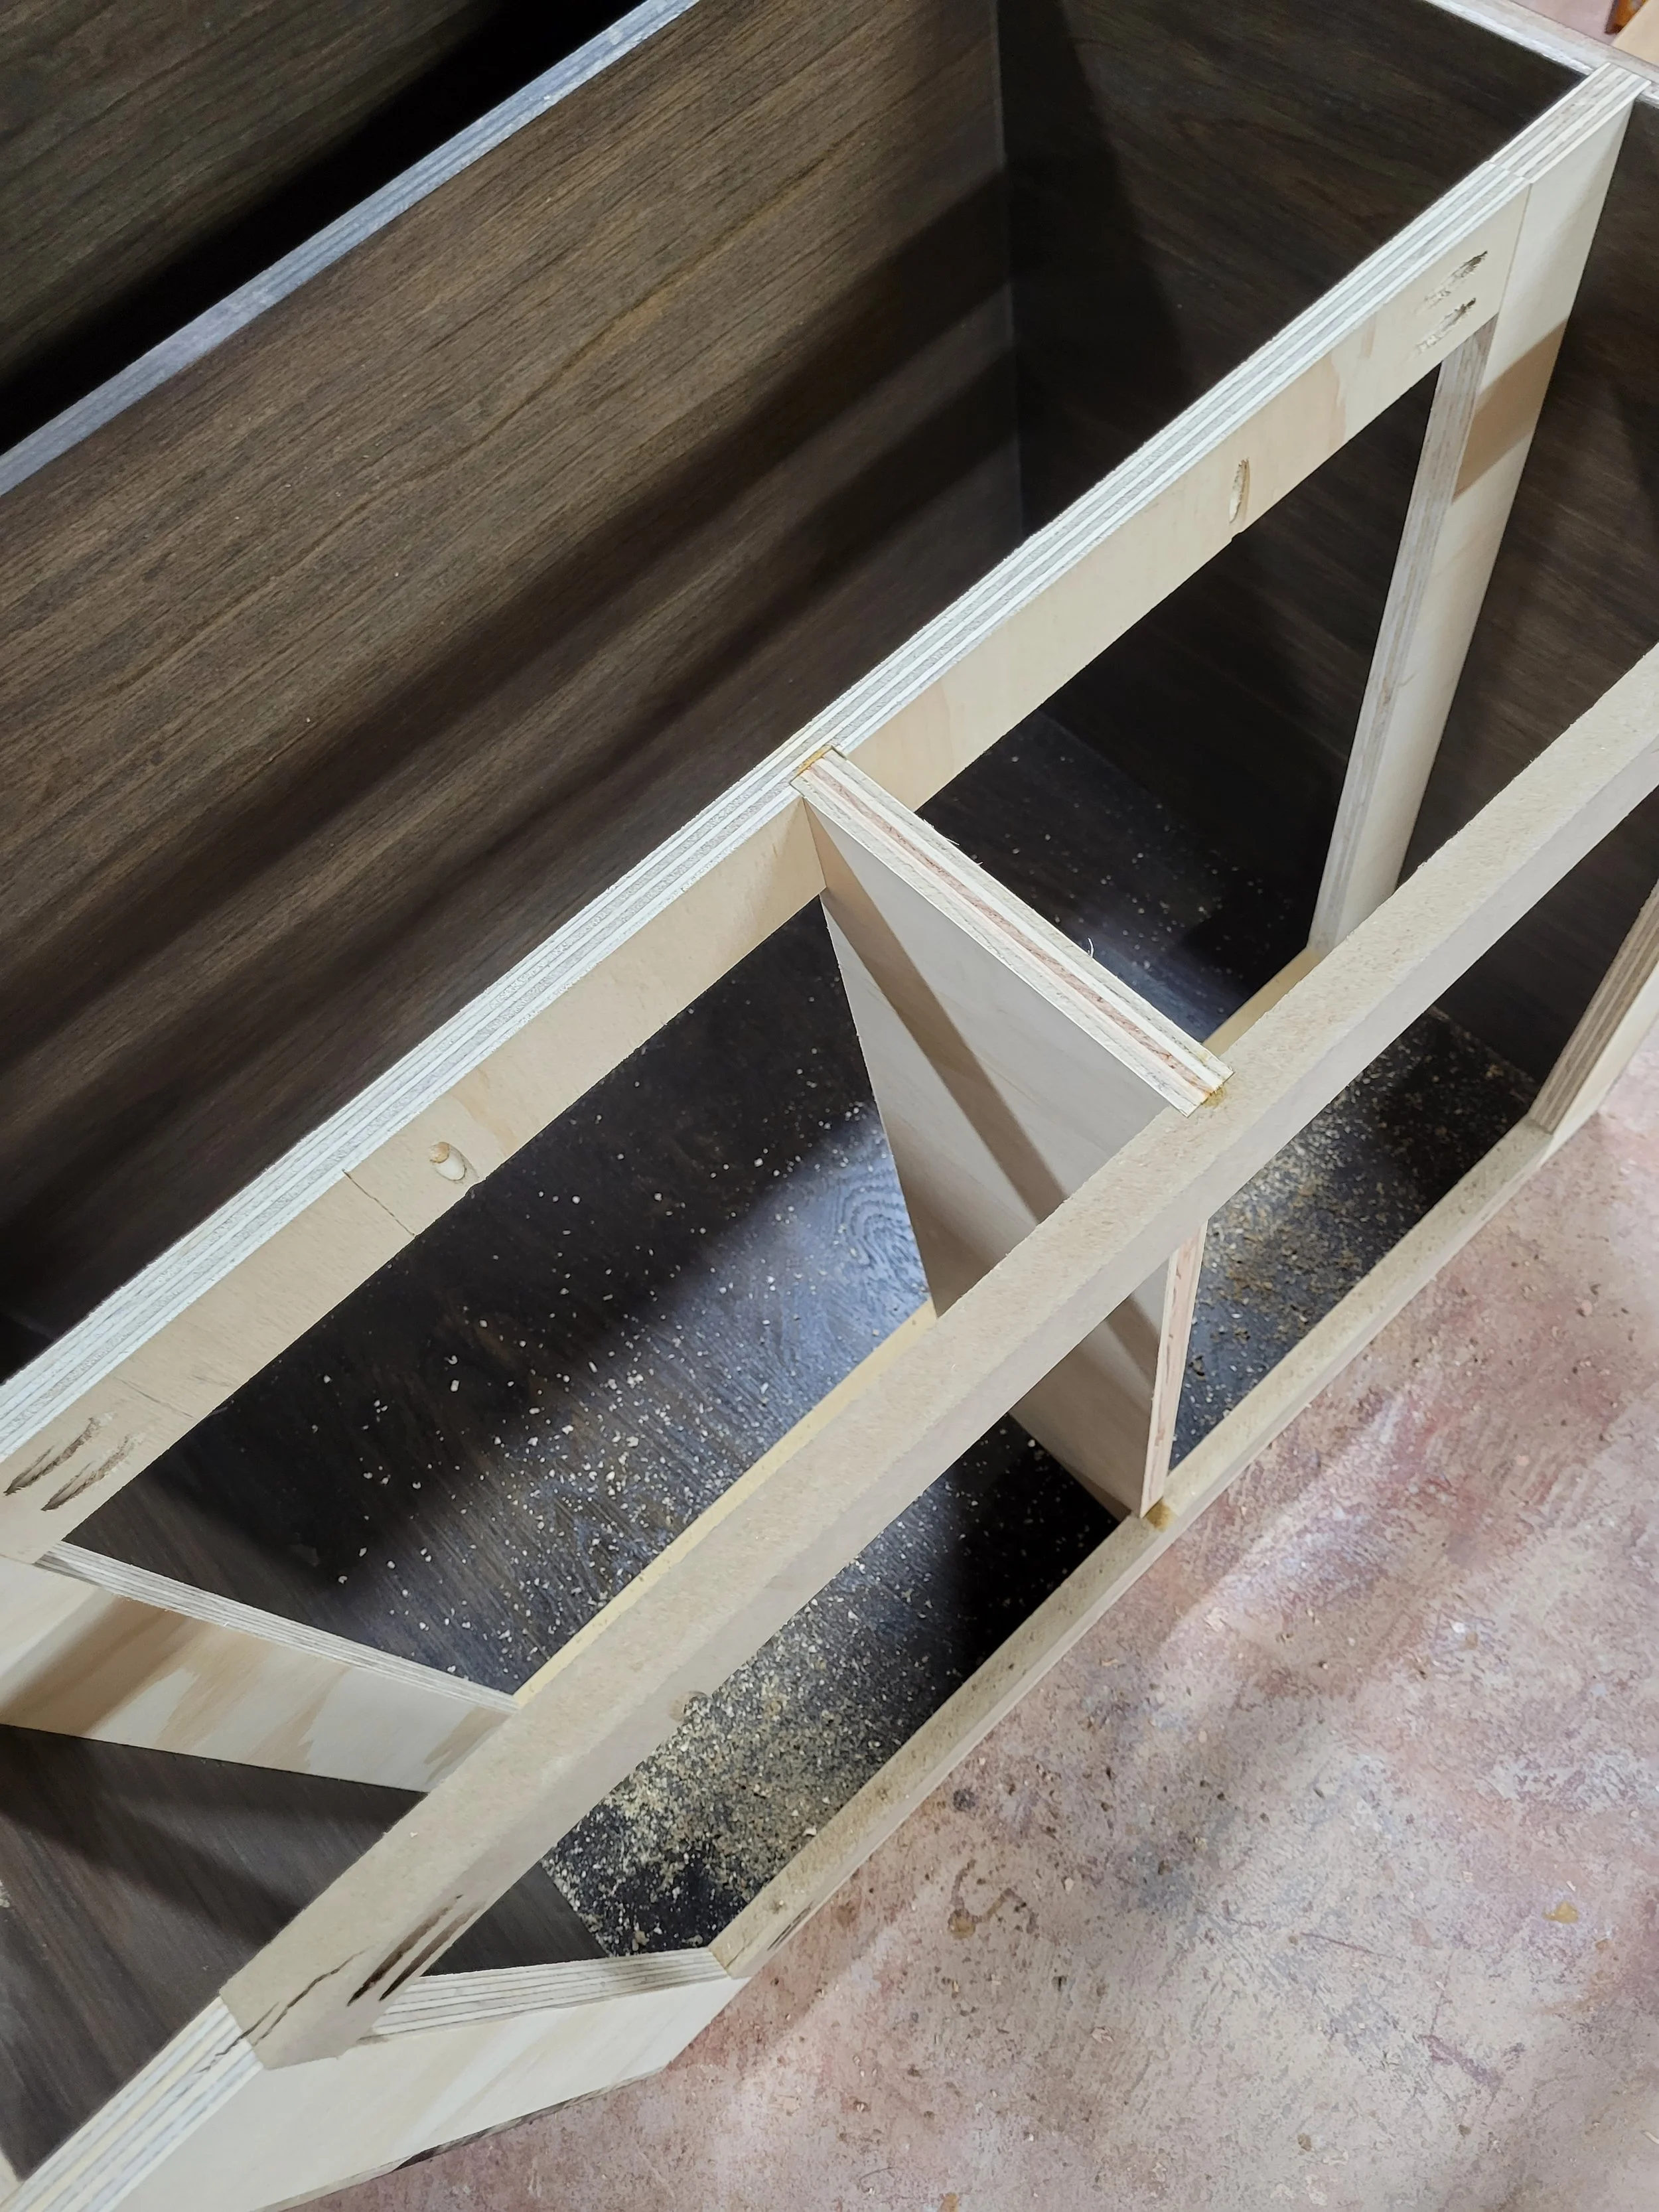
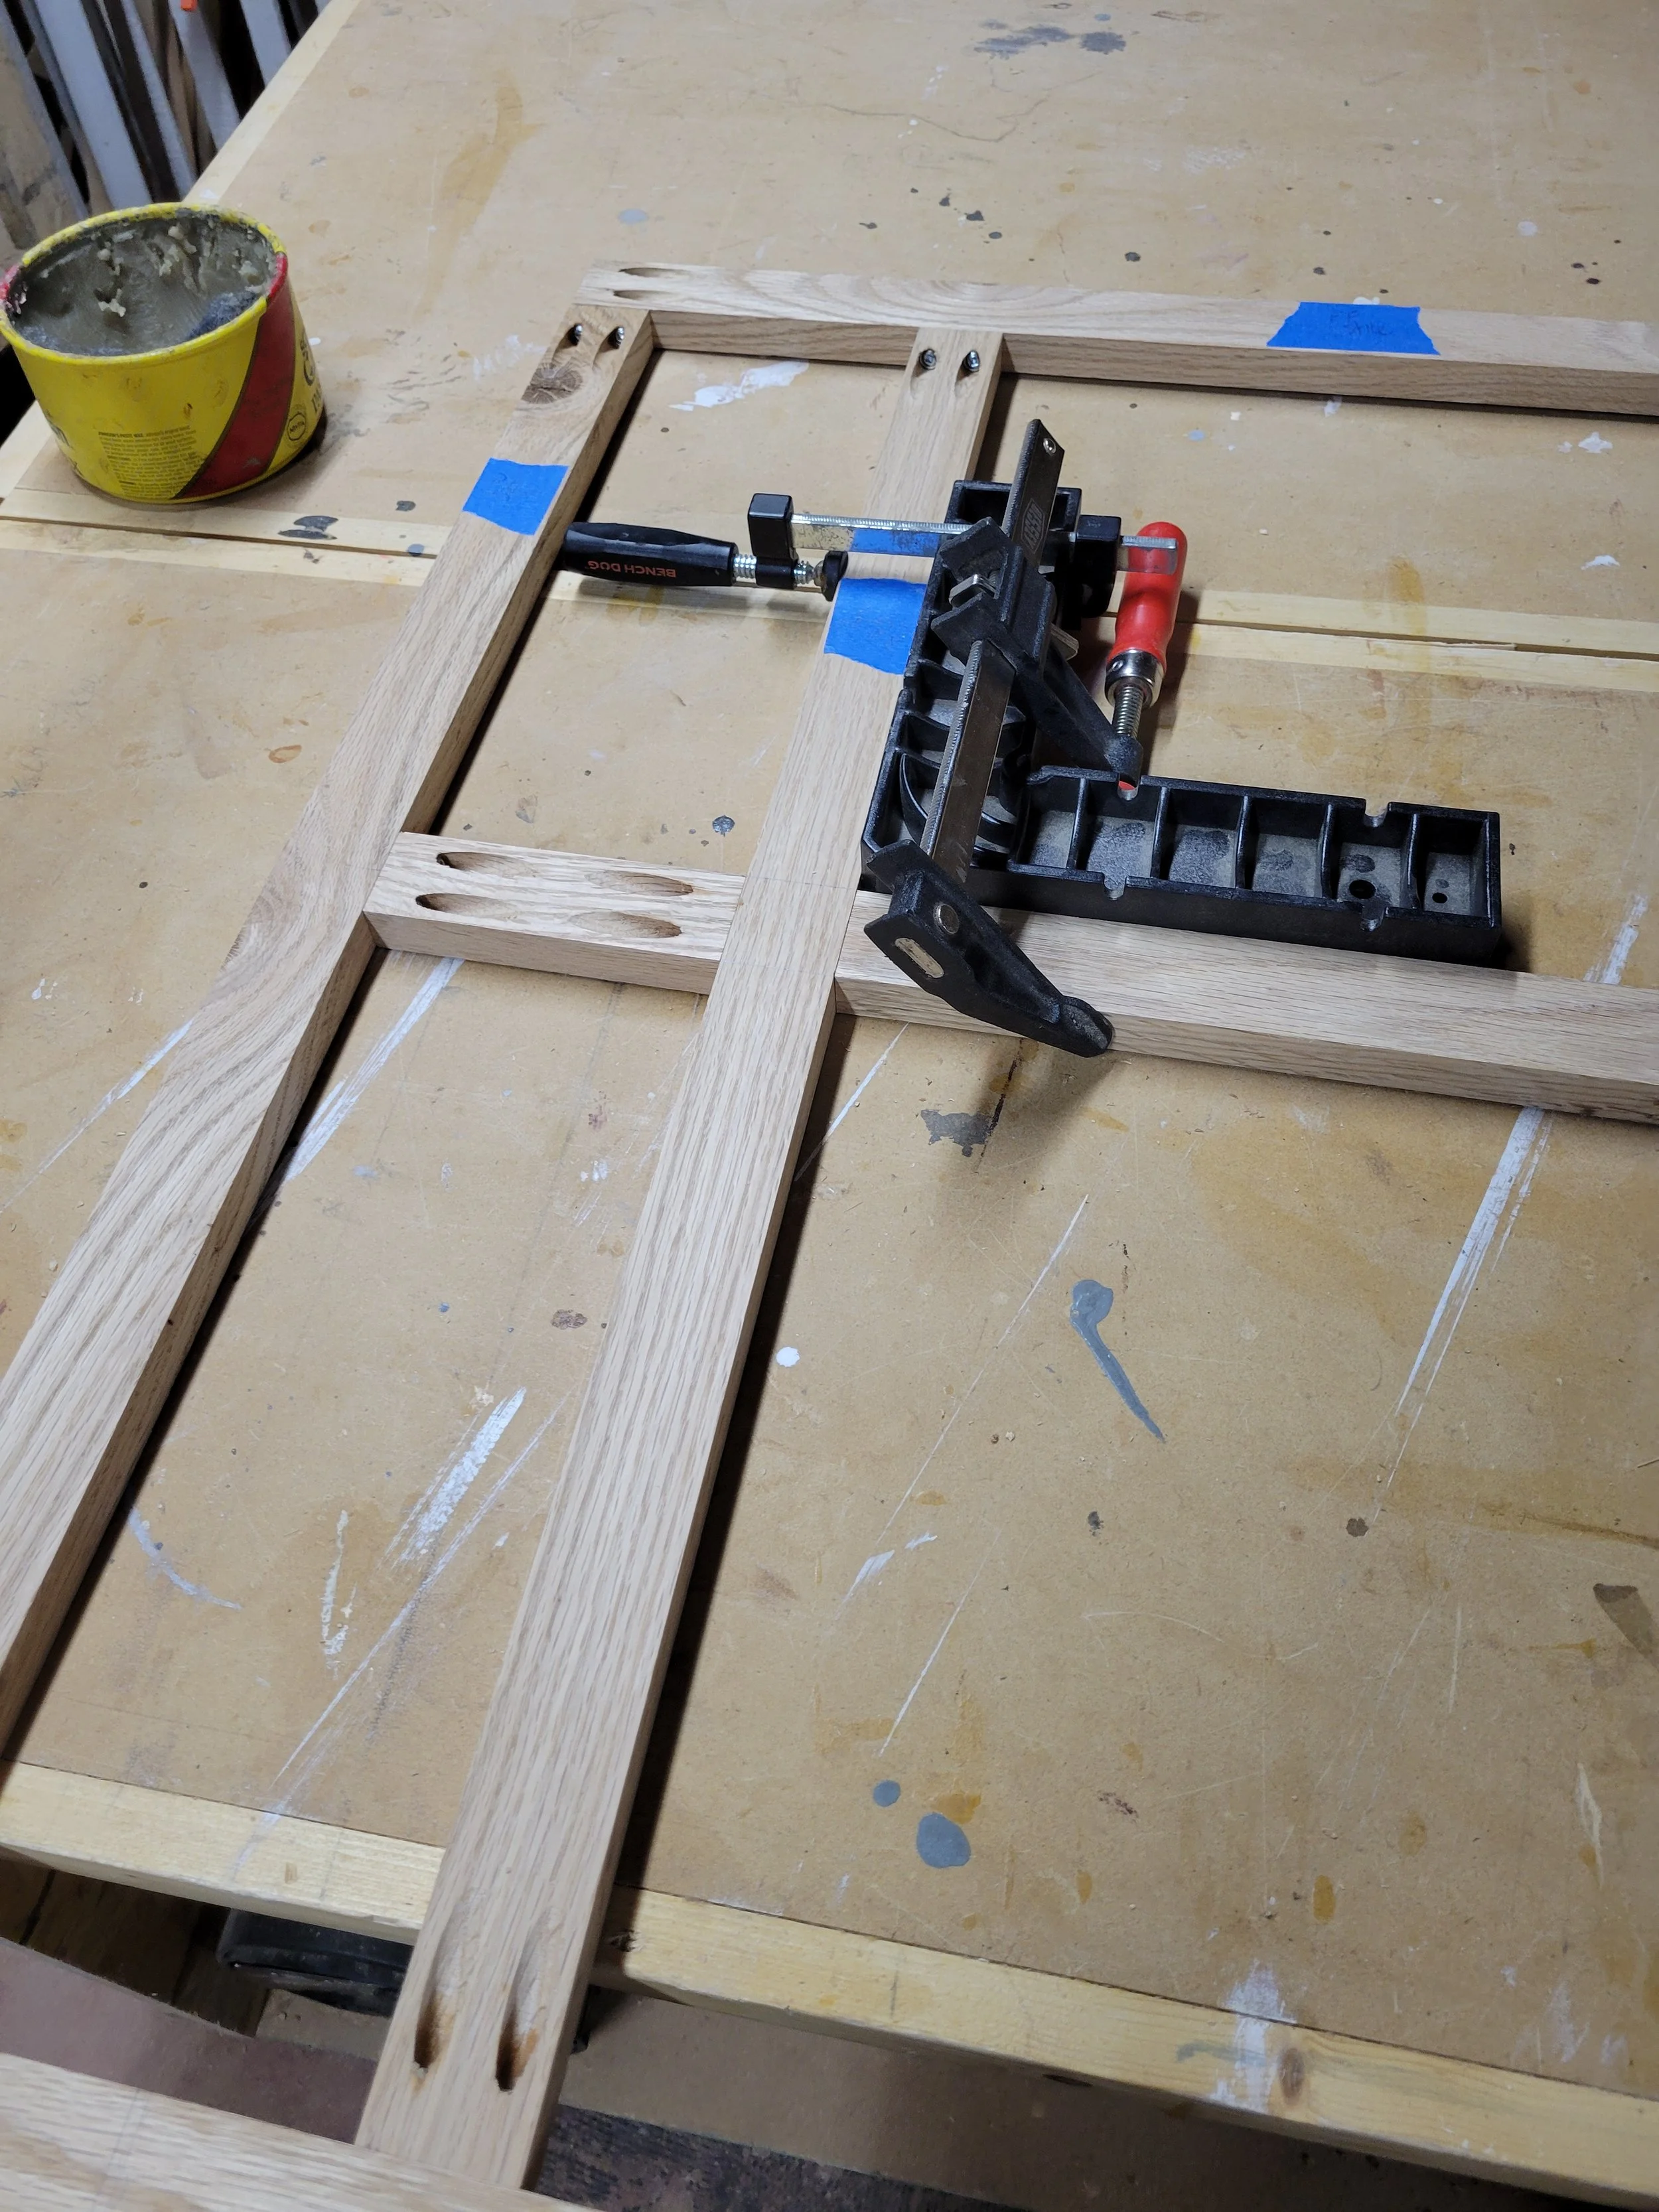
Once my sides were done I then constructed the web frames for each cabinet. A web frame is just a a rectangle that attaches to both sides like a shelf would. Web frames serve a few purposes. They help make the cabinets more stable and provide a surface for mounting drawers if you’re going to mount the drawer slides on the bottom. I wasn’t using bottom mount slides, but I was planning on putting two drawers side by side in the larger cabinet. Since I was using drawer slides that mount on the sides, I needed a divider between each drawer to mount the slides to. So I created web frames like the picture above that would hold that divider. I had planned on this, so I had already cut the dados into the sides that the web frames would sit in. The top web frame also provided a way for me to attach the counter top to the cabinet as well. Another benefit of the web frames is that they provide a surface to attach the face frame to, which I’ll get into later. Notice I used whatever scrap wood I had lying around because they won’t be visible.

To make the web frames I cut strips that were 2 1/2” wide to make a rectangle. I then used pocket screws to attach the strips together.
For the drawer divider I cut dados in the web frames and then glued the divider into the dados.
Preparation H
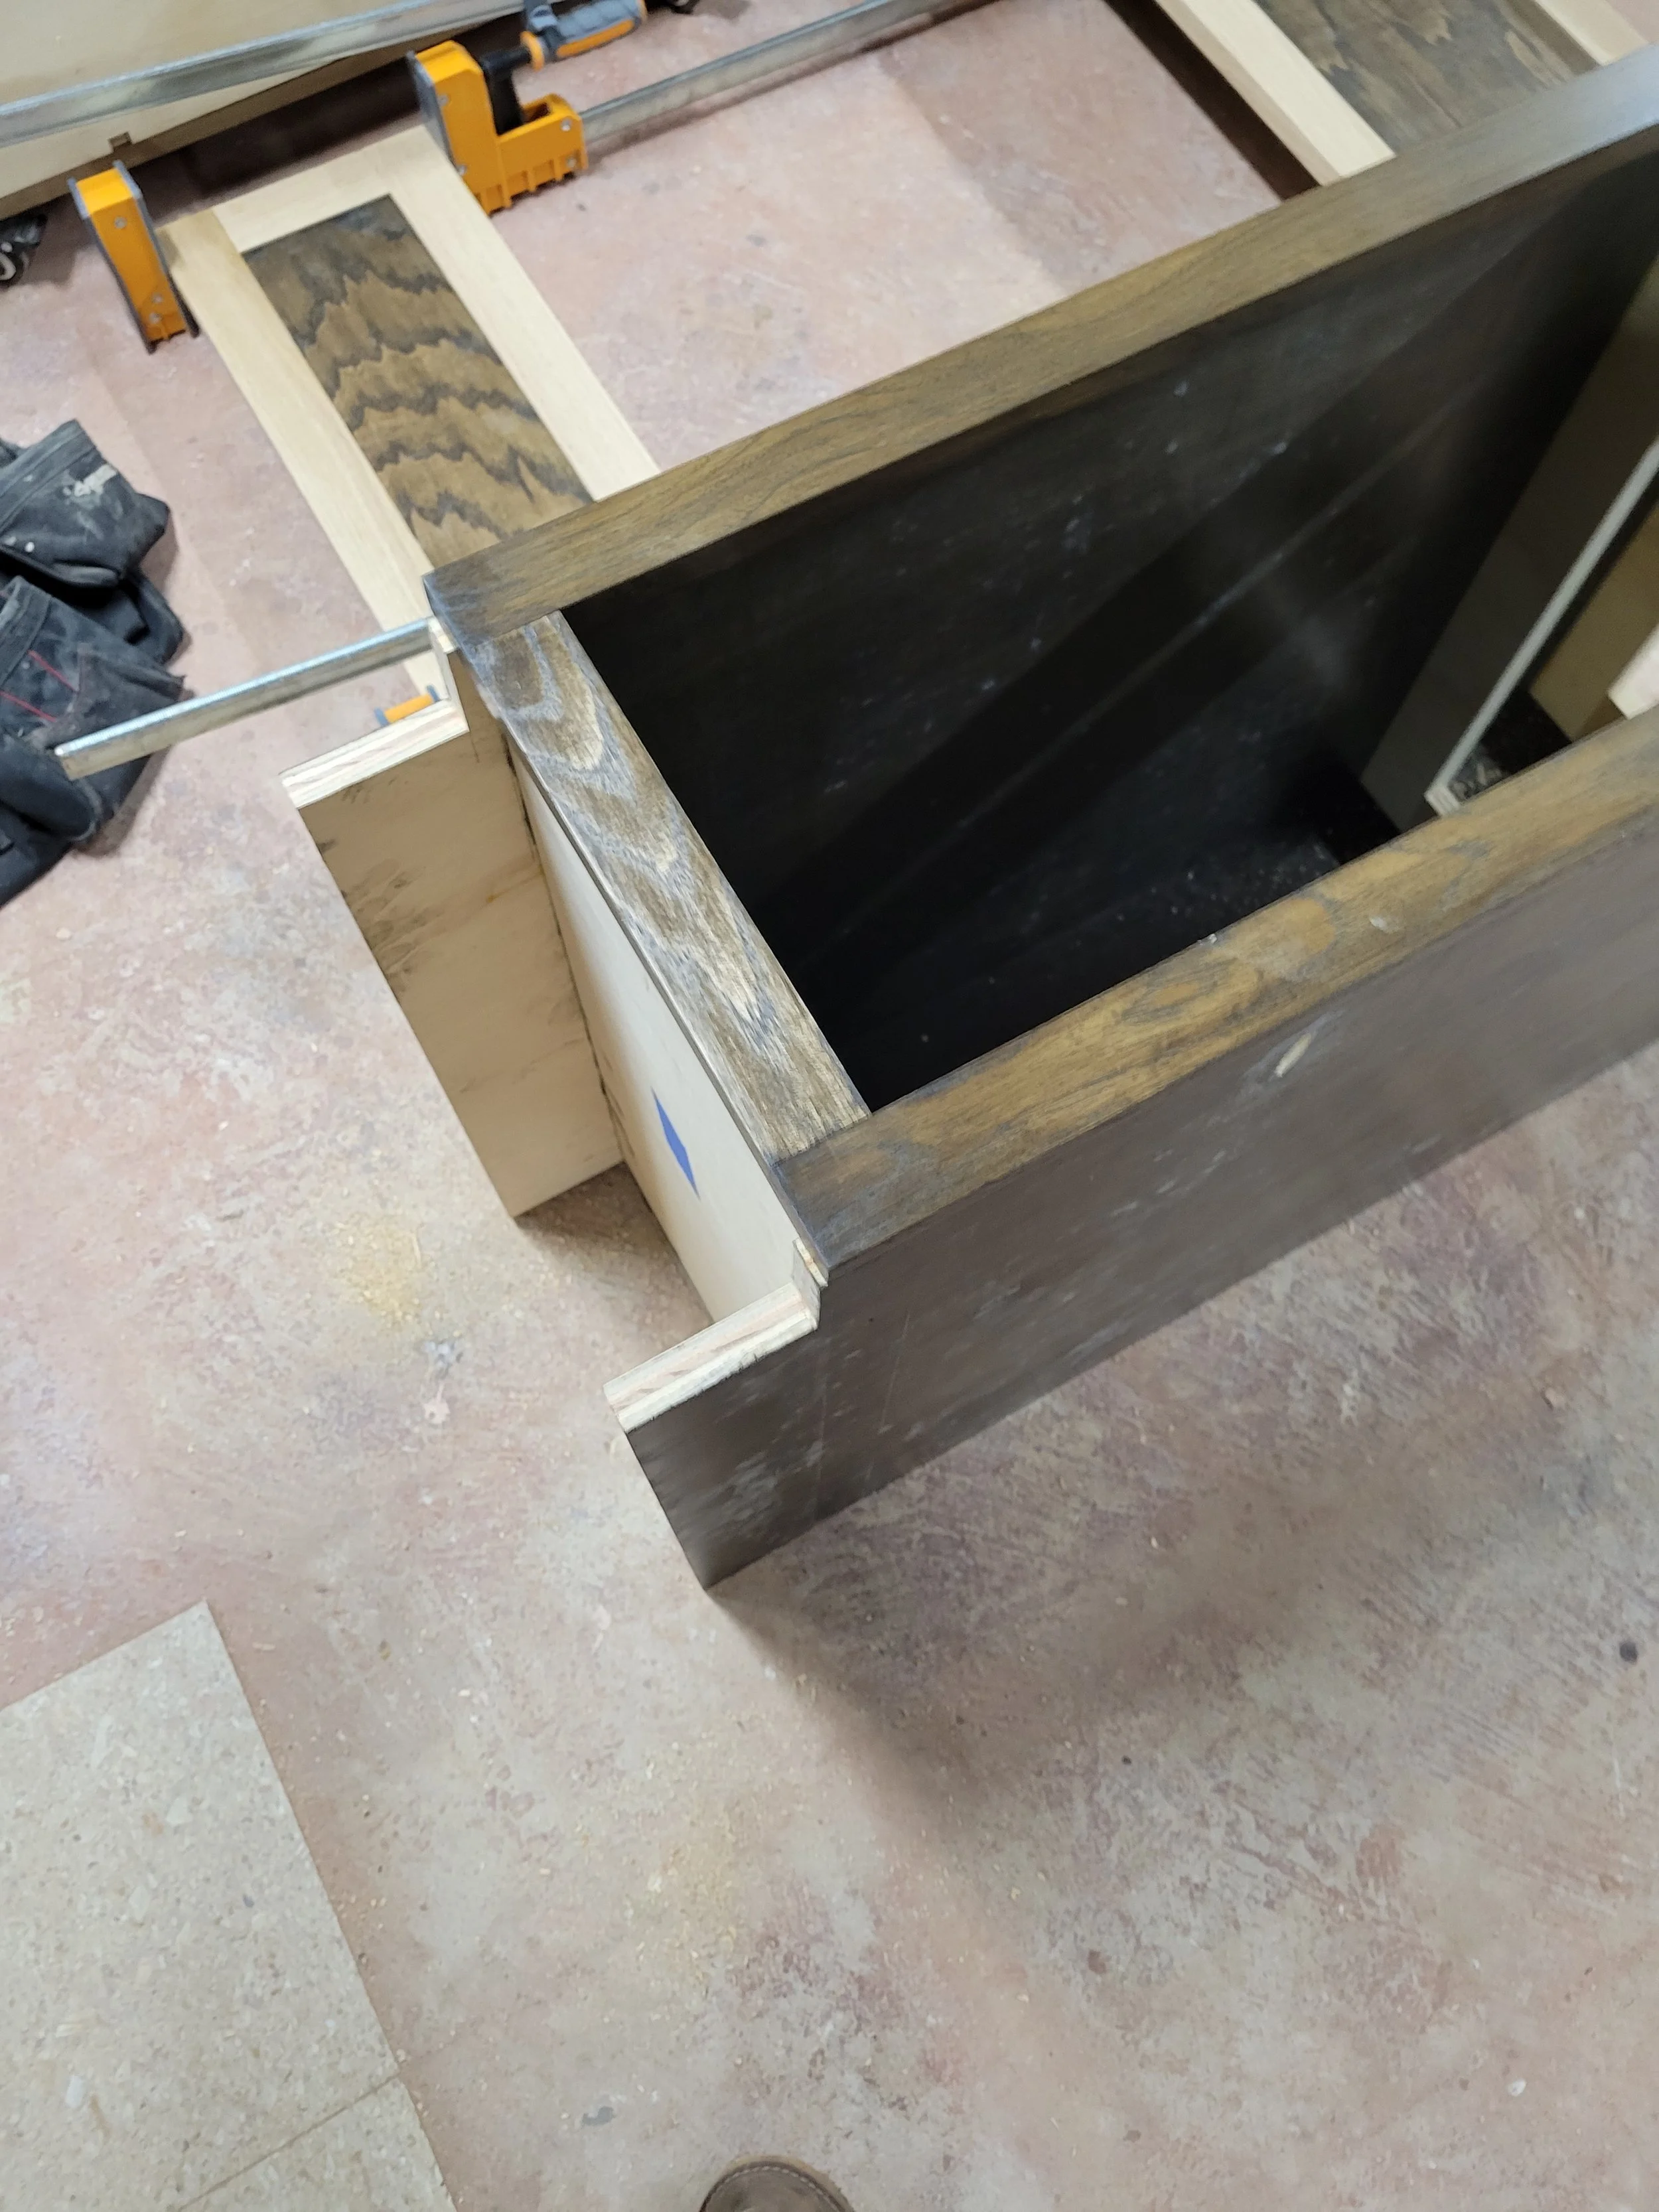
After I had created the web frames and cut the shelves to size I then dry fit everything to make sure it all fit together like planned. Dry fit is just assembling something without glue to ensure you didn’t screw everything up. Never glue something without doing a dry fit. Or do it. But you’ll be sorry when you realize something is just a tad too long.
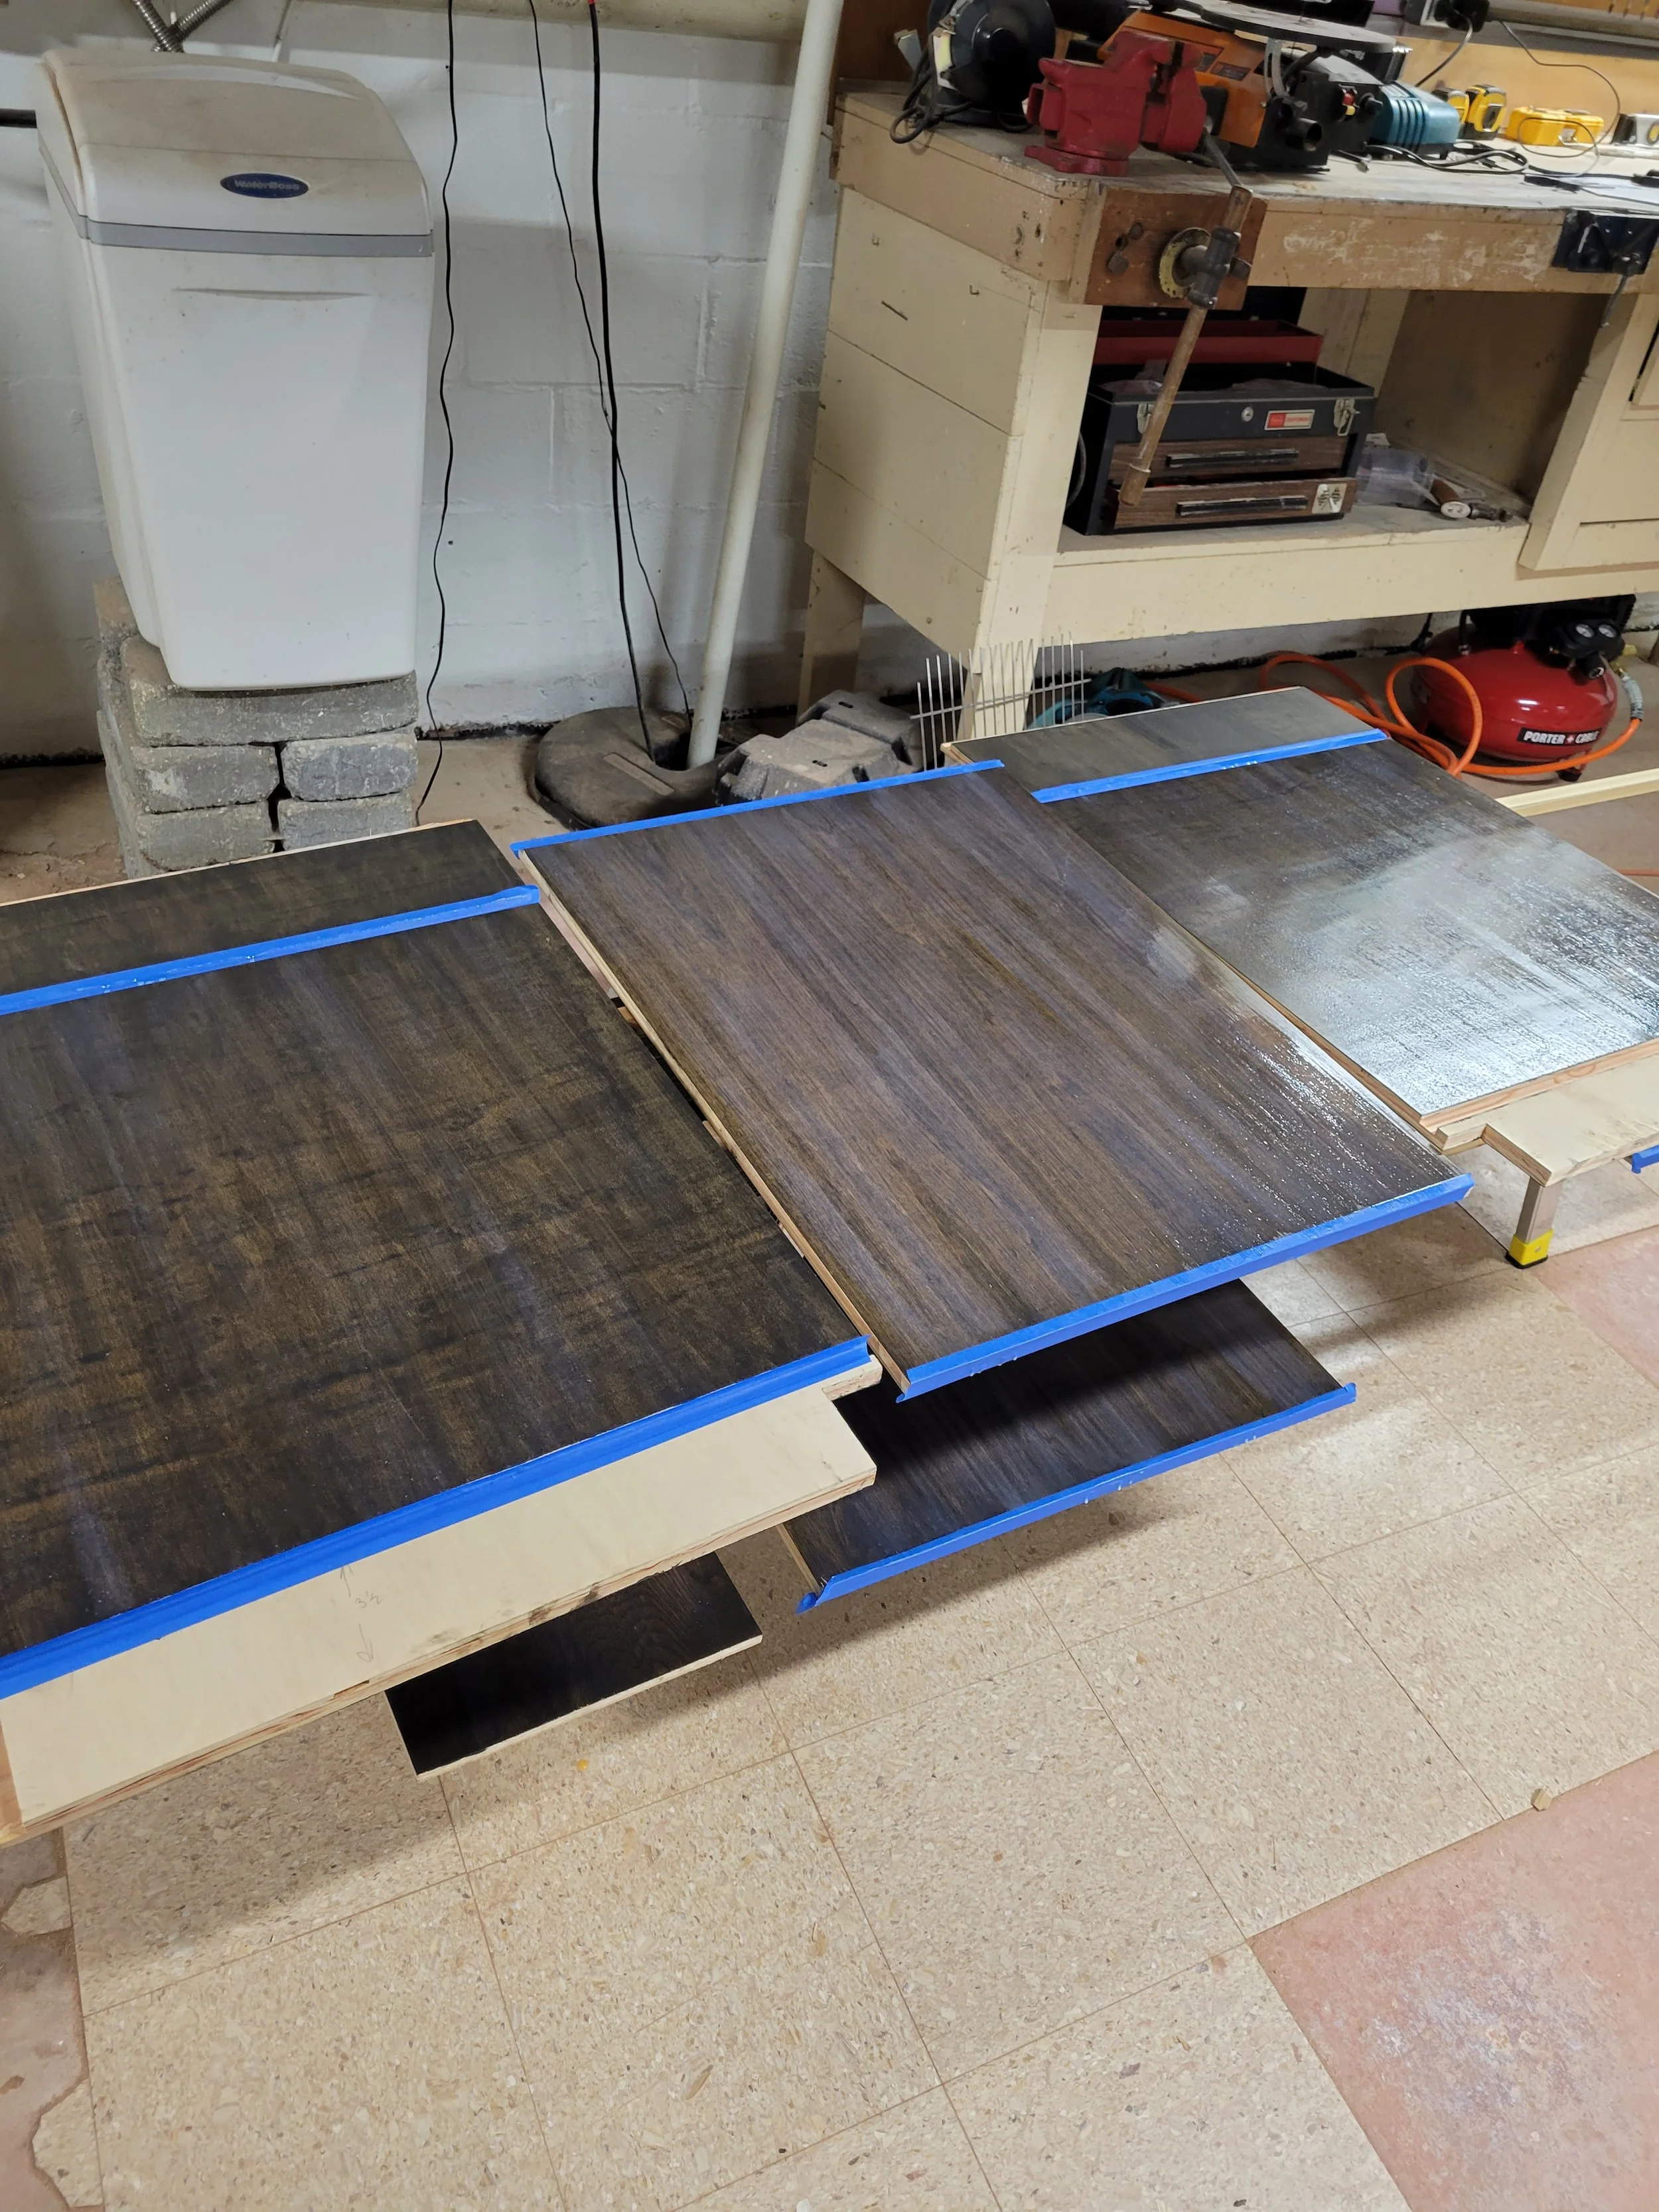
When everything looked good I then prepped everything by sanding then staining and finishing. Whenever I can, I stain my pieces before gluing to avoid leaving glue spots, or areas where glue had gotten on the wood and prevented stain from adhering. I had to be careful to prevent the stain and polyurethane from getting onto surfaces that would be glued because otherwise the glue wouldn’t bond. So I used painters tape, which I use a lot of. I didn’t stain the bottoms because they will never be seen and I don’t like wasting time and stain.
Make it or break it
Then it was time for the glue up. Normally woodworking relieves anxiety but when it comes time to glue up I’m always a nervous wreck. Once you start applying the wood glue there’s no going back so you damn well better have everything right and have everything you need for the glue up because there’s a time limit for when the glue sets.

Before gluing up I did a dry fit another two or three times because I’m paranoid. During this time I also lay out where I’m going to be putting in nails into the shelves and web frames. Because the sides of the cabinets won’t be visible I used nails to secure everything. For my process I first clamp everything to get a tight fit and make sure everything is square, then I nail everything so that I can remove the clamps and use them for my next glue up without having to wait for the glue to dry. If I had unlimited clamps I wouldn’t bother nailing but clamps are expensive so here we are. To mark where I’m going to nail I used painters tape and marked a line where my nails would go in. It’s hard as hell to eyeball once you’re nailing in the middle of the side panel.
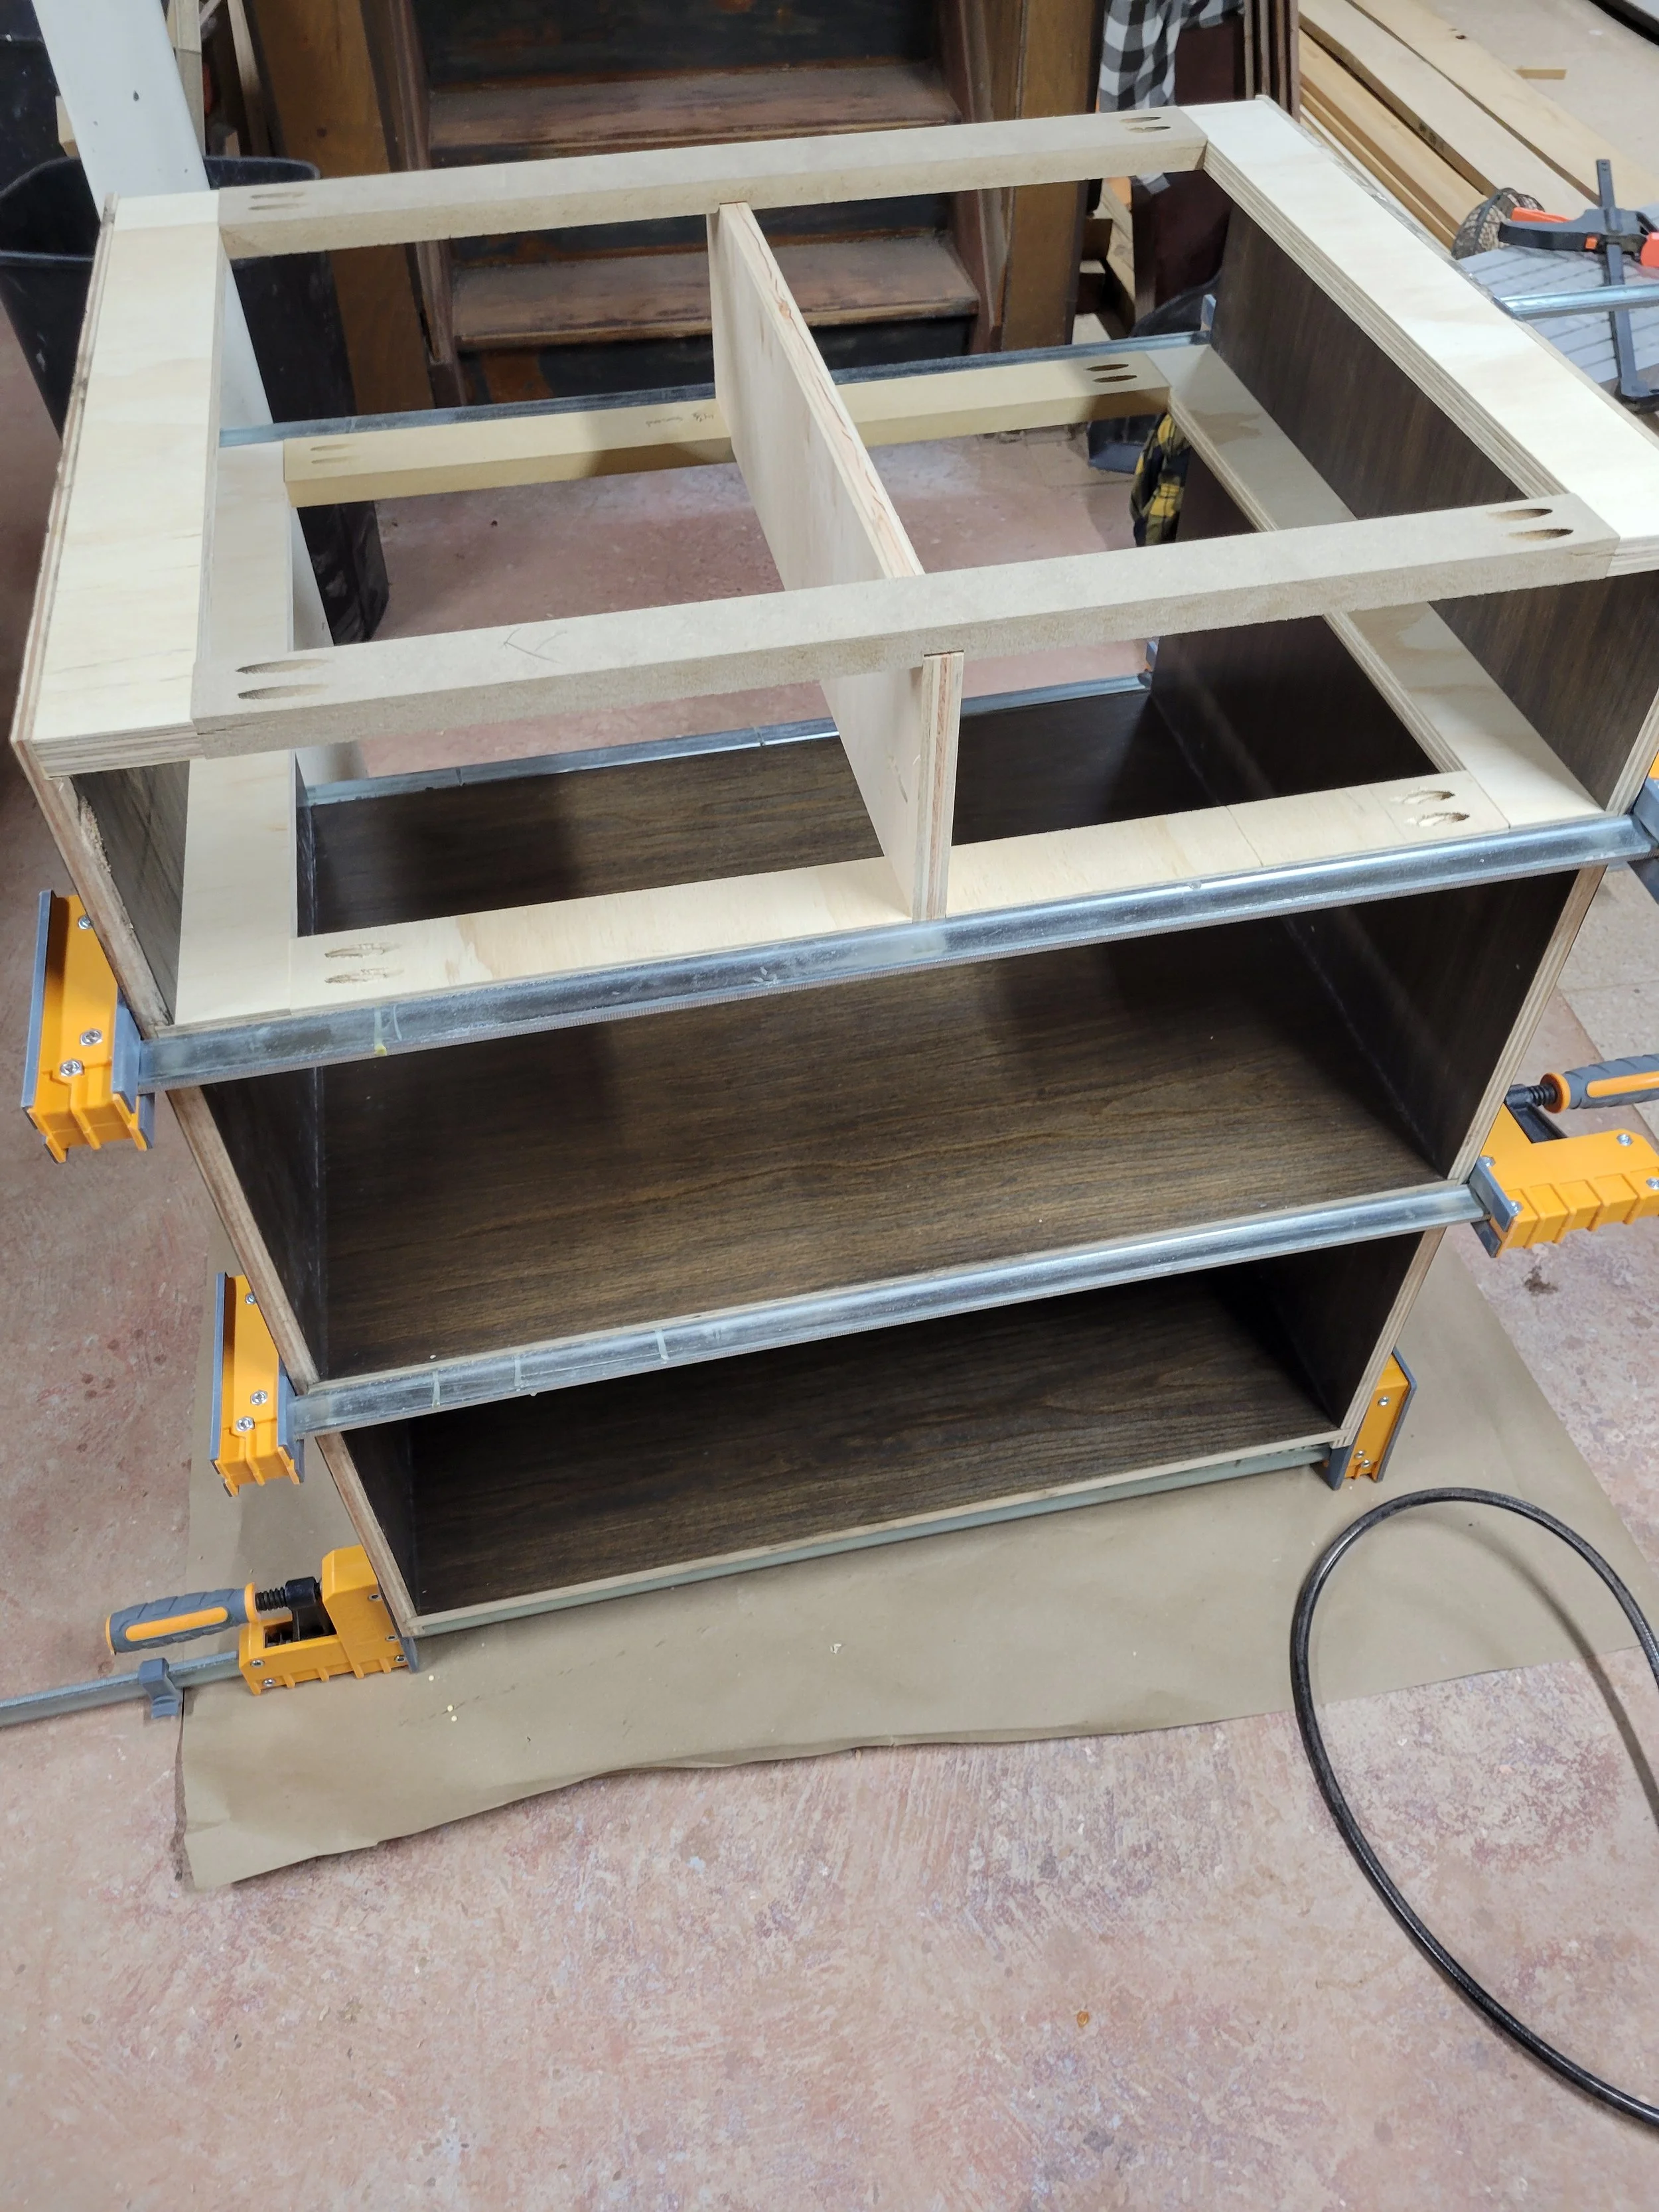
I then began my glue up by applying glue to the dados in each side panel. I laid one side down on the floor and attached all the shelves and web frames to this side first and then attached the other side. Once together I then tipped everything to an upright position and applied clamps like in the picture. I then measured each diagonal to make sure they were the same measurement, which helps me make sure things are square. Then I applied the nails and removed the clamps. I cleaned up any glue squeeze out with a damp rag. Much easier to do when your pieces are already stained.

I had grooves already cut in the side panels so that I could slide the back into place. I didn’t glue the back. I just applied nails.
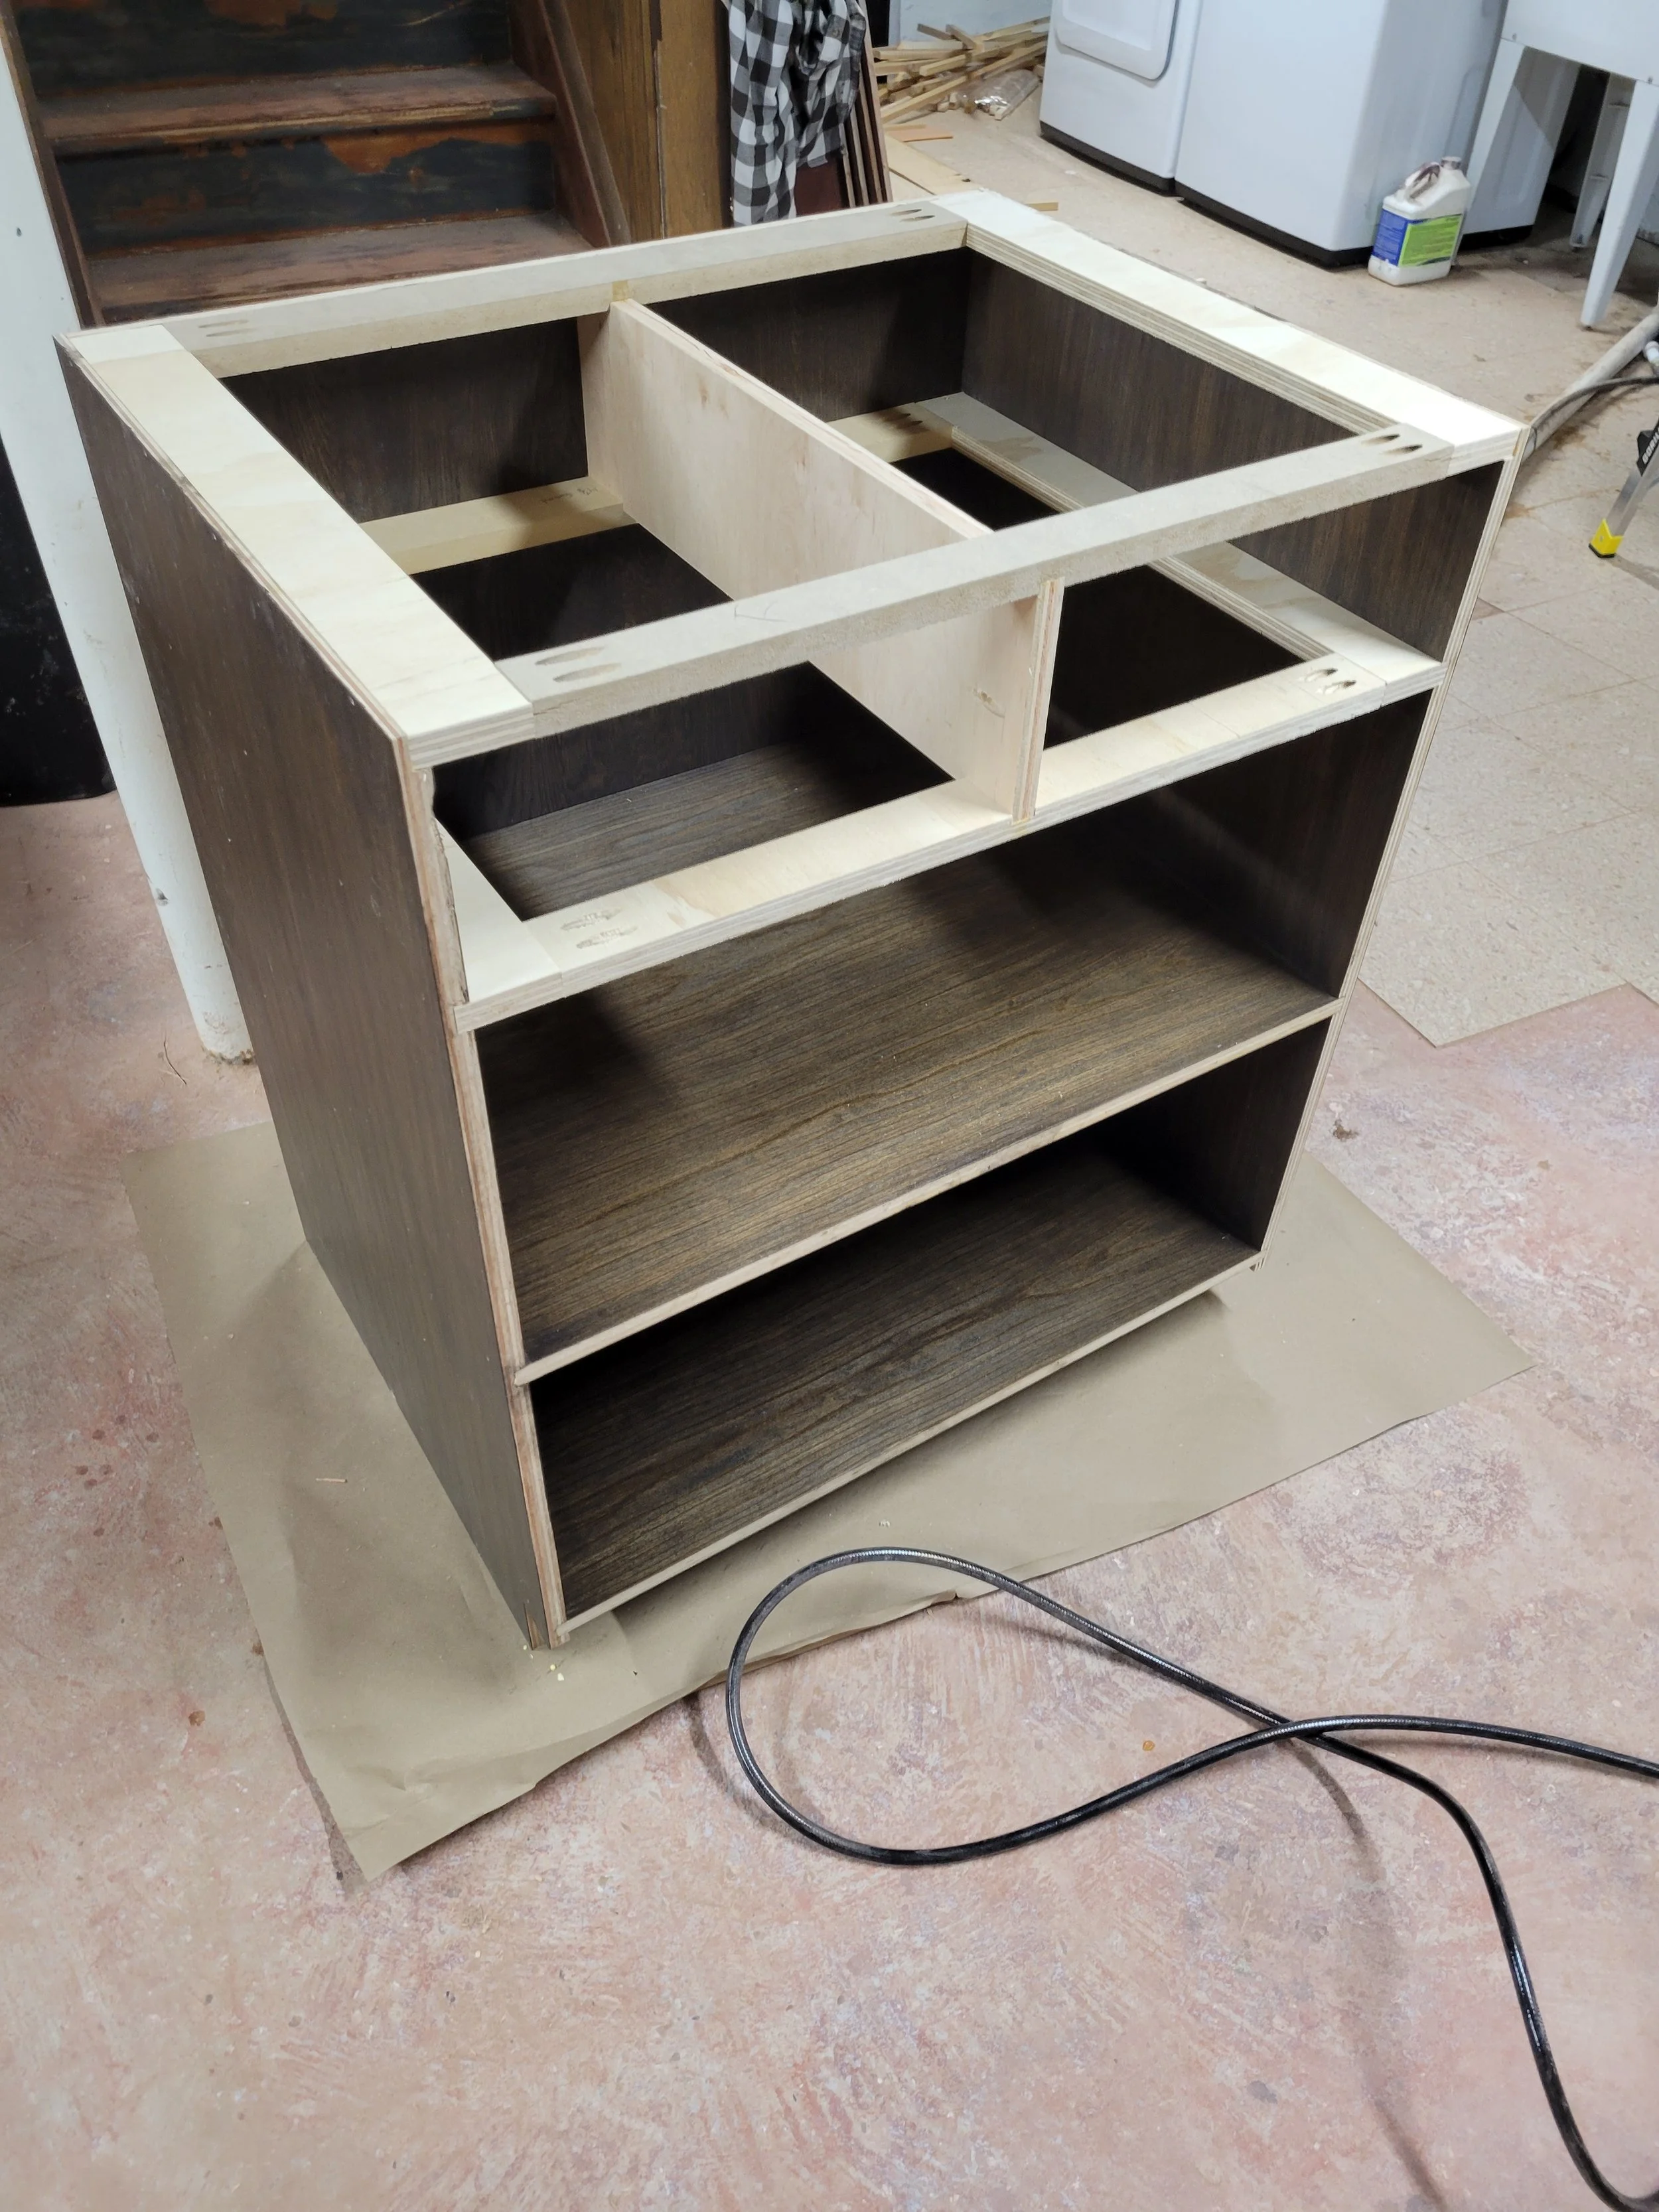
After it’s all said and done I had a cabinet carcass. All that’s needed is a face frame.
nothing without a pretty face
I planned to use a face frame to cover the unsightly plywood edges of the cabinets. If I used real hardwood I wouldn’t need a face frame and could leave it as is. Cabinets without face frames are called European style cabinets, which naturally means they are inferior to American style cabinets. That’s not true if frameless is your thing.
I made my face frames out of 3/4” oak. Each strip is 1 1/2” wide. I had cut them to size and constructed them before my cabinet glue up because I was confident in my abilities to do something right for once in my life. But I should’ve known I’d screw that up too.
But anyways I had cut all my pieces and assembled them using pocket screws along the back. I also learned at this time that pocket screws can make hardwoods like oak crack. After I ruined a couple pieces I learned of a good hack to solve this which was to coat the screw in paste wax and drive the screw in slowly. This worked extremely well.
There a few ways to attach the face frame. I would normally prefer to glue and clamp them on. The less hardware you use the better in my opinion. Another way is to just nail them on and fill the nail holes. The way I did it for this project was to use pocket screws. So I had to drill from the sides and bottoms of the shelves. You can see what that looks like in the picture. I did this because I knew the sides wouldn’t be visible. If you know people won’t see the pocket screws this may be the way to go since it is easier than gluing. Since I wasn’t going to use glue I stained and finish the face frames before attaching them.
The picture shows that my face frames were just a tad shorter than the cabinet face. Upon realizing this I devalued myself in the worst way and then fixed it by trimming the cabinet edge flush to the bottom of the face frame using a hand saw. It wasn’t a hard fix.
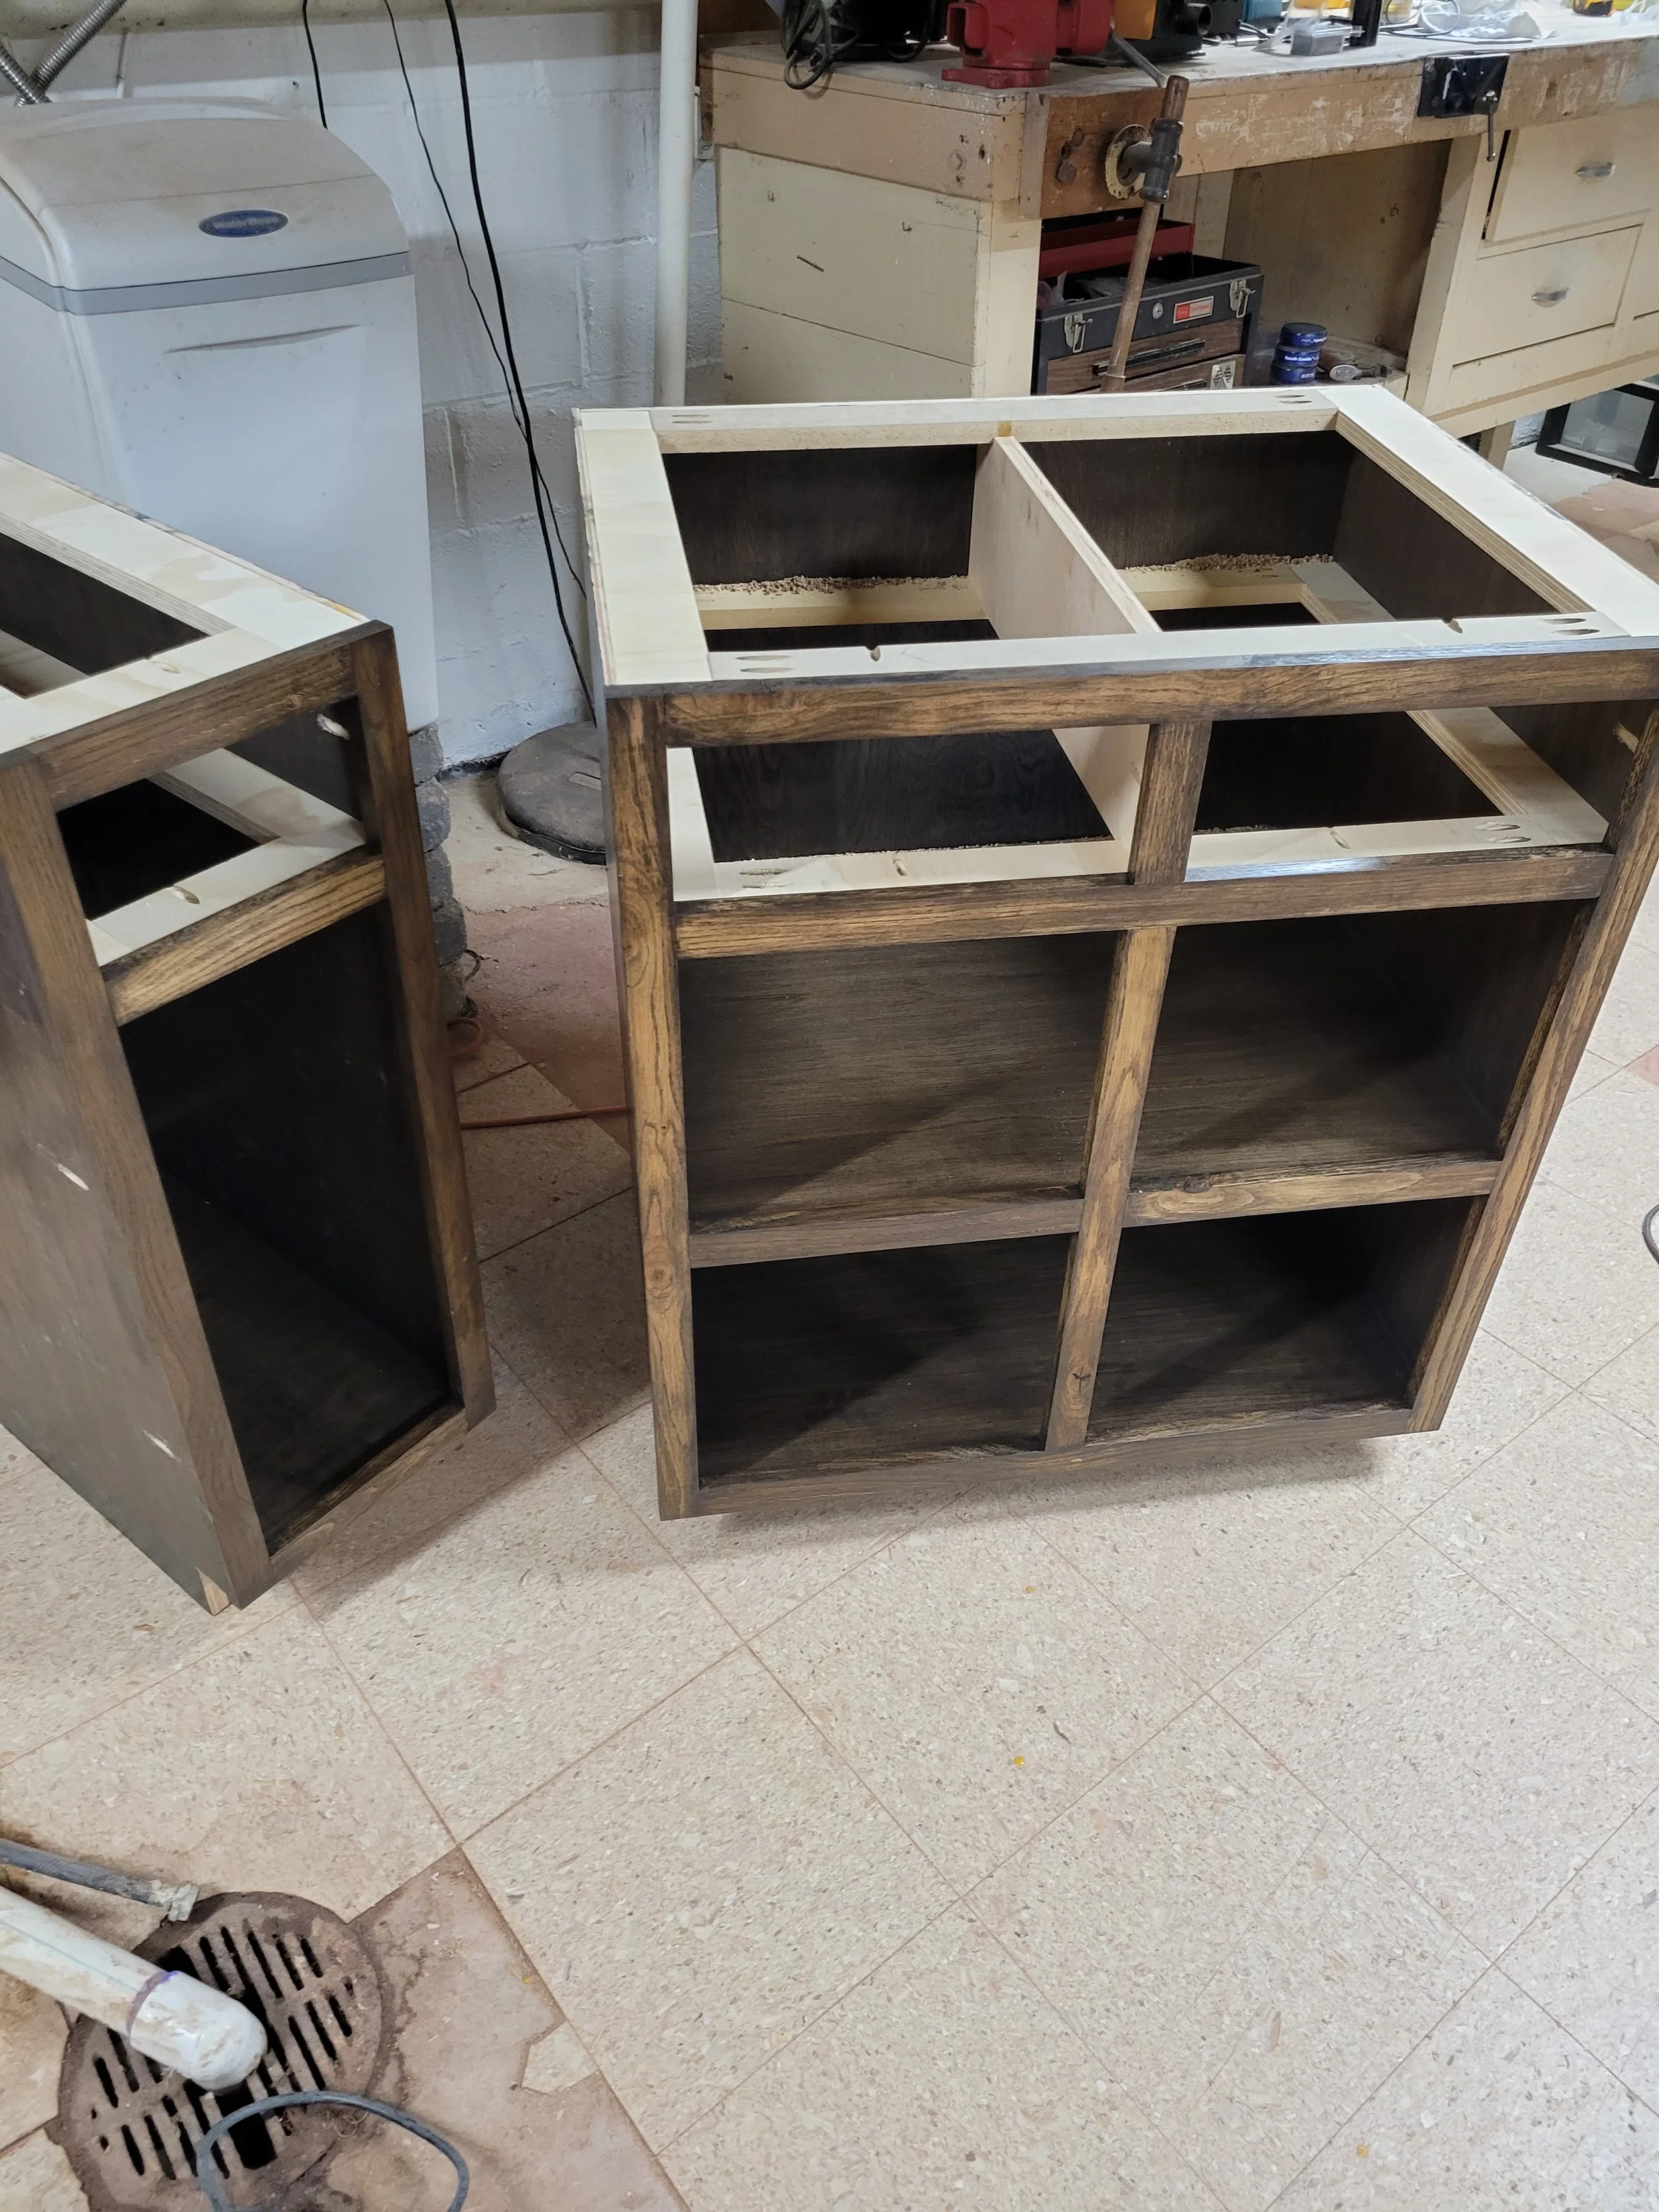
Once the frames were attached the cabinets were done. Well except for the doors and drawers and the toe kicks. And a bunch of other stuff. But you know what I mean.